How to set up a Help Center?
You can easily create a self-service portal for your customers to access articles and information. In this guide, we take you through the steps to set up a Help Center, including creating a portal and adding articles.
You can set up your Help Center in three parts, as explained below.
I. Creating a portal
Step 1. Click the Help Center icon from your sidebar, and click the "New Portal" button.
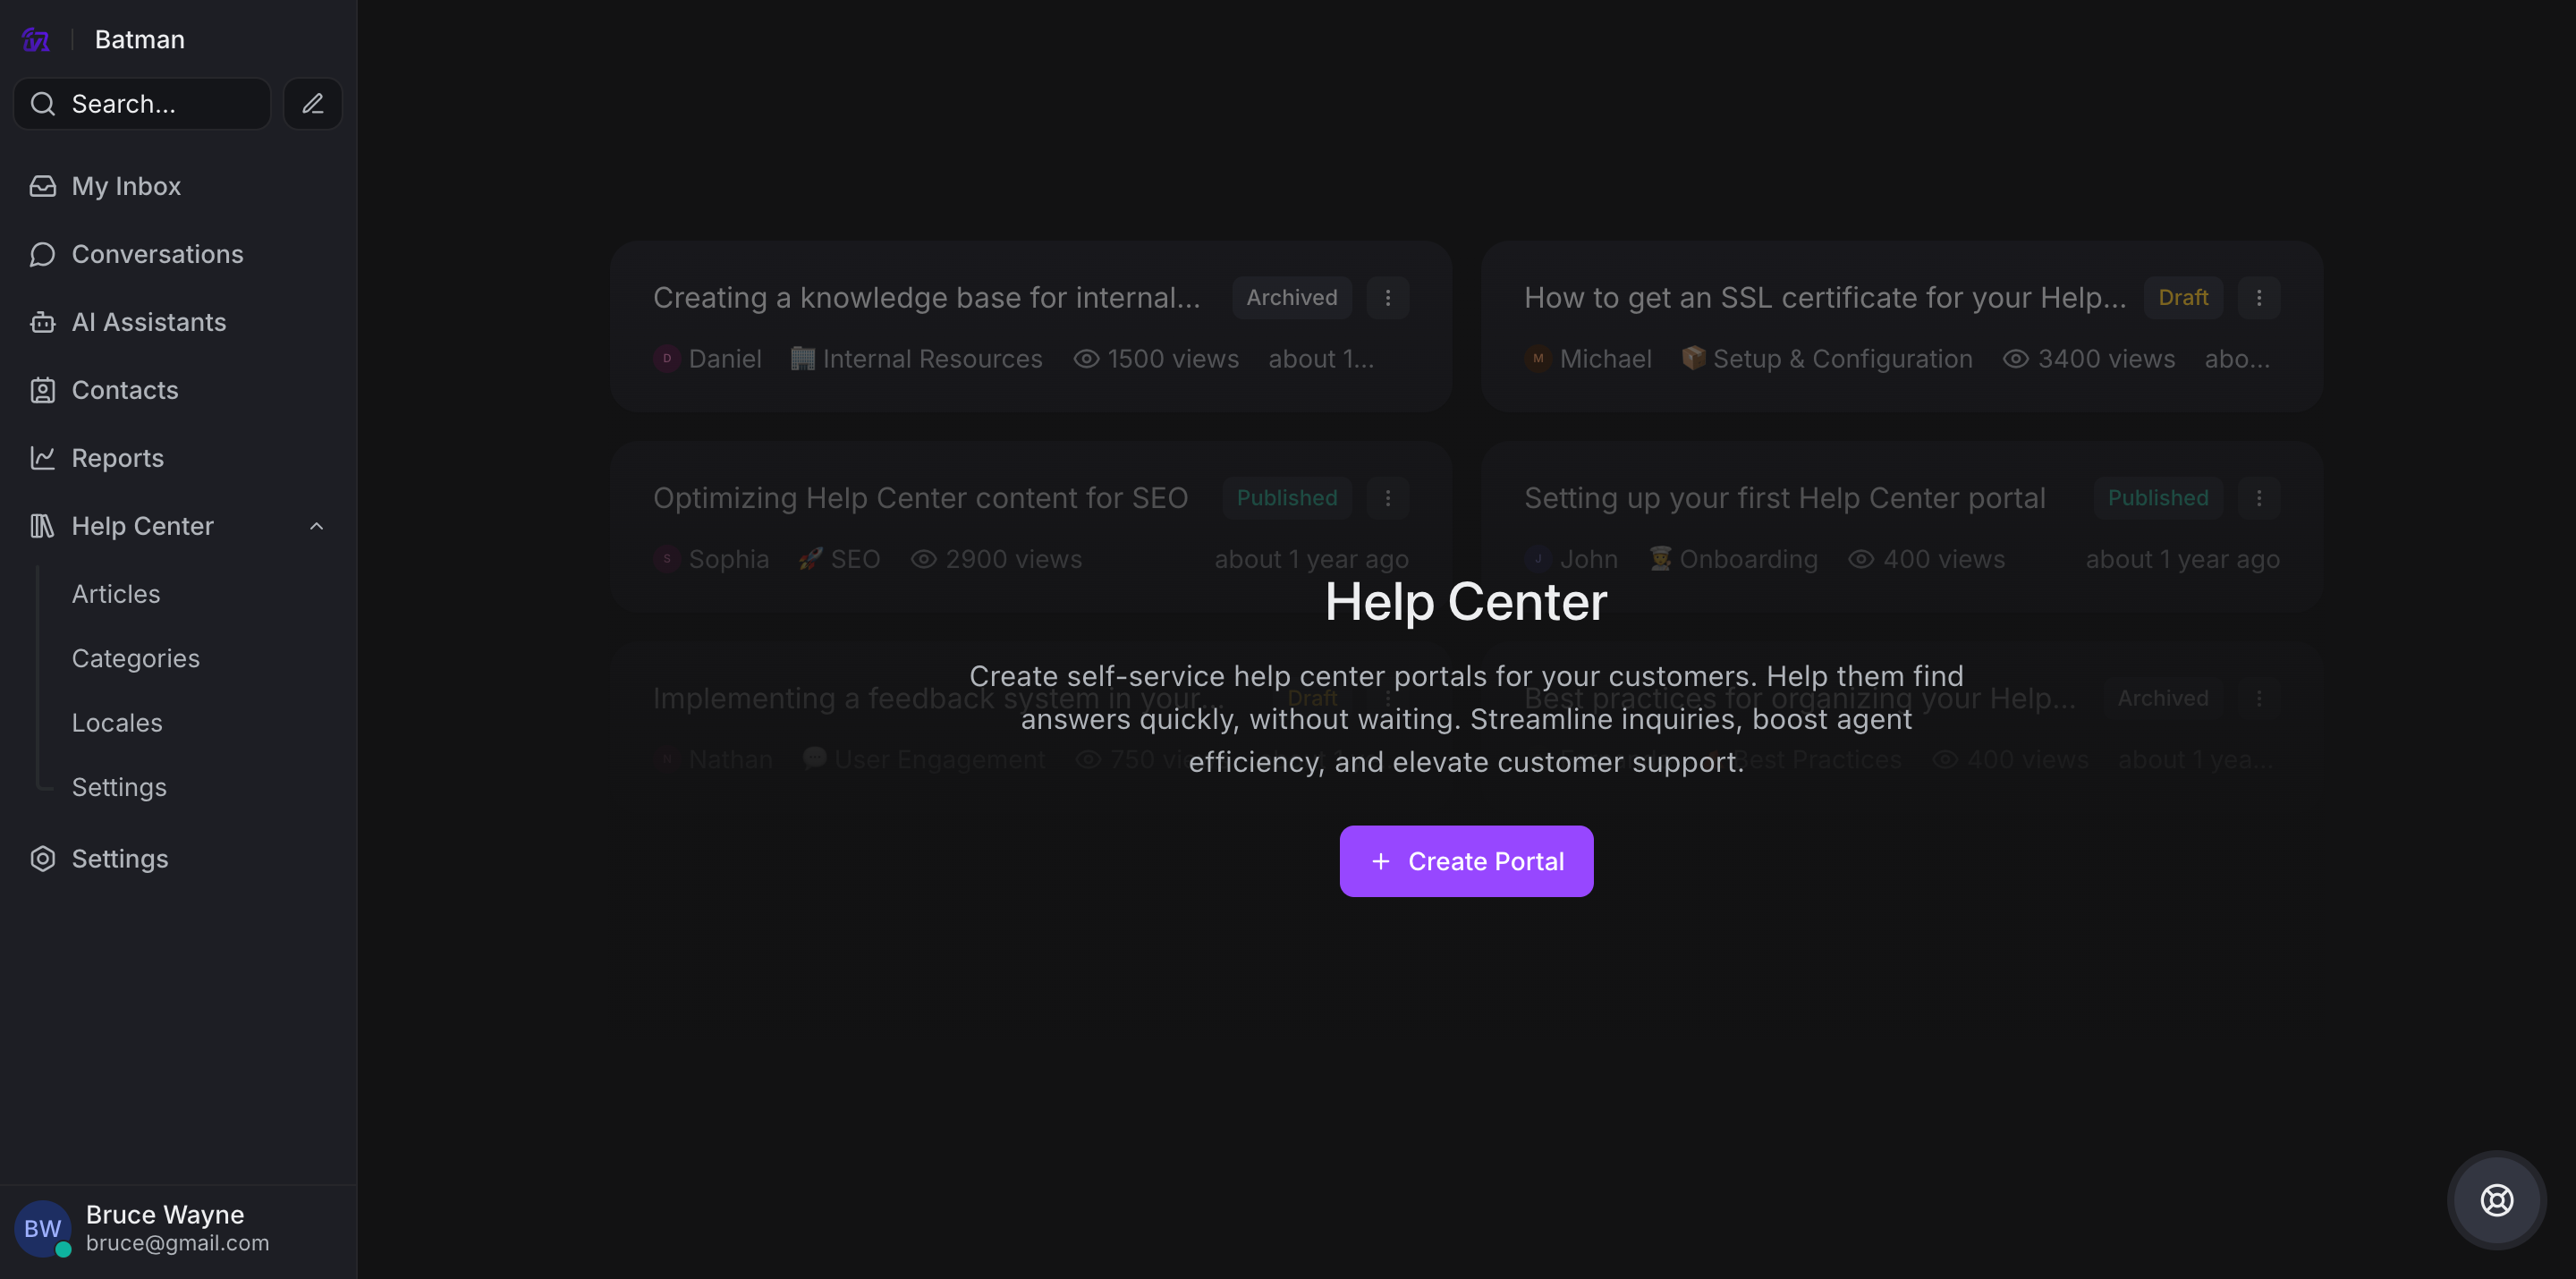
Step 2. You will see a basic settings page. Start filling in the fields.
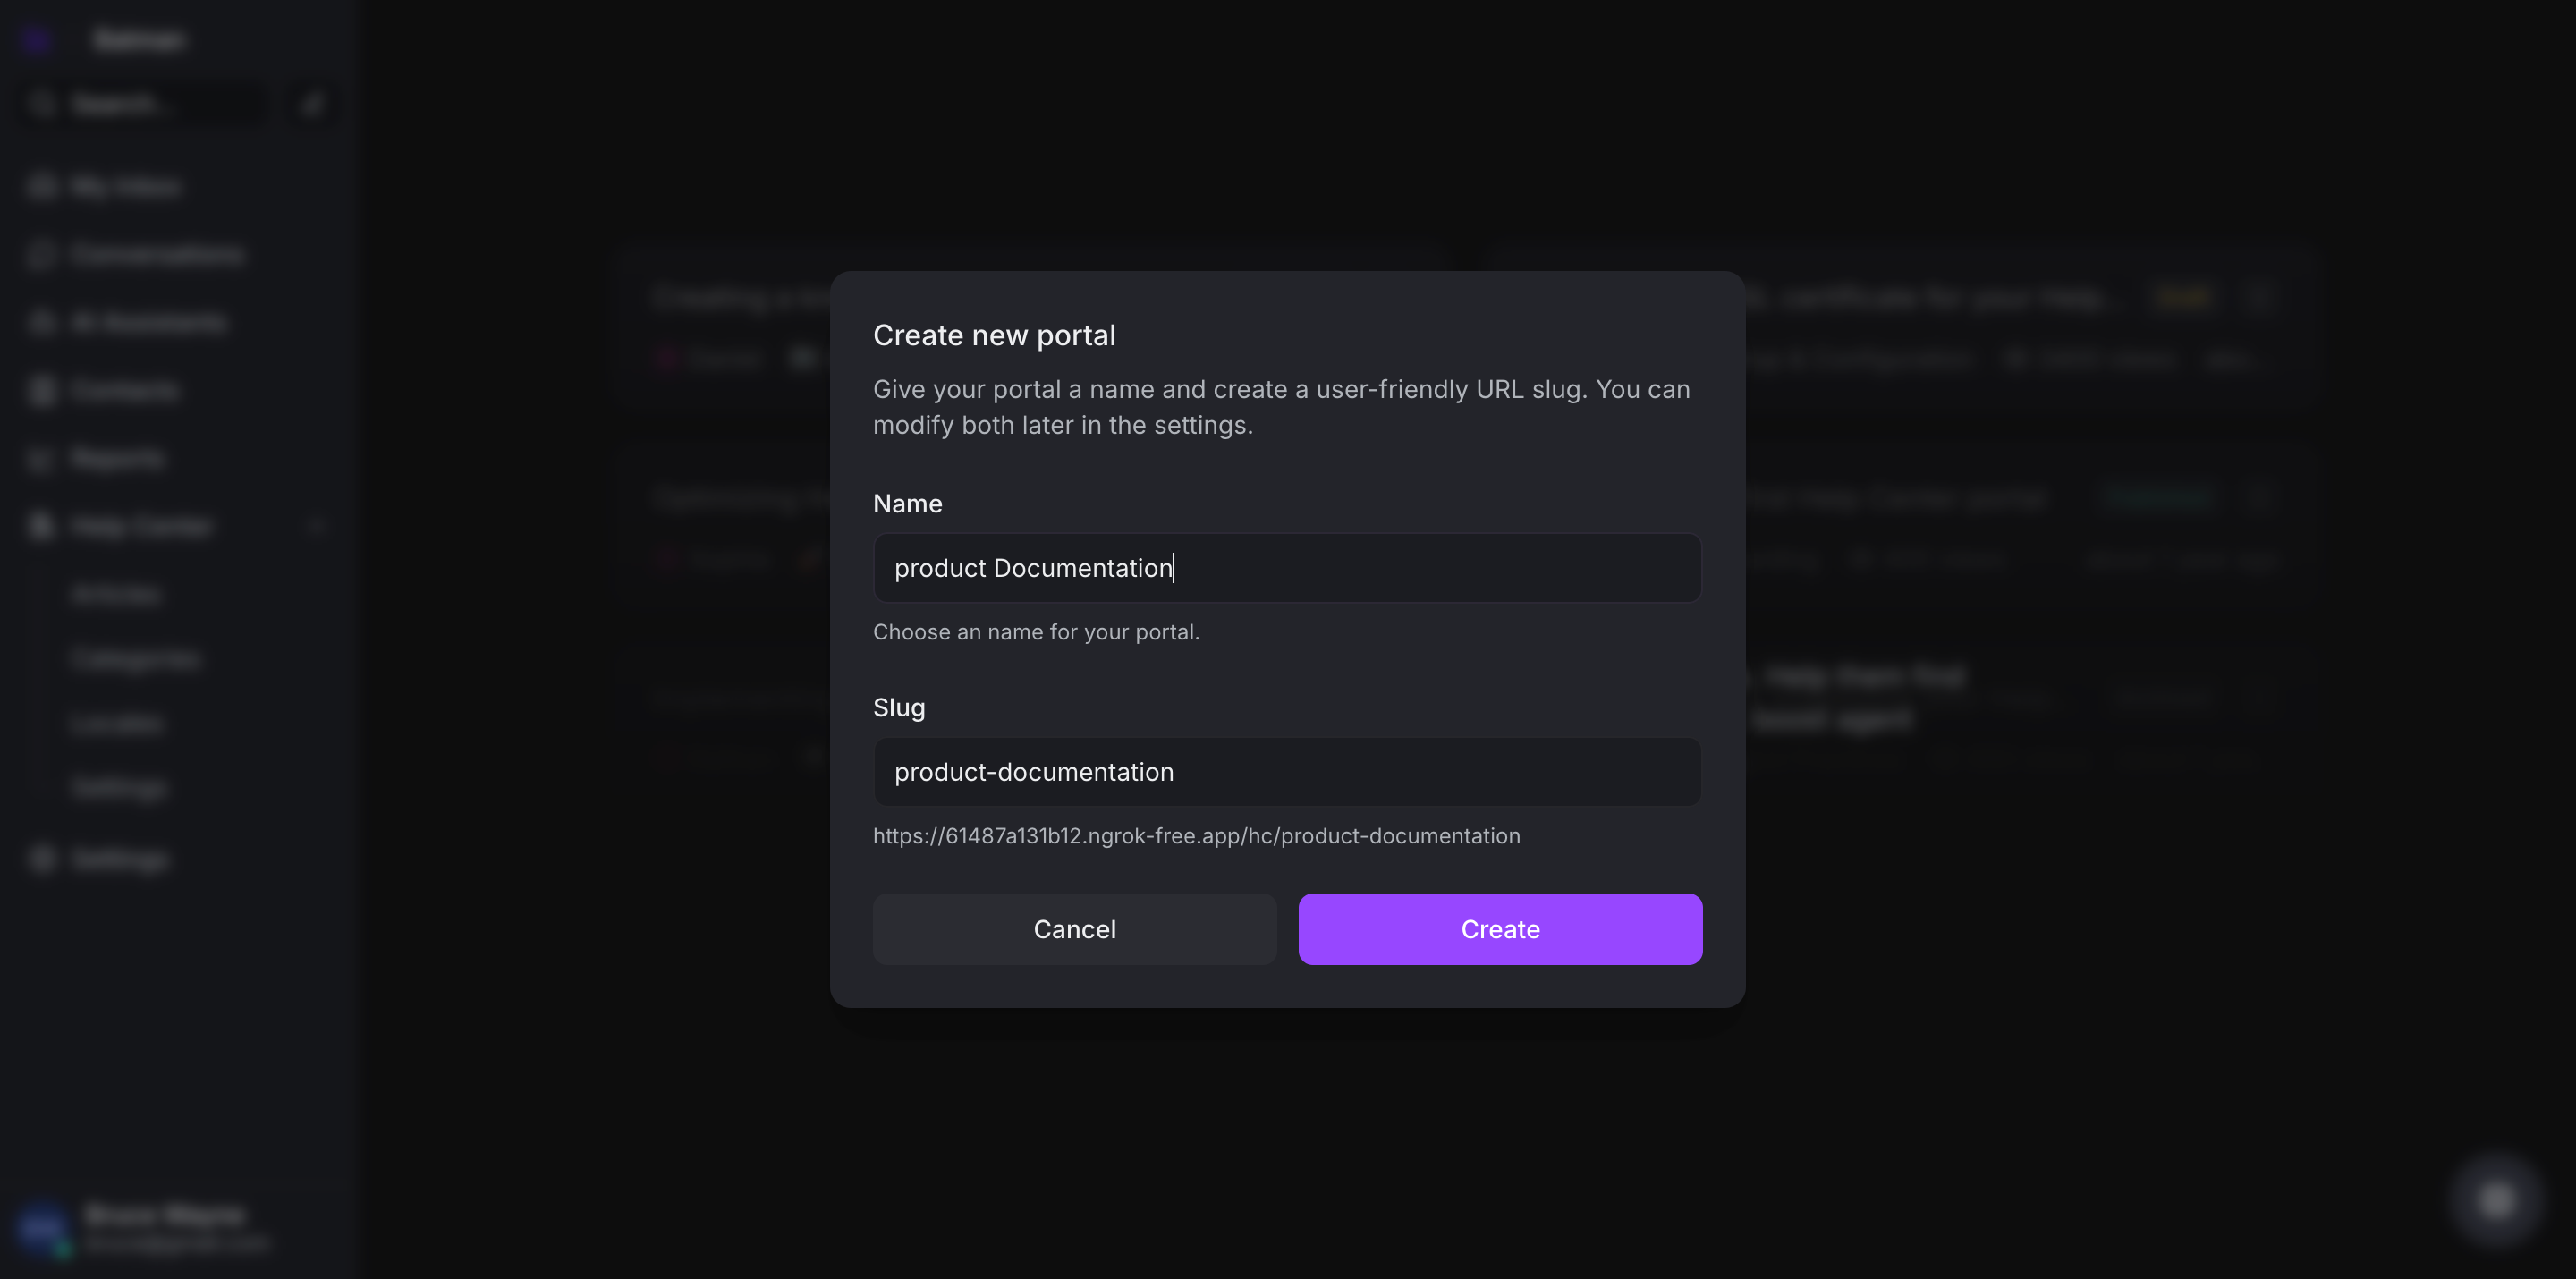
These fields are explained below:
-
Logo: Upload your organization's logo
-
Name: Name your portal to refer to it internally
-
Slug: This will be auto-generated
-
Custom Domain (optional): You can add the domain you want to serve your portal on a custom domain. For example, if your website is
yourdomain.comand you want your portal accessible atdocs.yourdomain.com, type that in this field.
Click "Create portal basic settings".
Your portal is ready. You can start adding categories and articles within these categories.
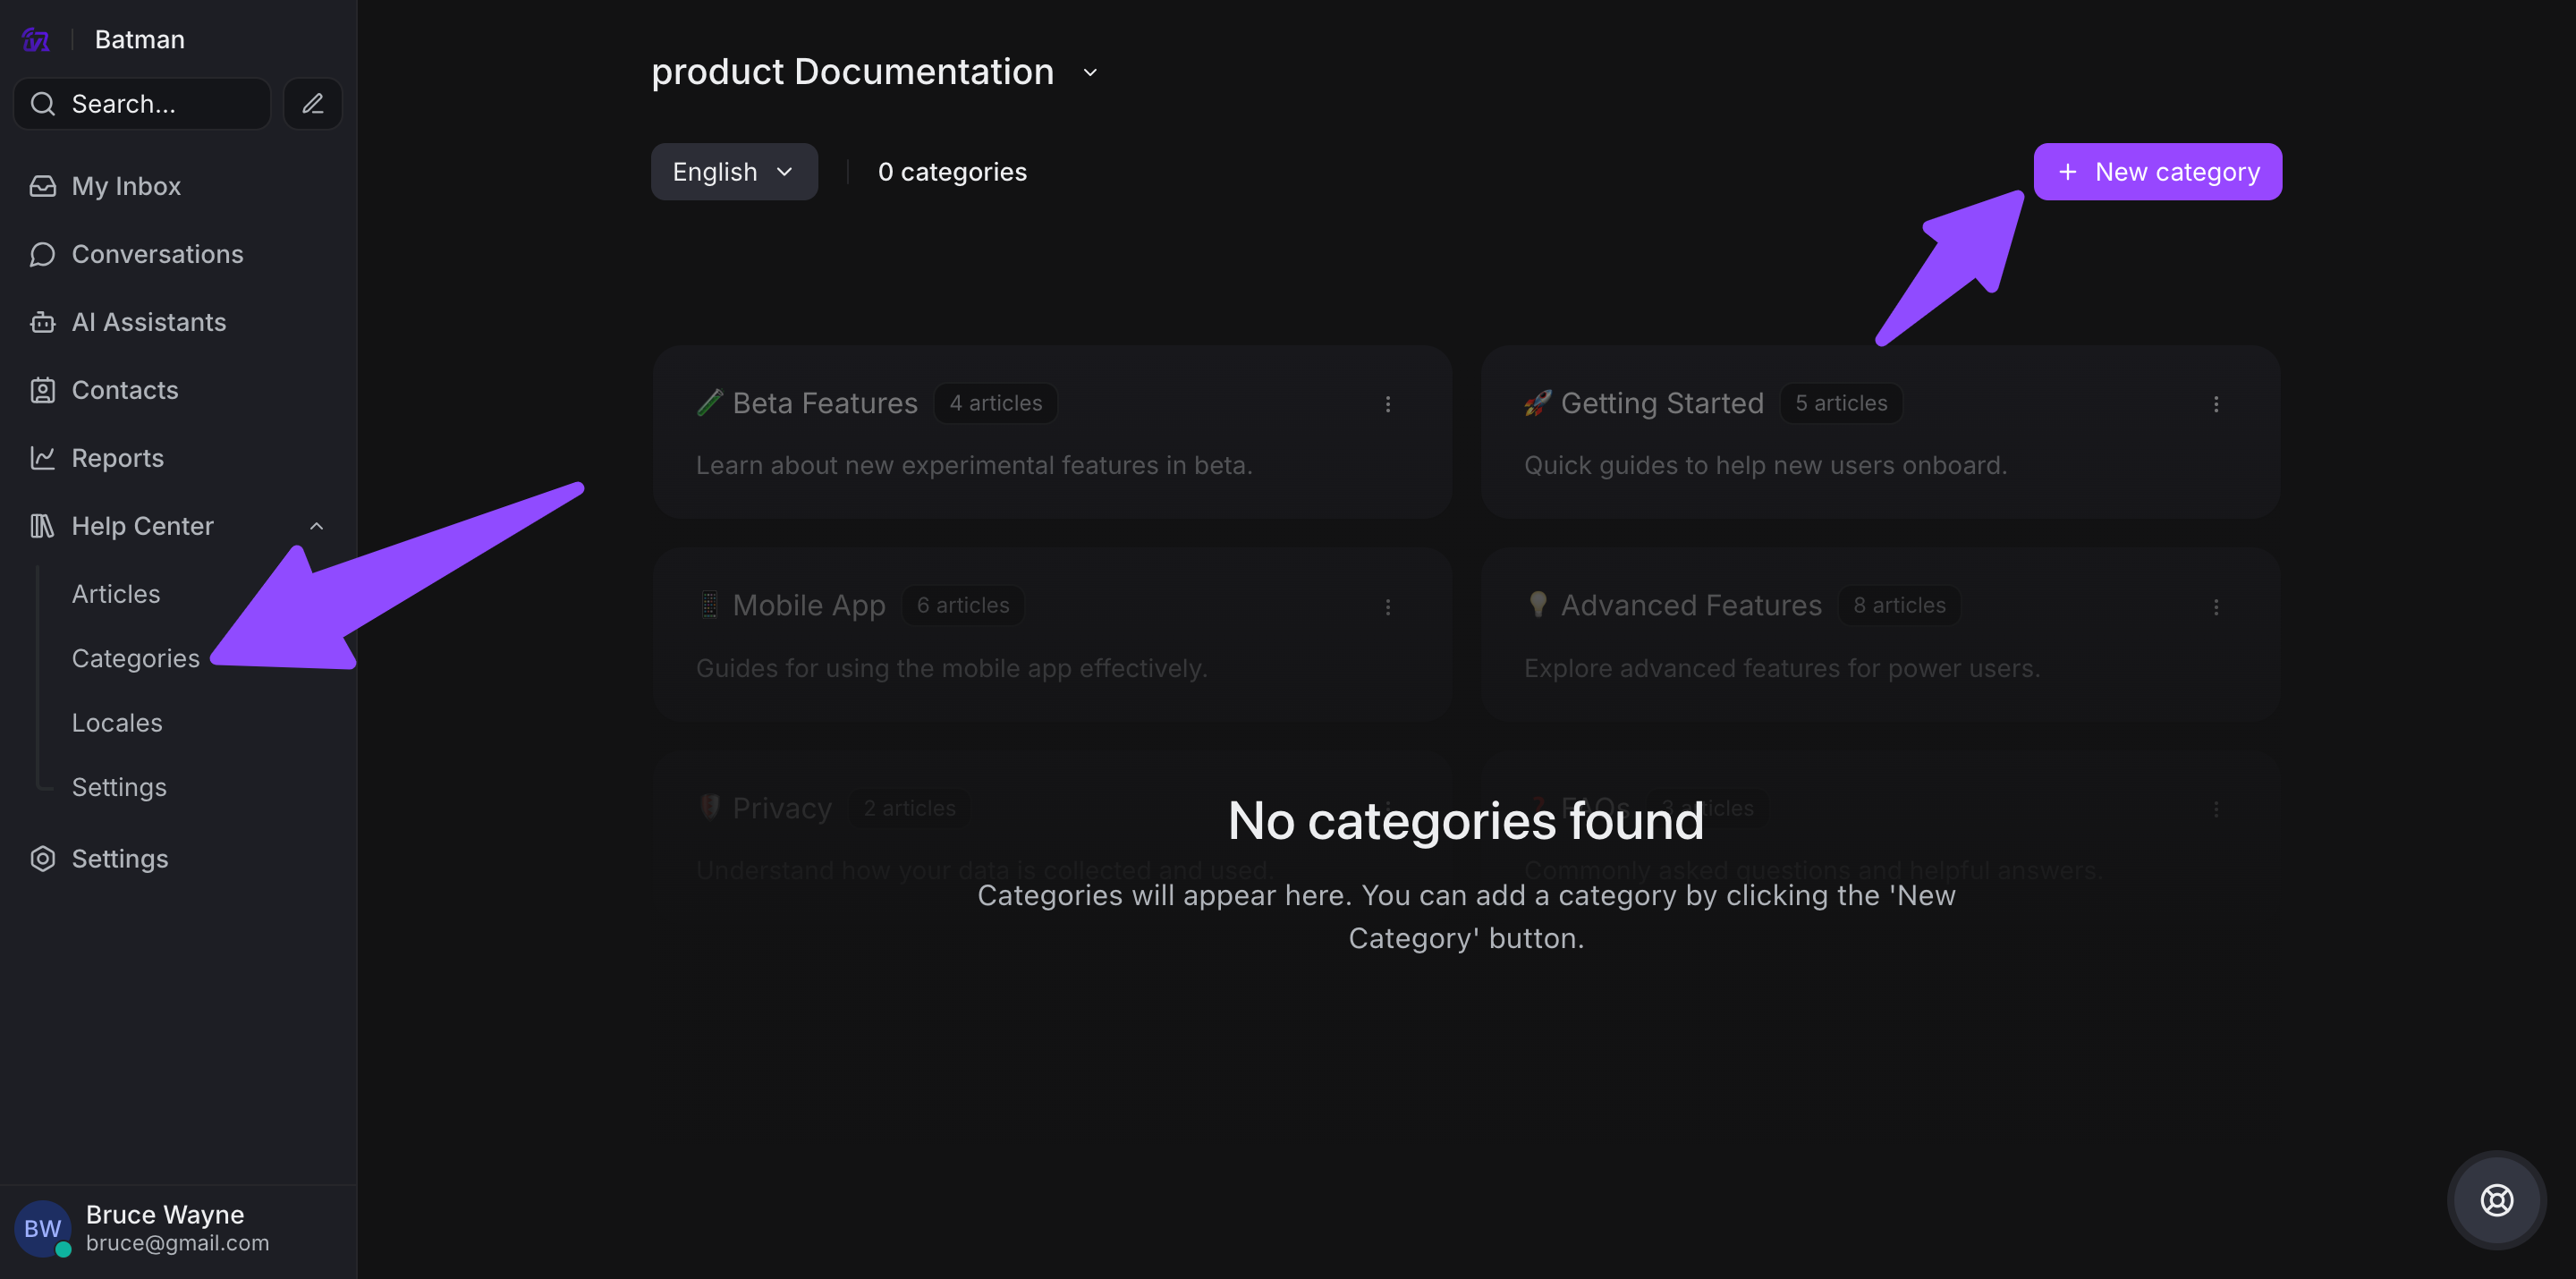
II. Creating categories
Categories exist to structure your portal and organize your articles. Follow these steps:
Step 1. Click the + sign alongside the Category section on the secondary sidebar to create a new category.
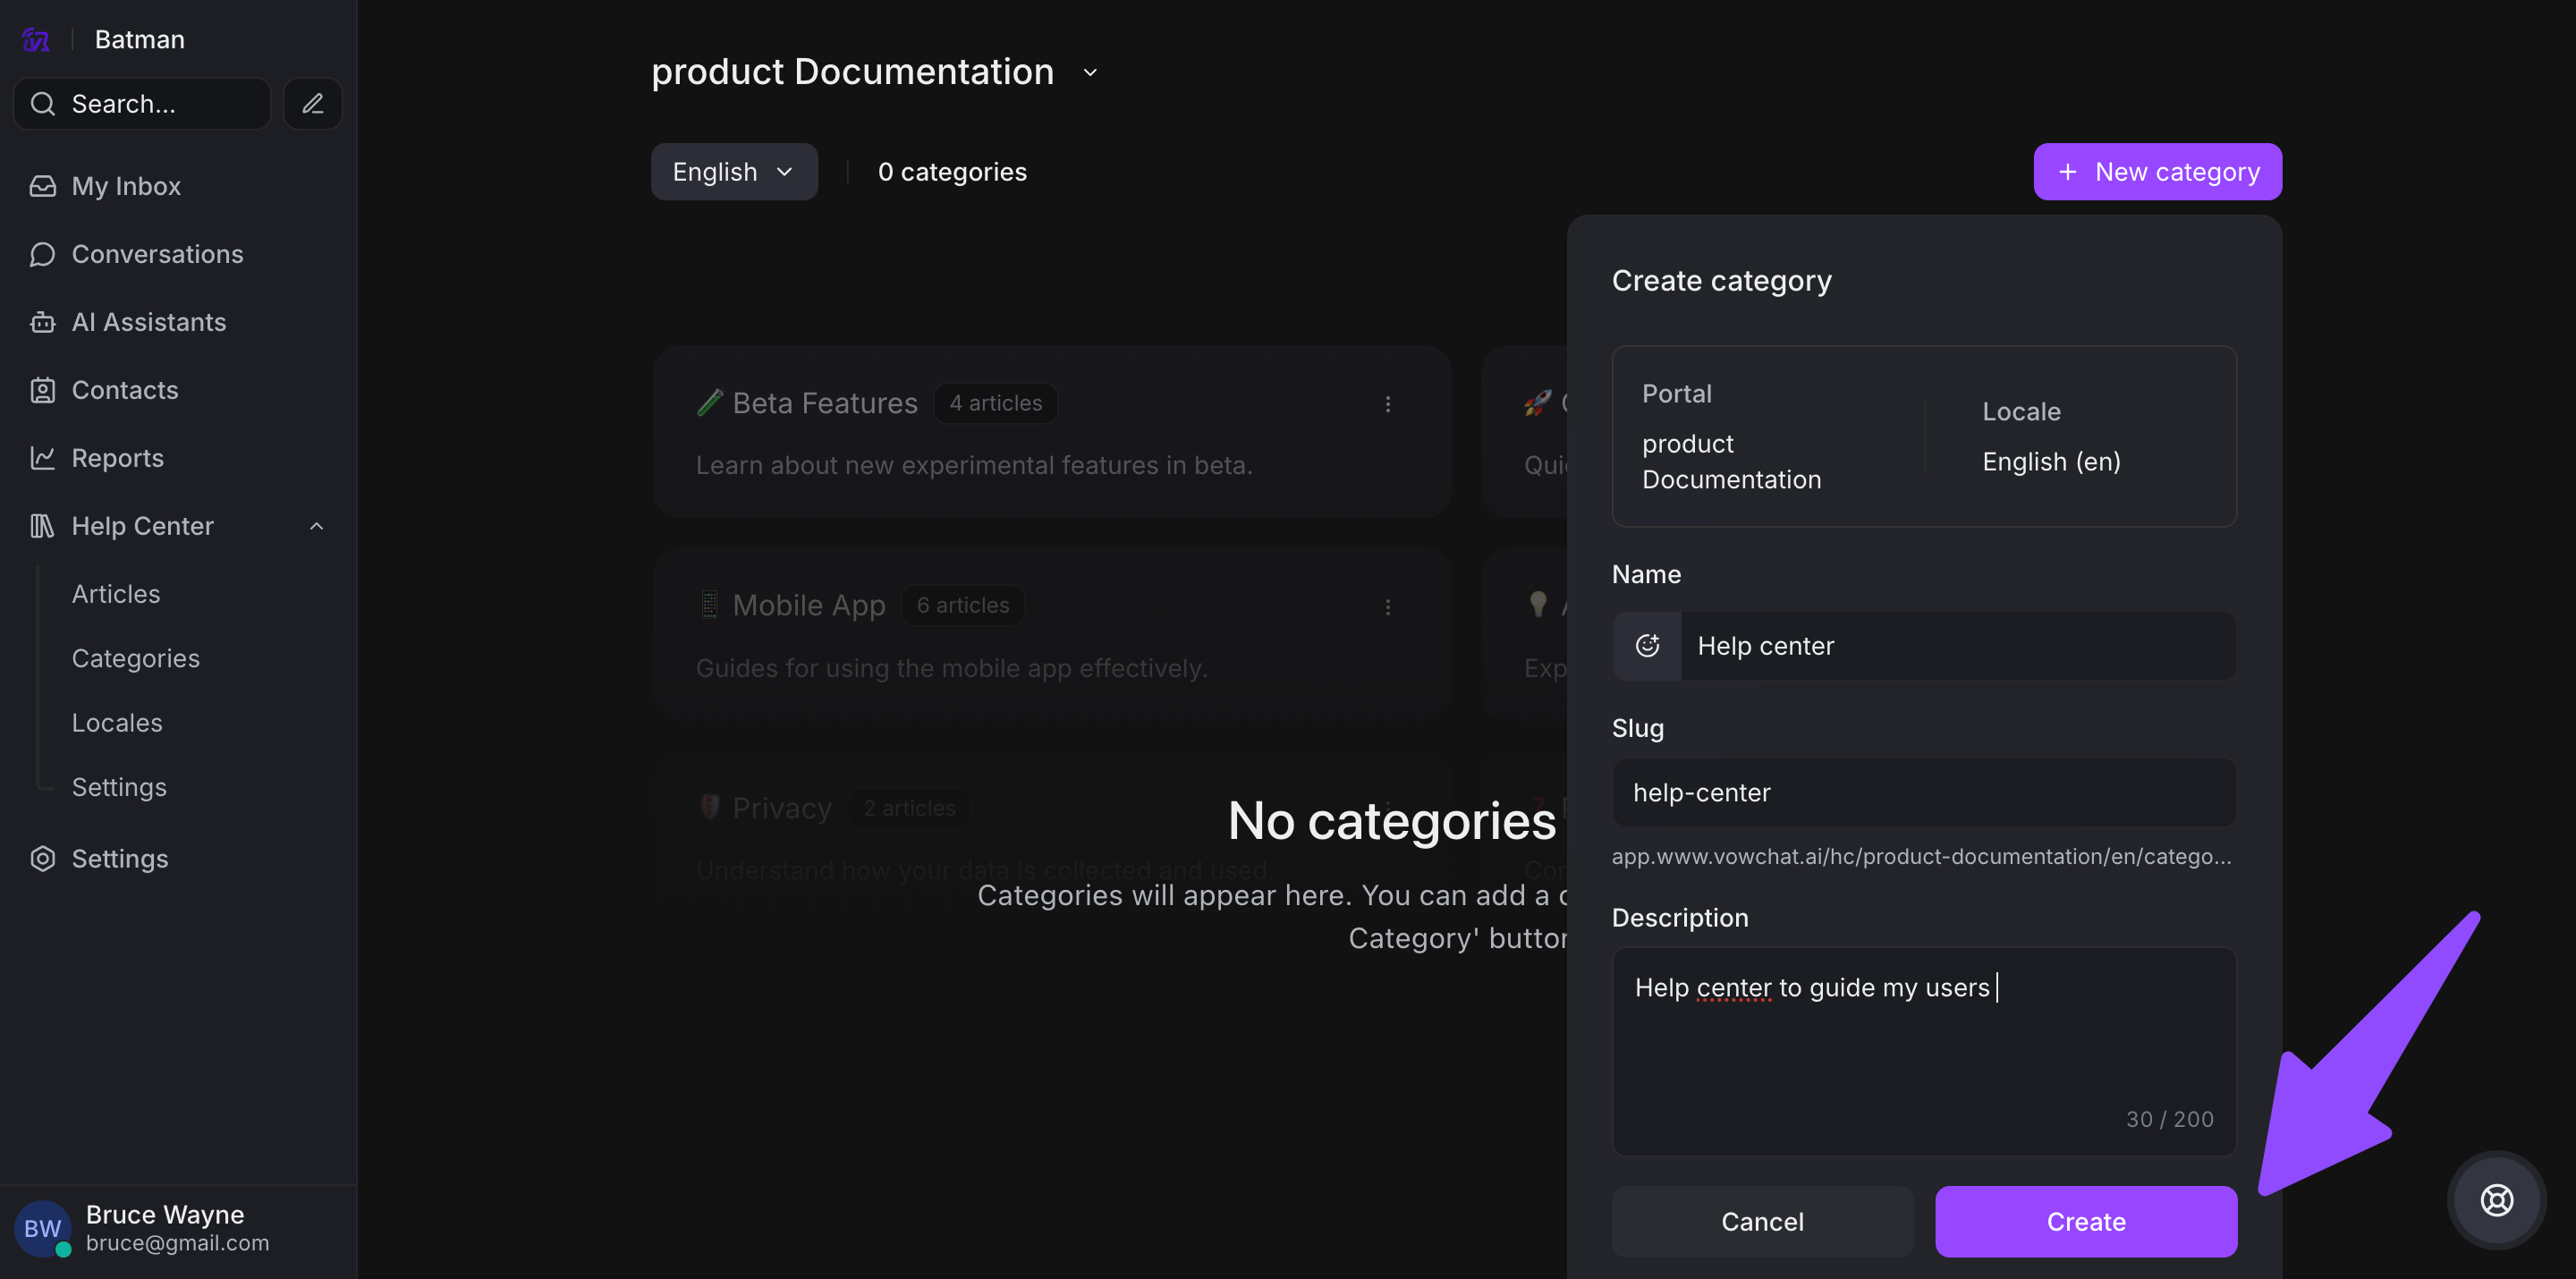
Step 2. A modal will open up. Fill up the fields.
These fields are described below:
-
Name: Name your category. This name will be used on the public portal
-
Slug: This will be auto-generated
-
Description (optional): Describe your category
Click the "Create category" button.
III. Creating articles
Finally, start writing your articles. Follow the steps below.
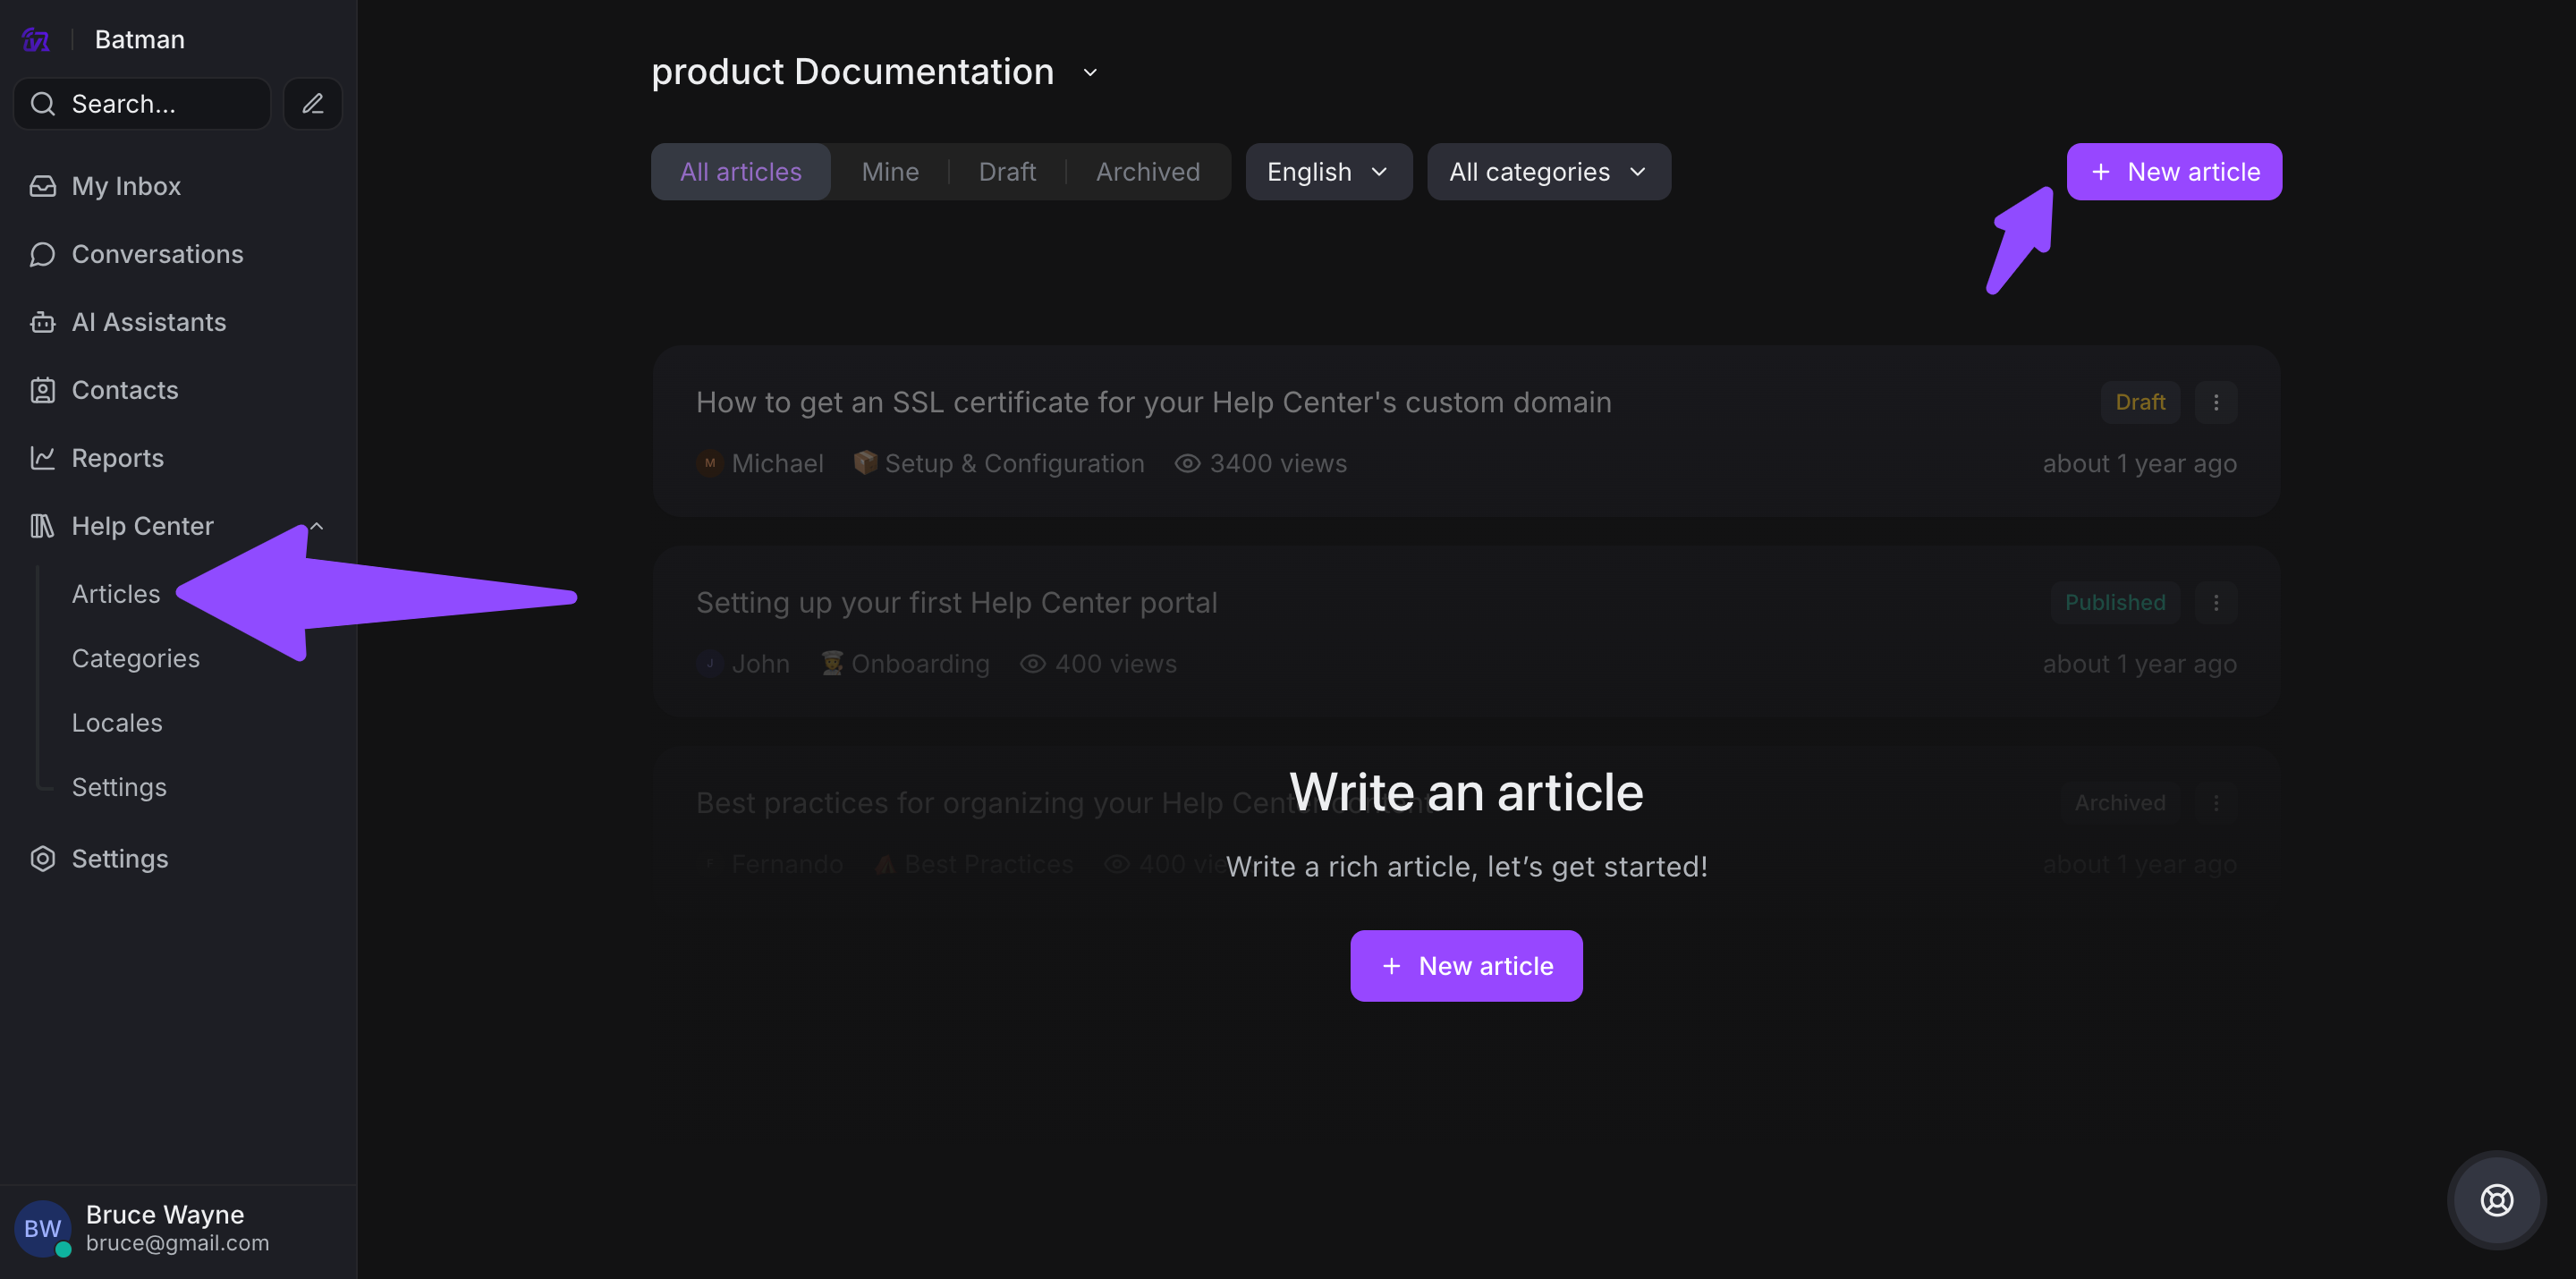
Step 1. Find and click the "New Article" button on almost every page.
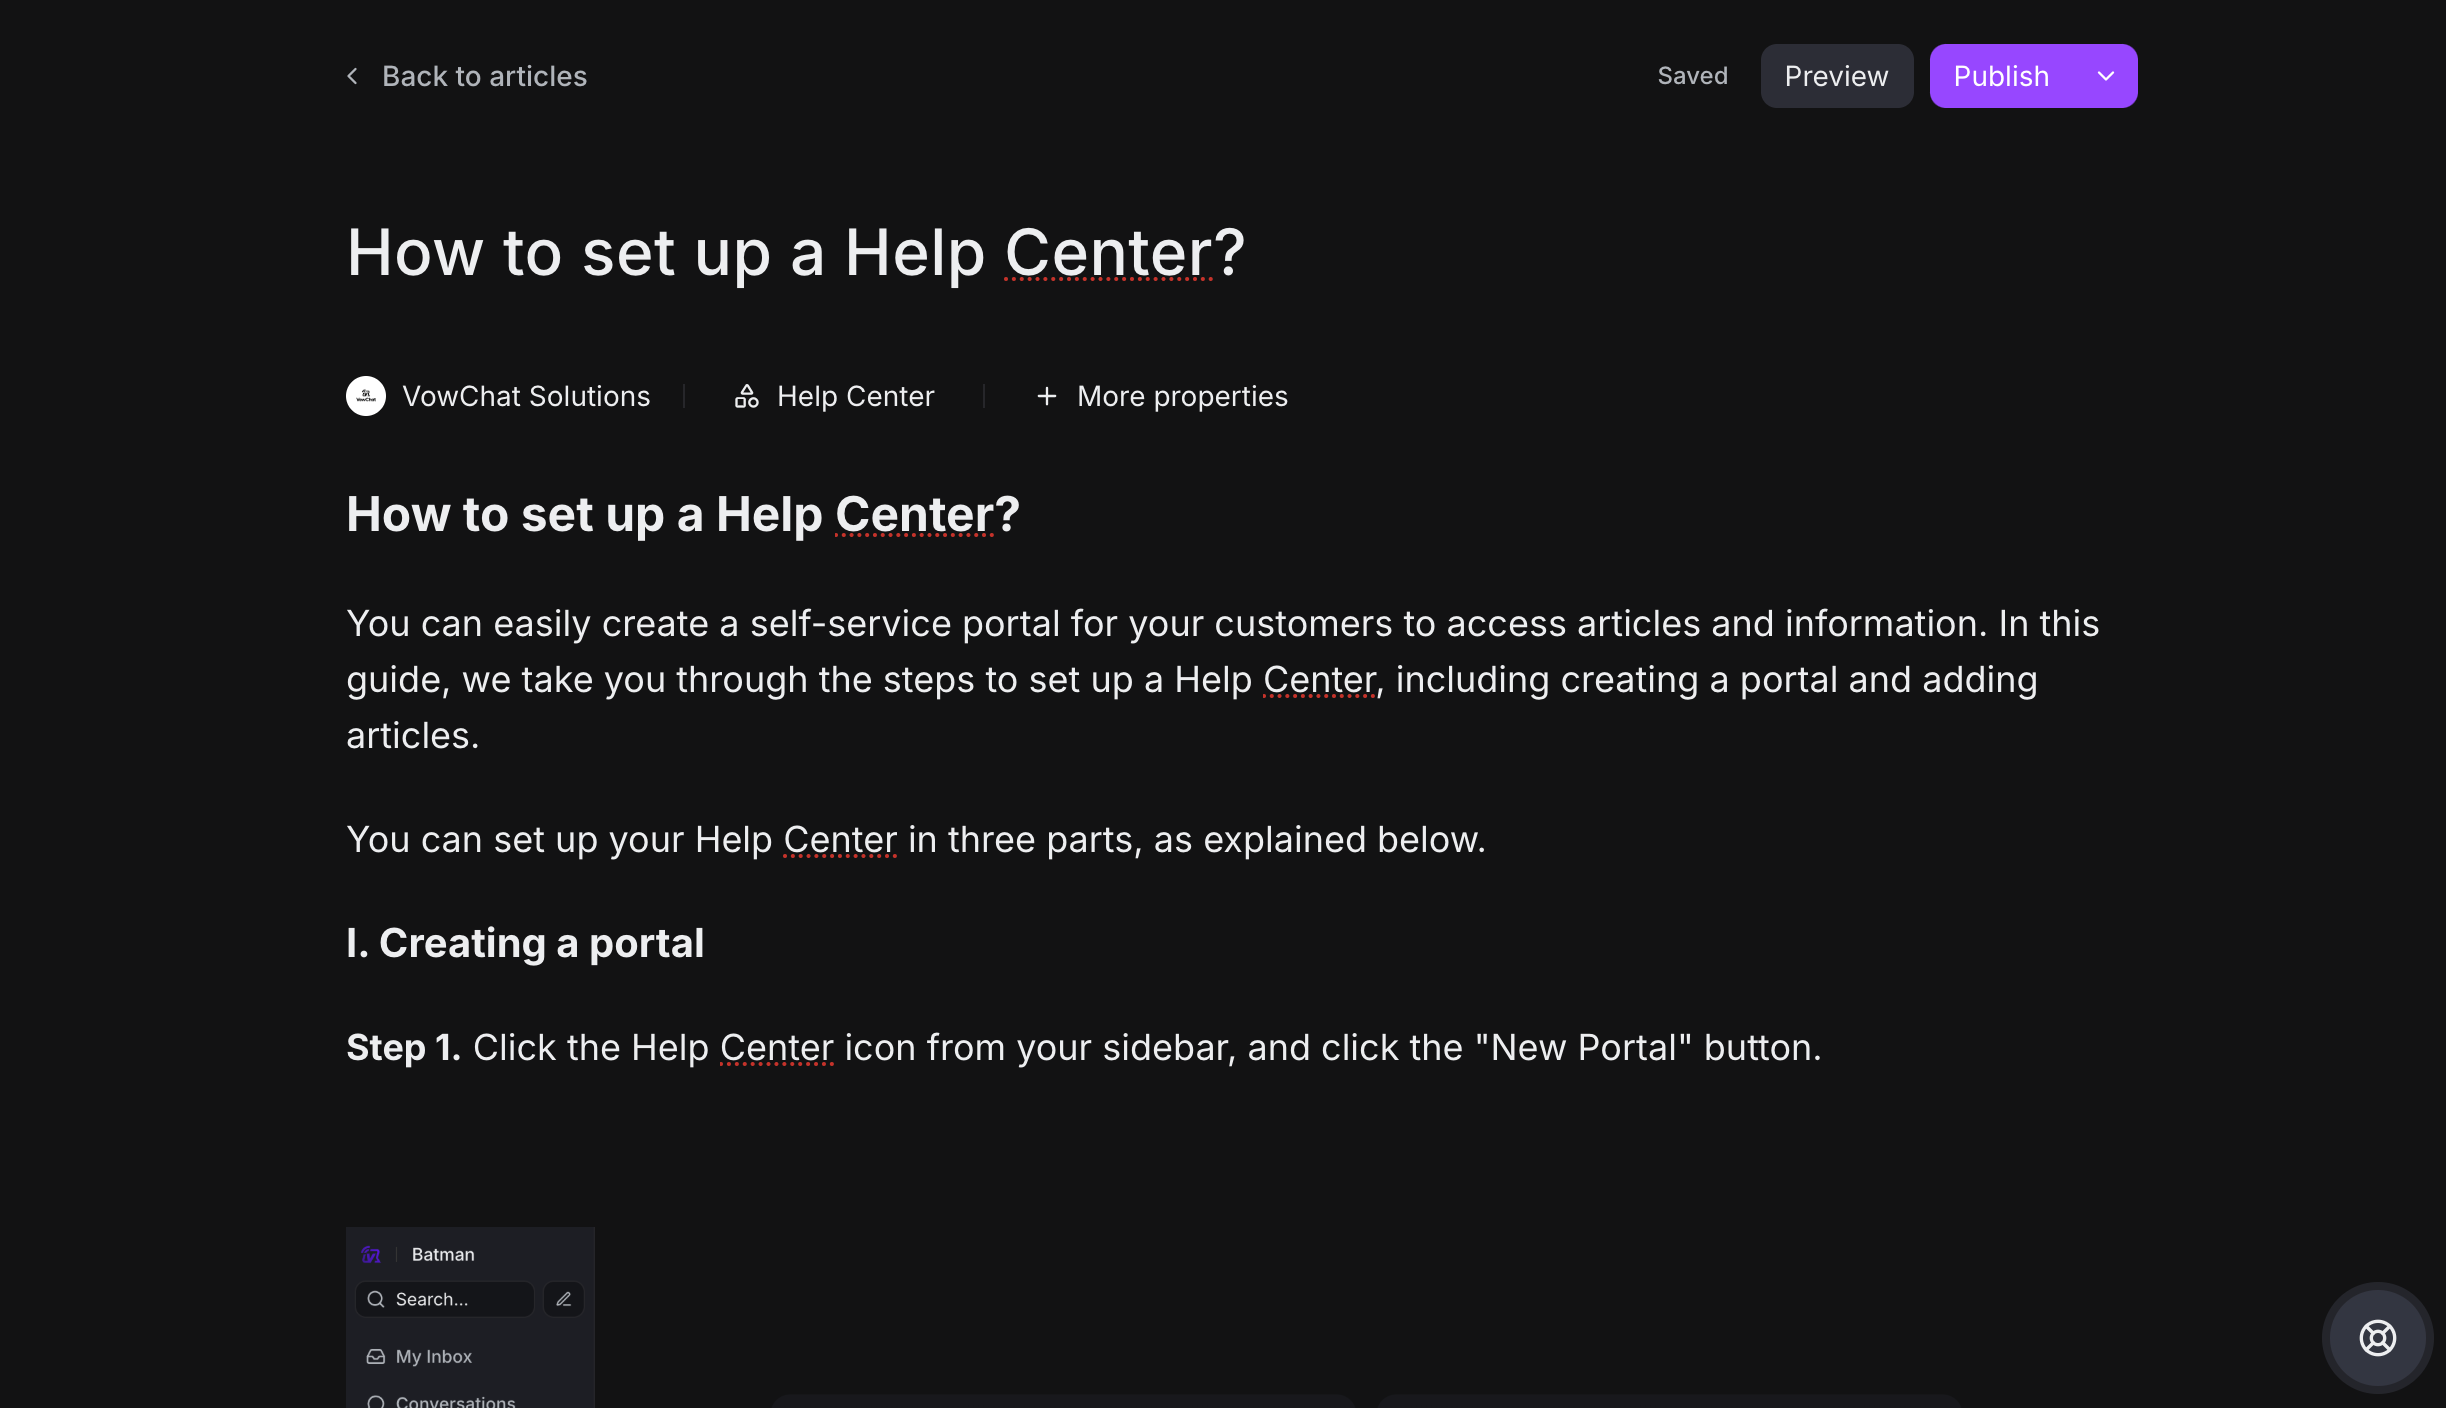
Step 2. Use the text editor to write your article. Use the sidebar to:
-
Select the article's category
-
Choose the author
-
Update meta content
Key details:
-
Use the "Preview" button to see how the article will look
-
Click "Publish" to make the article live
The published article will appear in the Help Center with the content you've written.