So, you have your first channel ready and know your way around the dashboard. Now let us learn everything about the core features of VowChat––where to find them and how to use them effectively.
We like to call these features as "tools" to help you effectively communicate with your customers.
Agents
You would have entered VowChat through one of the two ways:
-
You signed up, and you are your account's admin.
-
You were invited via email by the admin of your account.
Regardless of your entry point, it'll be helpful to understand what an Agent can do on VowChat.
What is an Agent on VowChat?
An Agent is anyone from your team who can answer customer conversations. They can be a member of your customer support team, your Engineering colleague, your co-founder, the marketer on your team, or anyone and everyone you want to bring to your VowChat account to help answer questions.
What differentiates an Agent from an Admin?
Permissions do. Agents can only access channels, response templates, reports and conversations. They can assign conversations to other agents or themselves. They can also resolve conversations.
Admins can do everything.
How to add an Agent to VowChat?
We have a detailed document for adding agents in the Setup Account section.
How to use the Agents feature?
There are two basic ways to do this, as explained below.
1. Assign an agent to a conversation
Step 1. On your dashboard, when you open a particular conversation, you'll find a section that reads "Conversation Actions". Click the + sign to expand it.
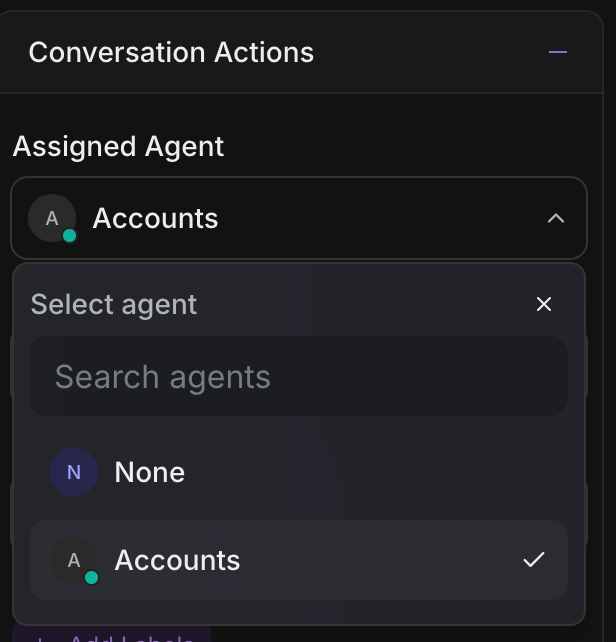
Step 2. You'll see an option that reads "Assigned Agent" followed by a dropdown of all the Agents on your account. Use the search bar to narrow down on the name of the Agent you're looking for.
Alternatively, you can also assign a conversation to yourself by selecting "Assign to me".
2. Talk on Private Note
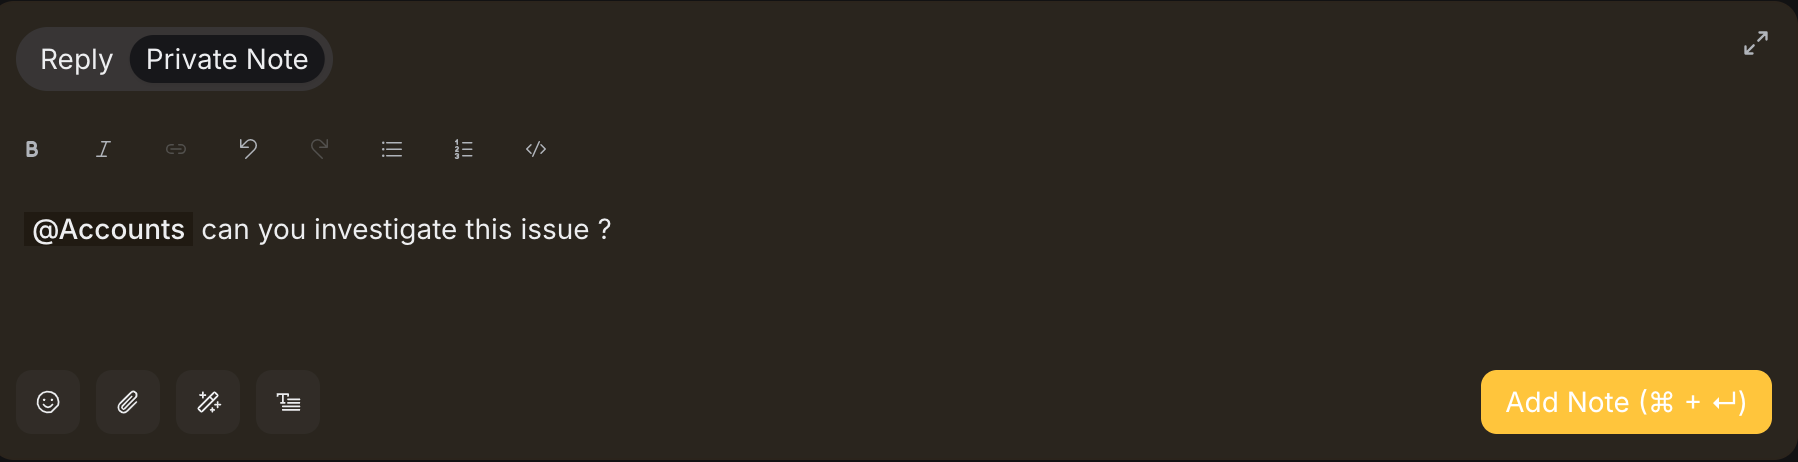
When you want to talk to your teammates within a conversation thread about a customer's question, you can use Private Notes. These are internal comments that won't be visible to your customers.
Step 1. On your dashboard, when you open a particular conversation, you'll find a reply box. Notice there are two options: "Reply" and "Private Note" (in yellow).
Step 2. Click on "Private Note" to write an internal message.
Step 3. Type your message. You can:
-
Use
@to mention specific teammates -
Add emoji and rich text formatting
-
Attach files if needed
These notes are perfect for:
-
Asking colleagues for help
-
Documenting conversation context
-
Sharing internal updates about a customer issue
Agent Reports
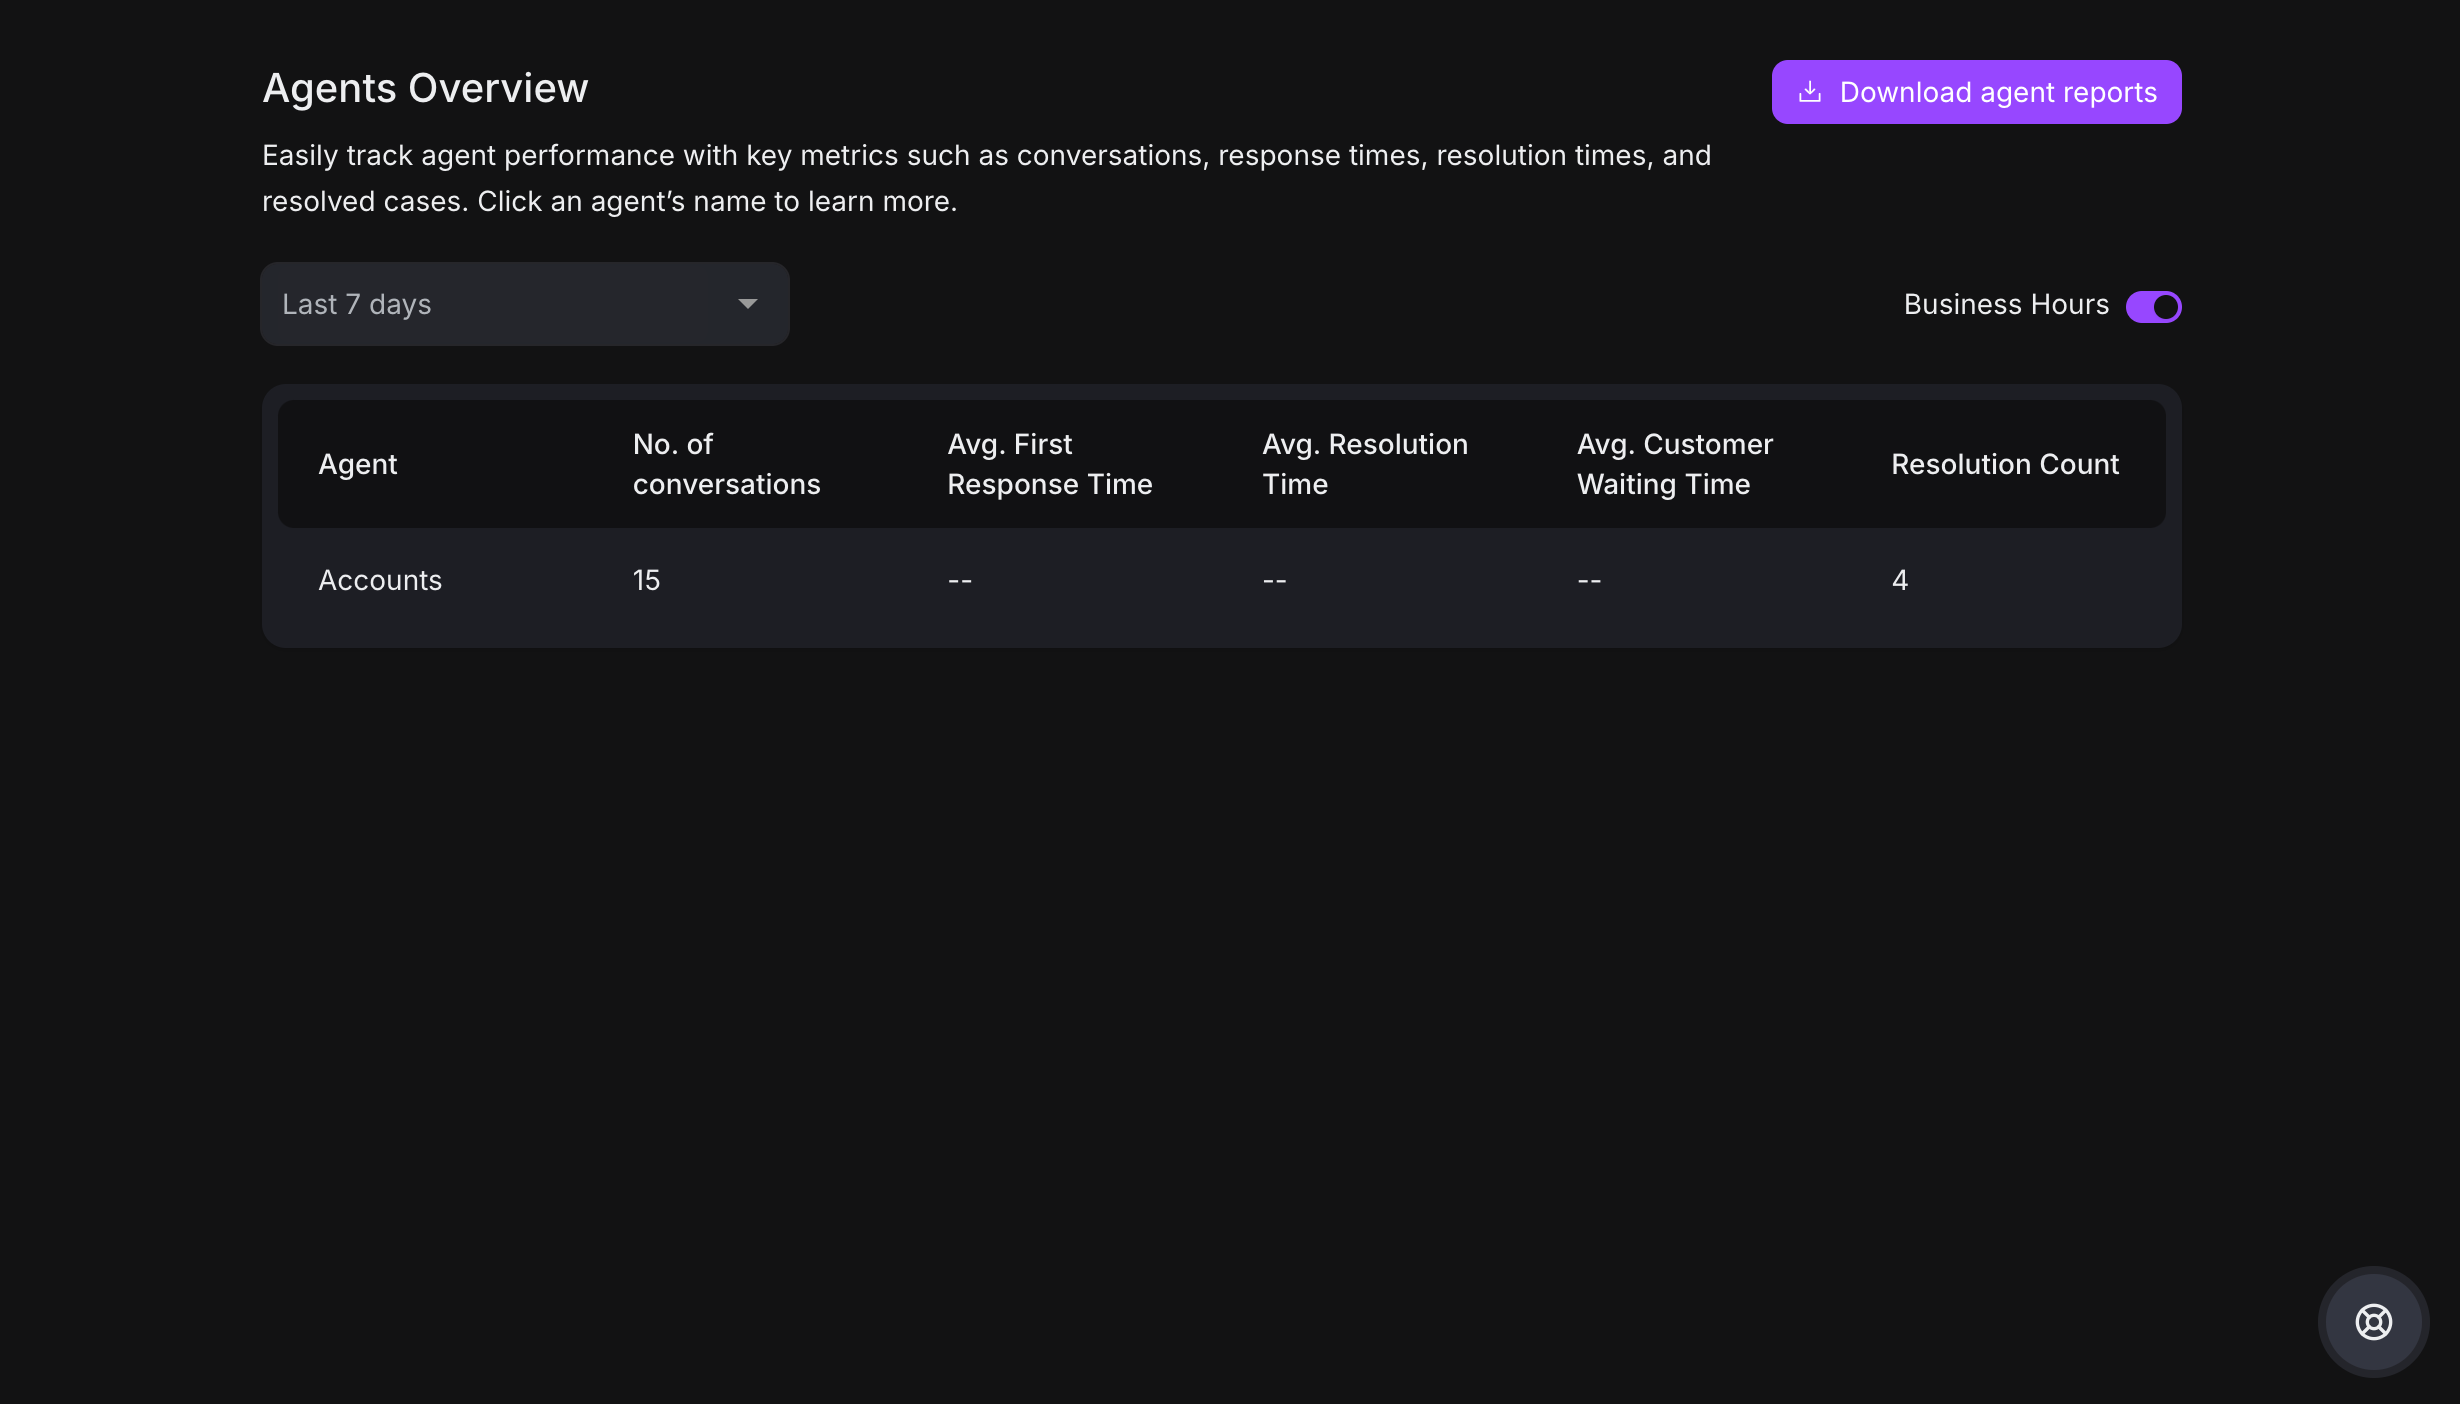
If you're an admin, you can access detailed Agent Reports to track team performance.
Step 1. Navigate to Reports → Agents Overview
Step 2. You'll see metrics like:
-
Total messages sent
-
Average response time
-
Conversations handled
-
Resolution time
Step 3. You can:
-
Select a specific agent from the dropdown
-
Choose a time period
-
Download the report
-
Toggle business hours view
Teams
What is a Team on VowChat?
A Team is an internal group of Agents on VowChat that handle a specific type of conversation. For example, you could have a Tech team handling technical queries, a Billing team for payment issues, and a Product team for feature requests.
How to use the Teams feature?
There are three main ways:
1. Assign a conversation to a team
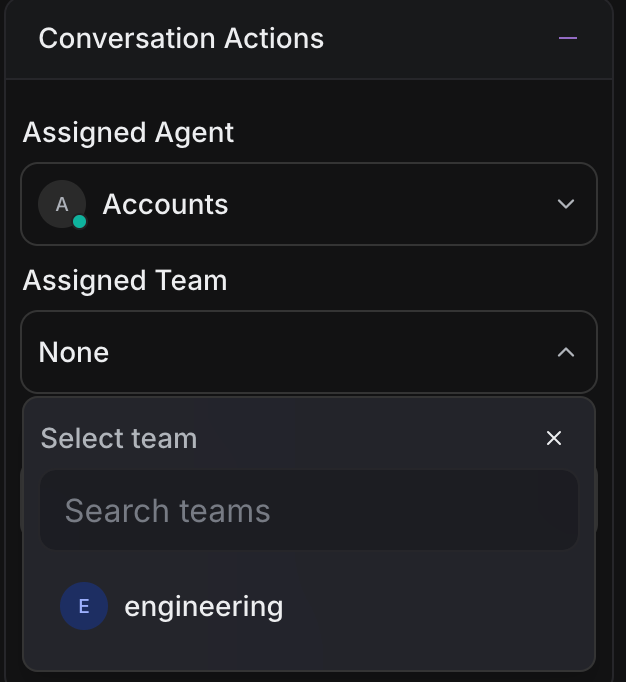
Step 1. Open a conversation on your dashboard.
Step 2. Click the + sign in "Conversation Actions" section.
Step 3. Select "Assigned Team" from the dropdown menu.
Step 4. Search or select the team you want to assign.
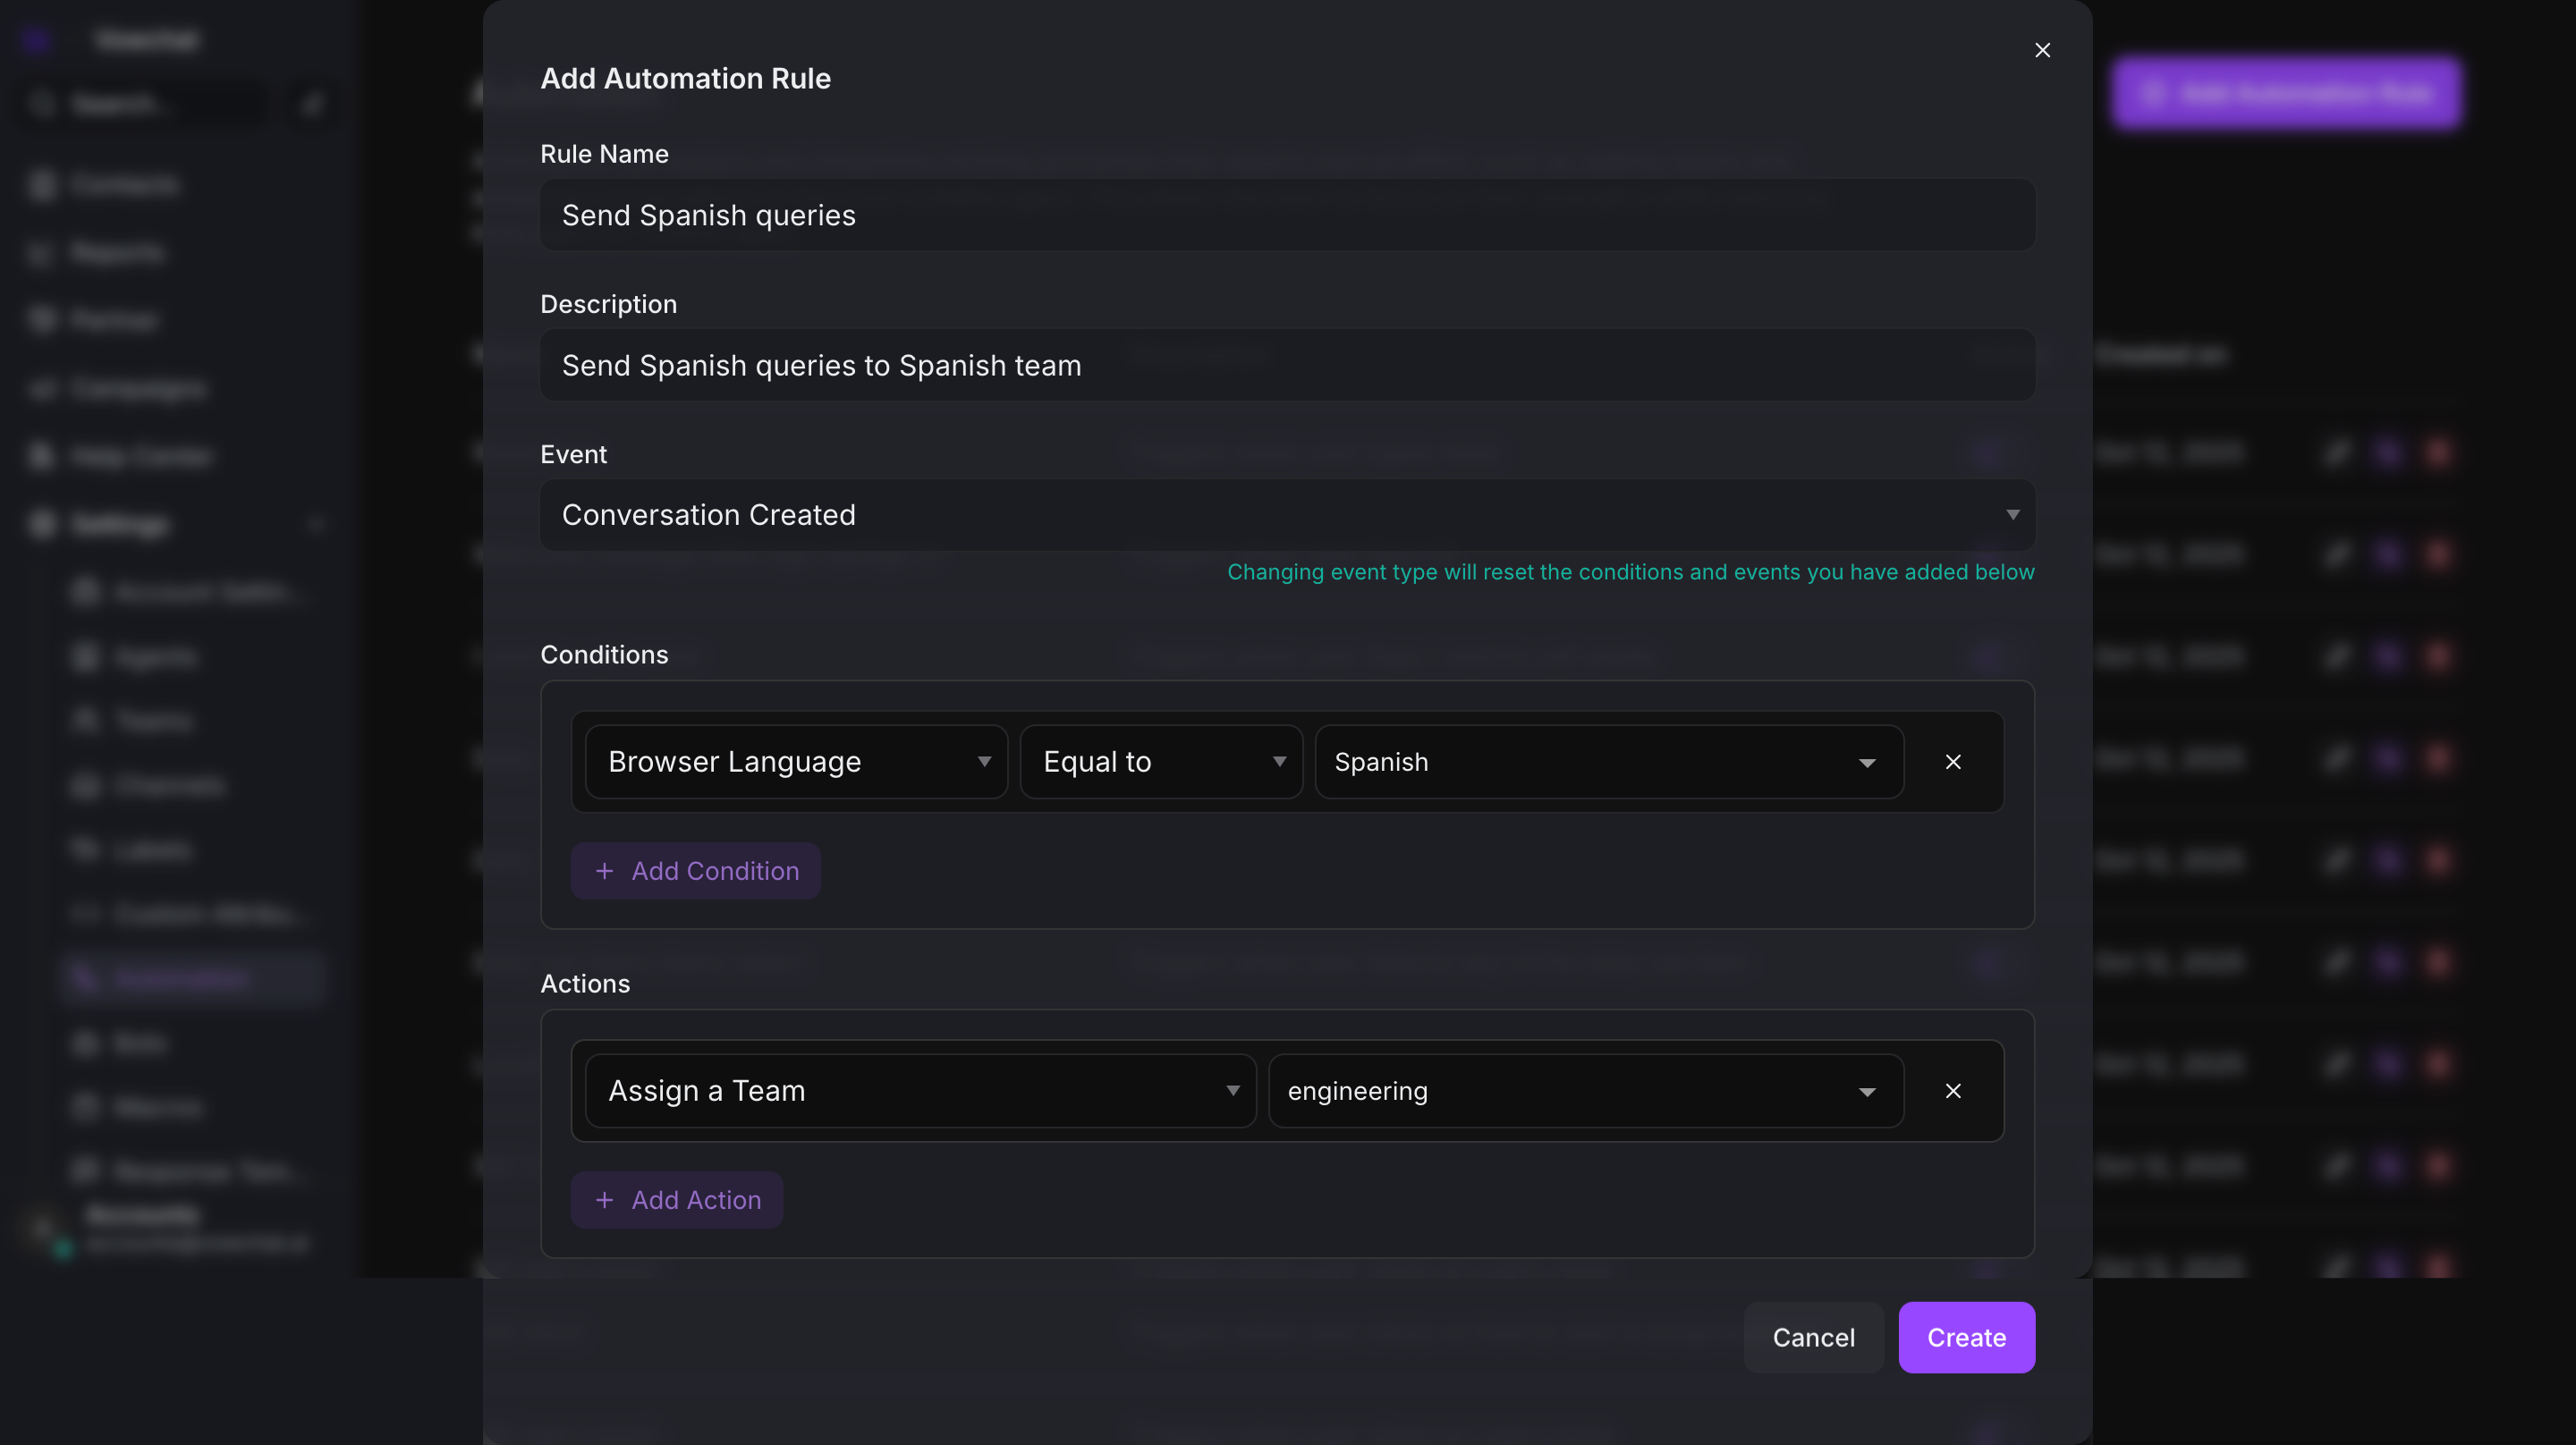
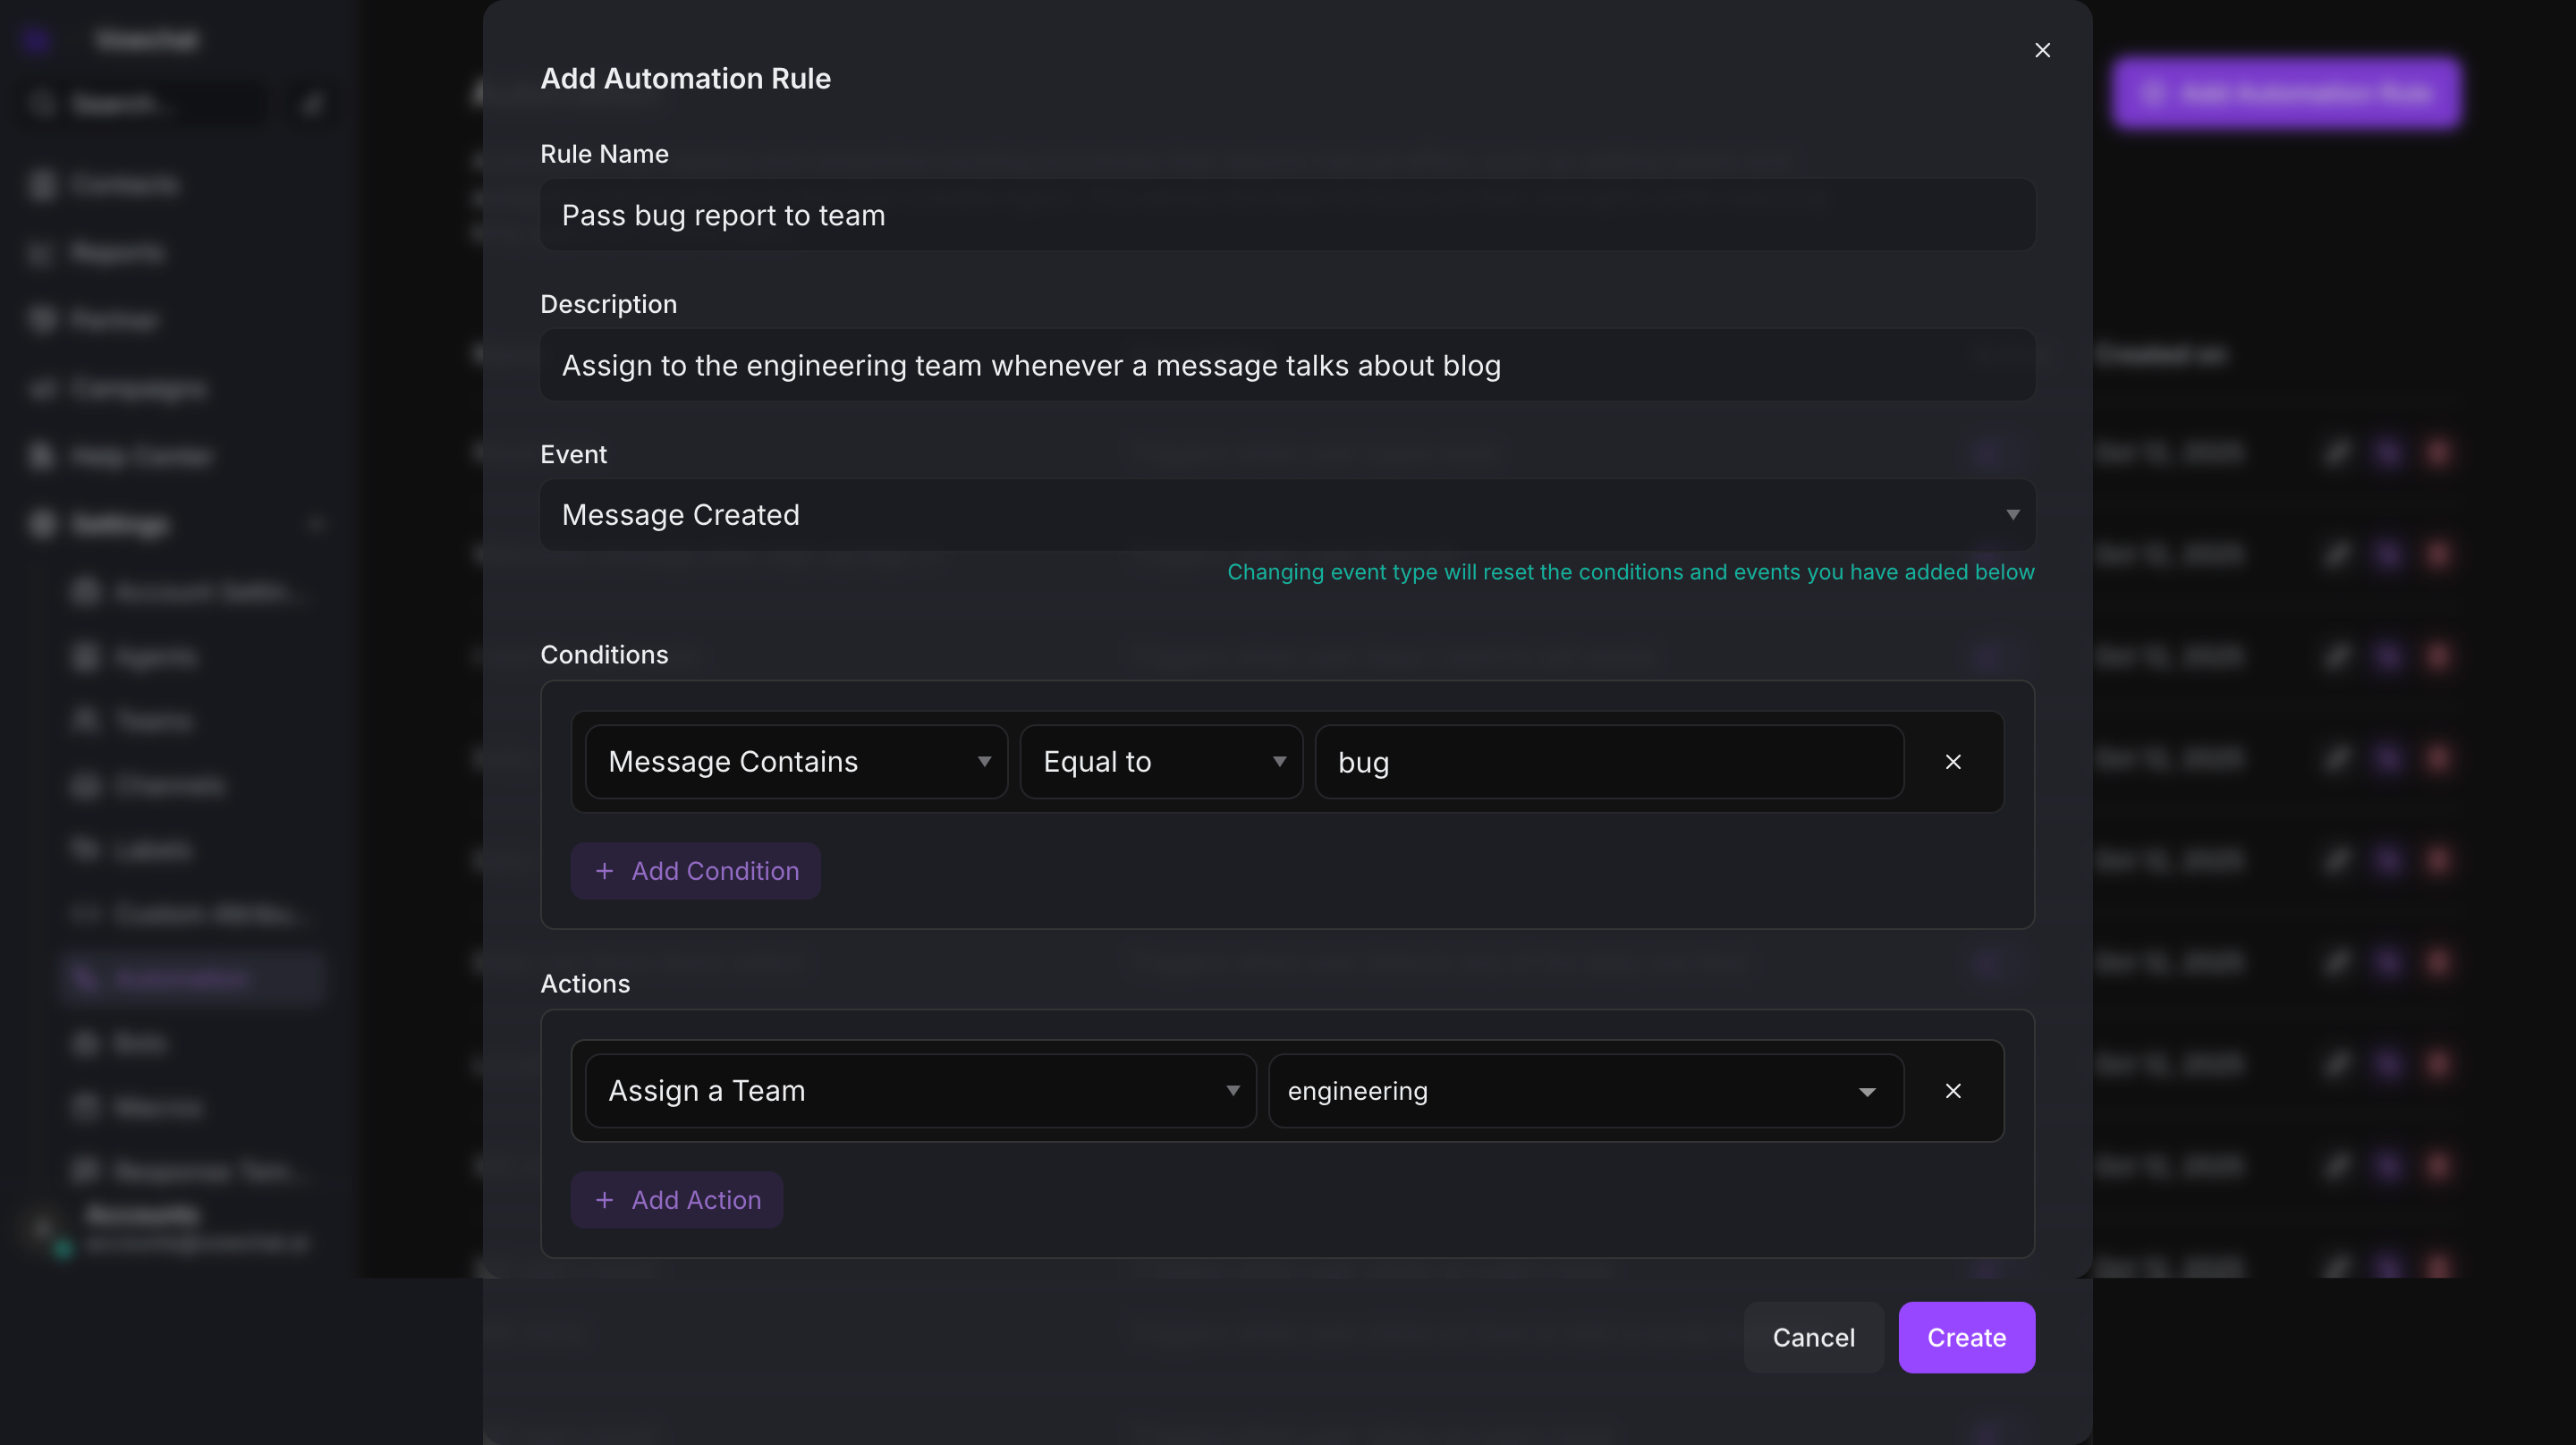
2. Use Automation Rules
You can automatically route conversations to specific teams based on conditions.
Example 1: Route by Browser Language
If a customer's browser is set to Spanish, automatically assign to the Spanish Support team.
Example 2: Route by Message Content
If the message contains keywords like "bug" or "error", automatically assign to the Engineering team.
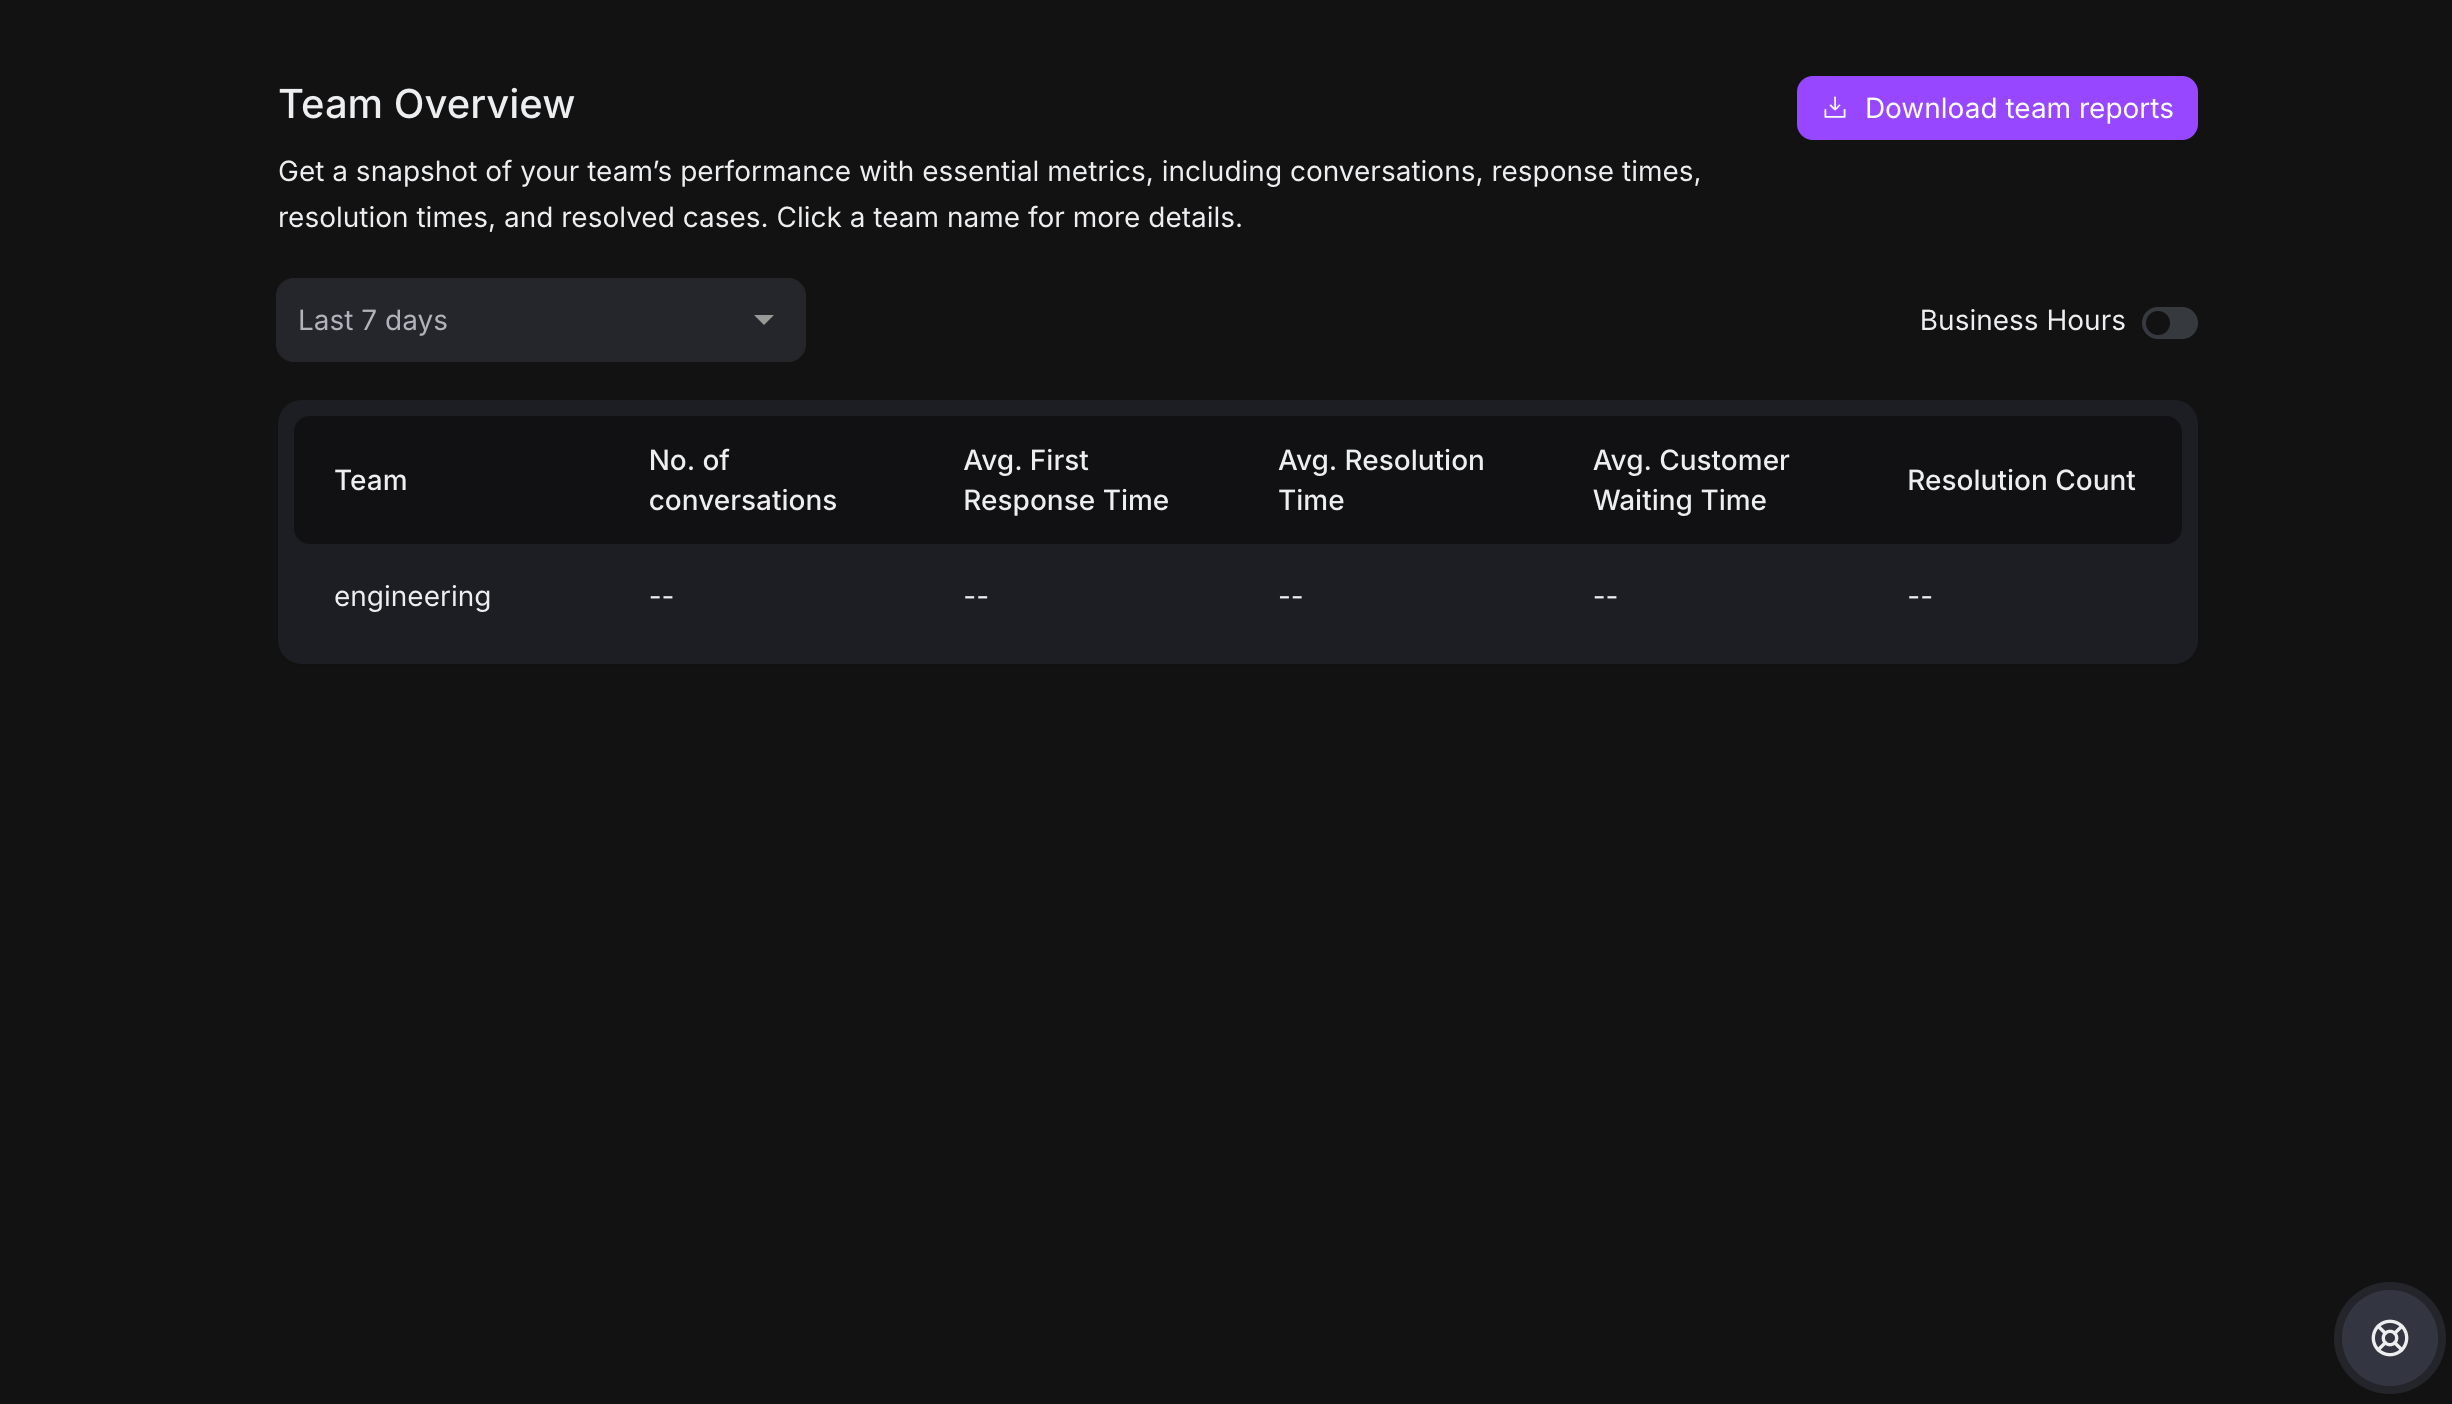
3. View Team Reports
Step 1. Navigate to Reports → Teams Overview
Step 2. Select a team from the dropdown
Step 3. View team performance metrics:
-
Total conversations handled
-
Average response time
-
Resolution rate
-
Member contributions
Contacts
What are Contacts?
Contacts are two types of people:
-
People who have messaged you through any of your channels
-
Contacts you've manually uploaded to VowChat
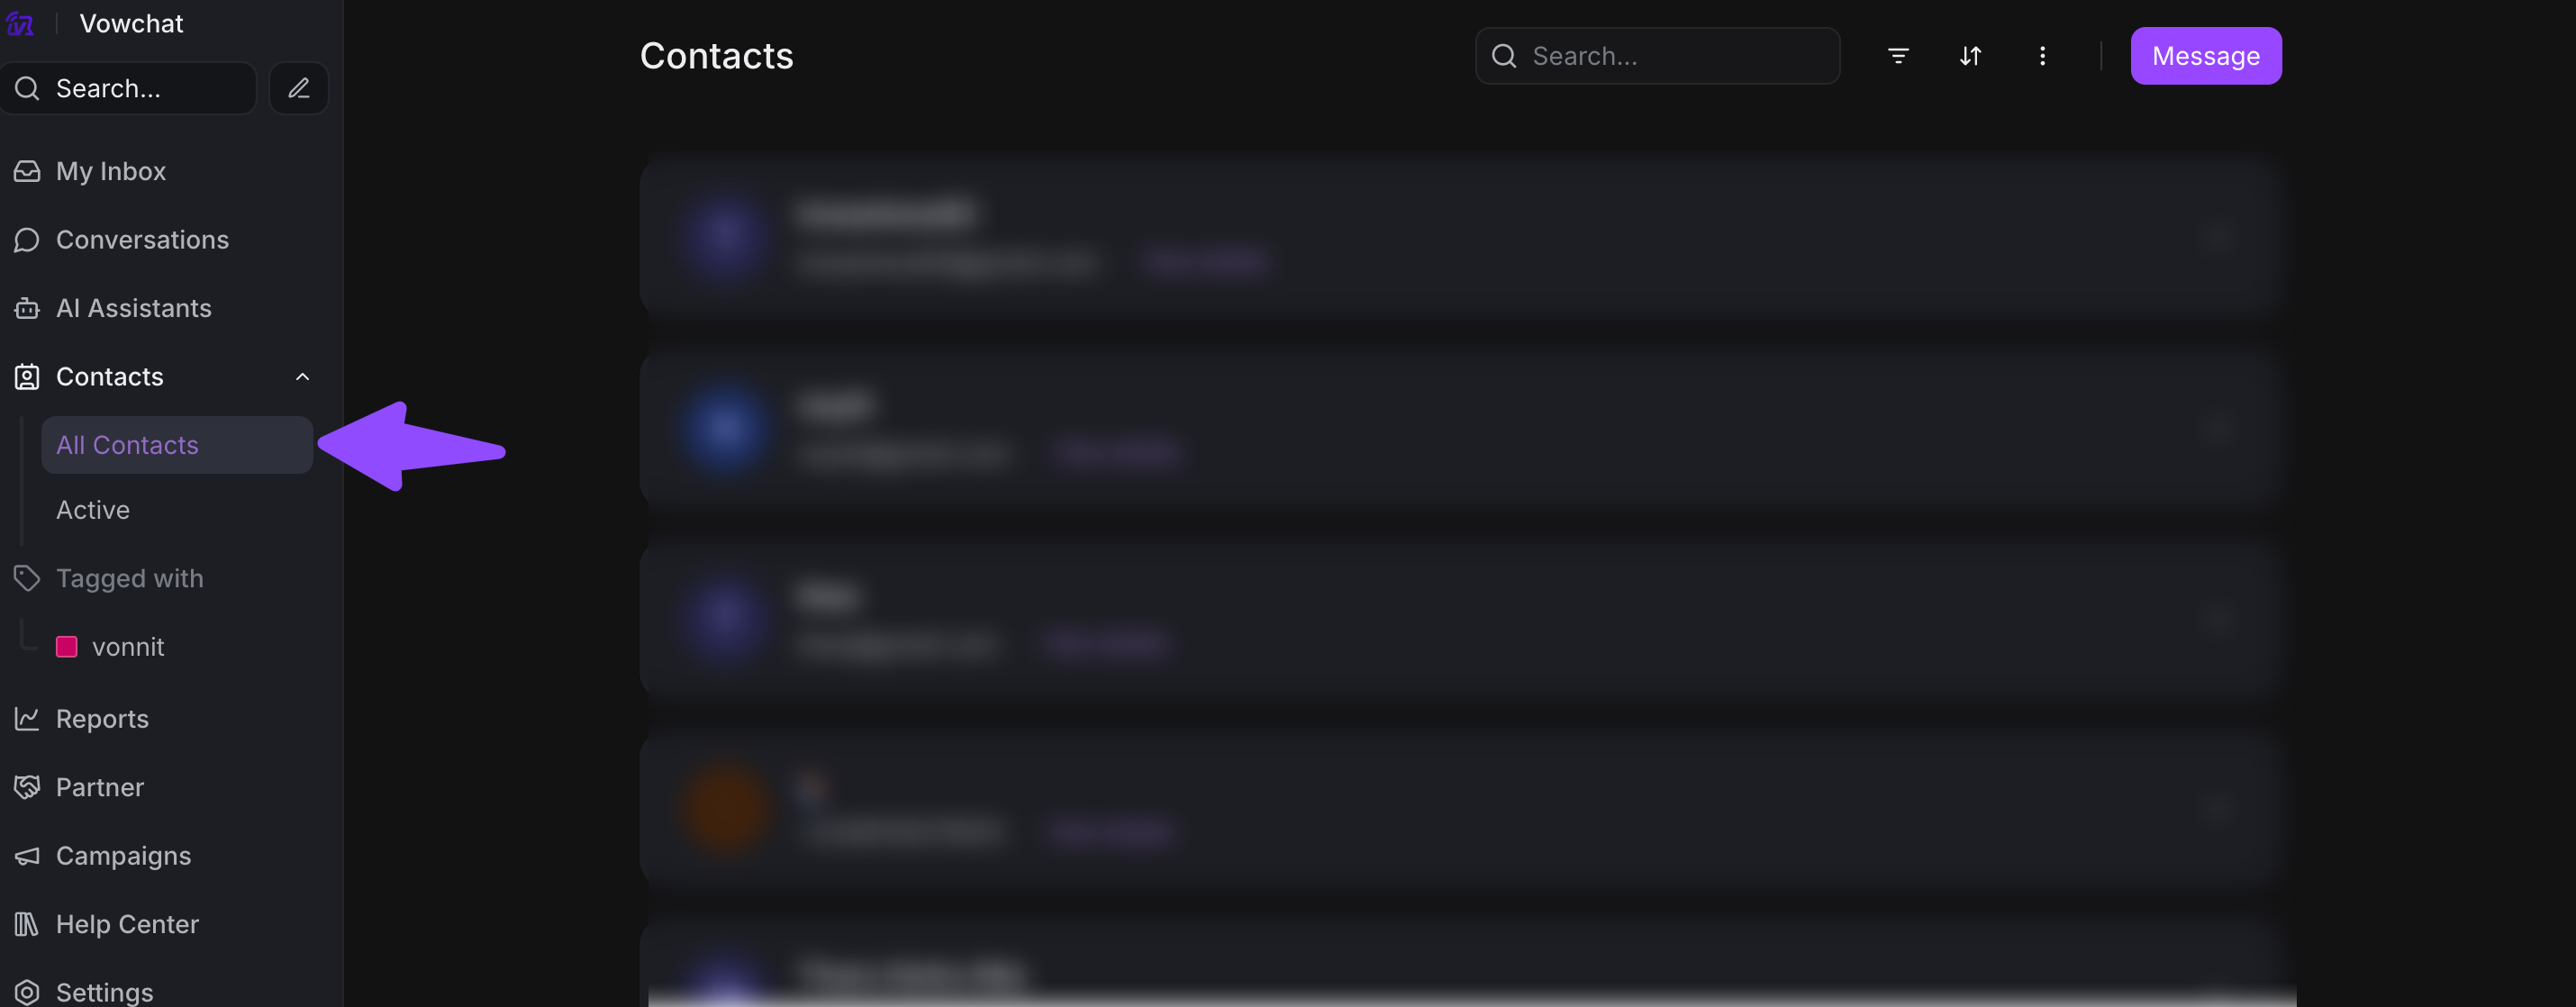
How to use the Contacts feature?
1. View Contact Details
Step 1. Click on "Contacts" in the sidebar
Step 2. You'll see a list of all contacts with:
-
Name
-
Email
-
Phone number
-
Last contacted date
-
Conversation count
2. Filter Contacts
Step 1. Click the "Filter" button
Step 2. Create filters based on:
-
Labels
-
Channel
-
Country
-
City
-
Custom attributes

Step 3. Save your filter for future use
Contact Management Tips
-
Add Custom Attributes: Store additional information like subscription tier, signup date, or purchase history
-
Create Segments: Group contacts by behavior or characteristics
-
Import/Export: Bulk upload contacts or export your database
-
Merge Duplicates: Combine duplicate contact profiles
Labels
What are Labels?
Labels are tags you can add to conversations and contacts to organize and categorize them. Think of them like folders or tags in your email.
How to use Labels?
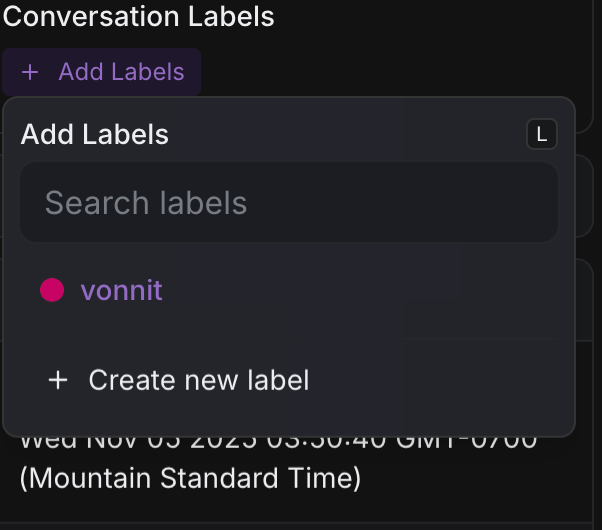
1. Add Labels to Conversations
Step 1. Open a conversation
Step 2. Click the + sign in "Conversation Actions"
Step 3. Select "Labels" and choose from existing labels or create new ones
Step 4. You can add multiple labels to one conversation
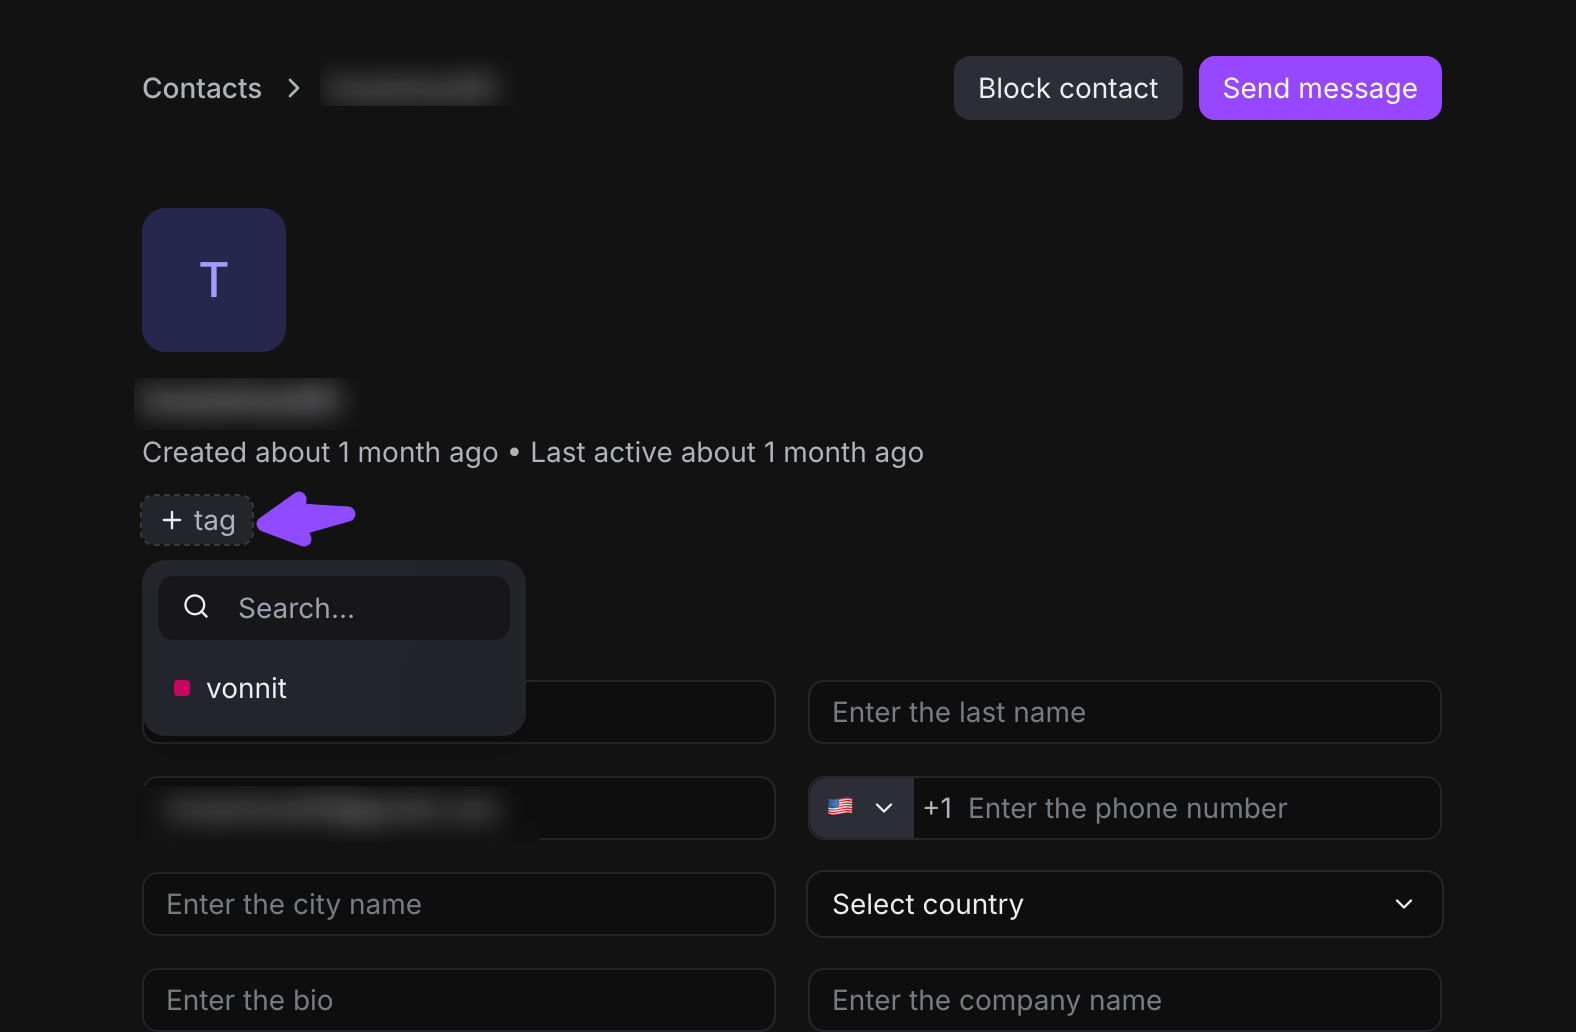
2. Add Labels to Contacts
Step 1. Go to Contacts
Step 2. Open a contact profile
Step 3. Click "Add Label" in the contact details
Step 4. Select or create labels
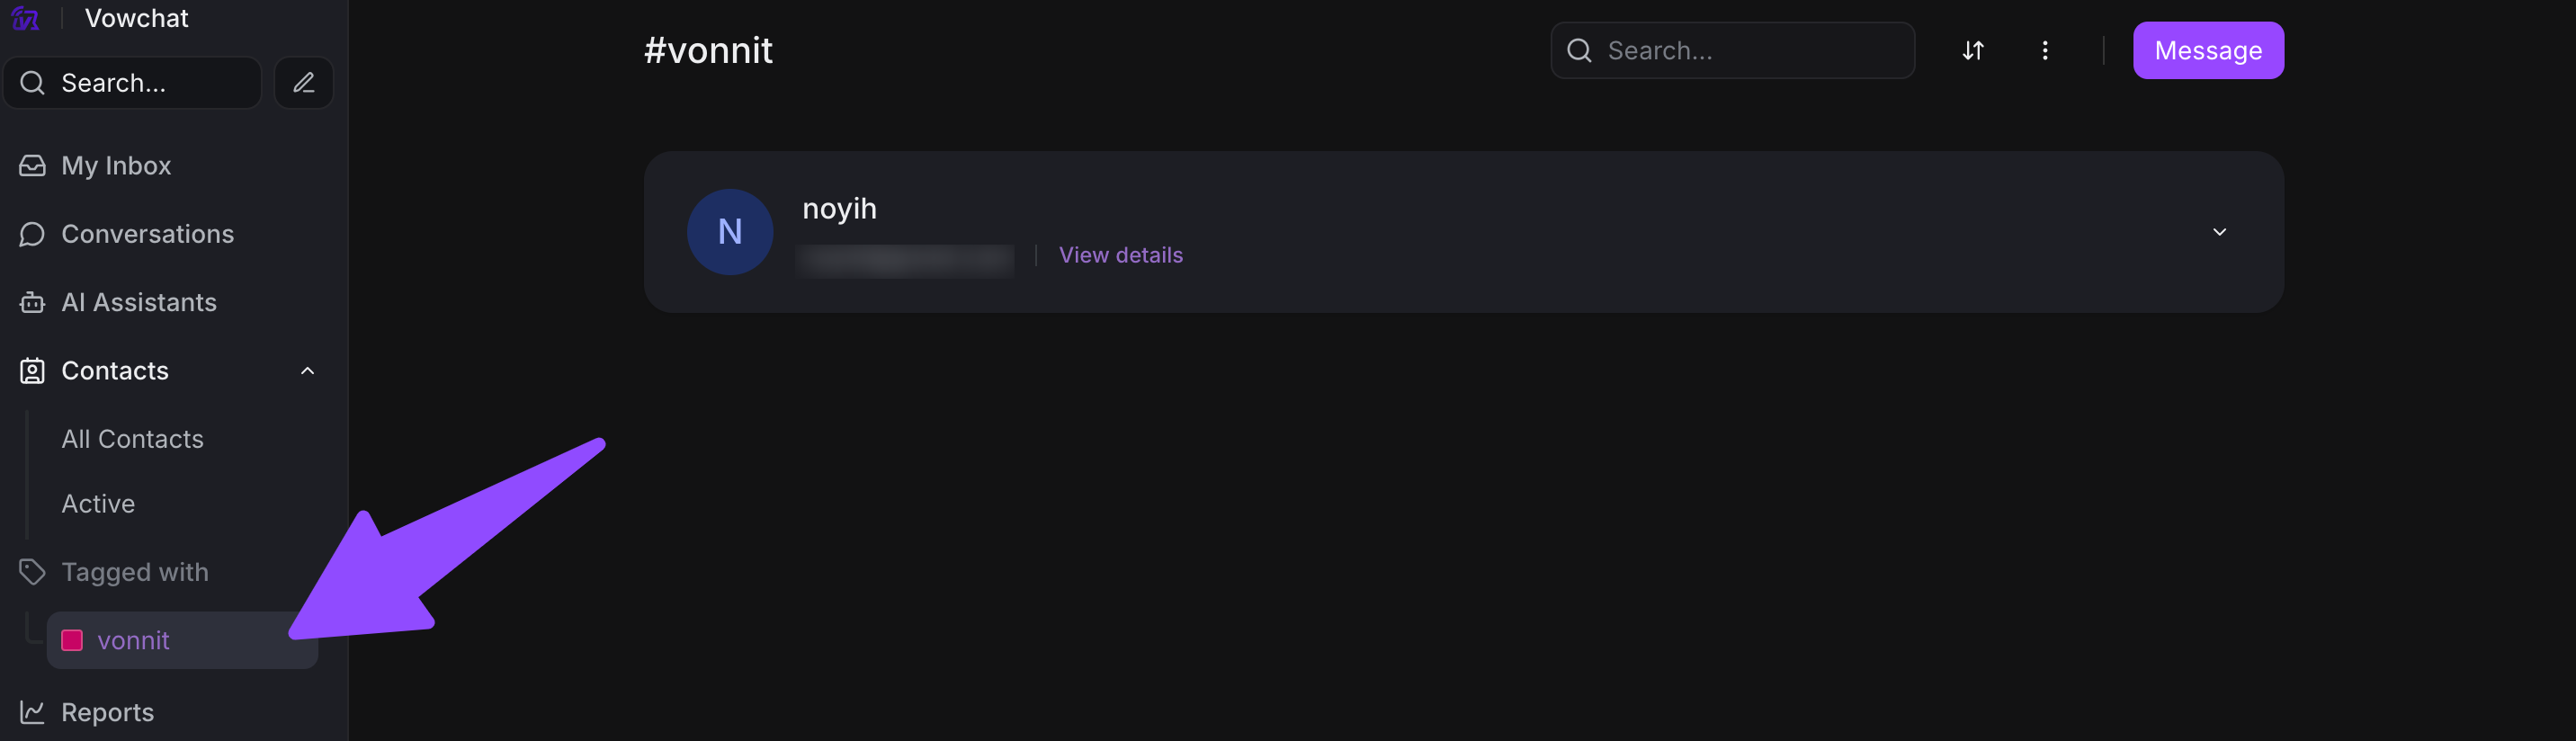
3. Filter by Labels
Once you've labeled conversations and contacts, you can easily filter them:
For Conversations:
-
Click on a label in the sidebar
-
All conversations with that label will appear

For Contacts:
-
Go to Contacts
-
Use the filter option
-
Select label criteria
4. View Label Reports
Step 1. Navigate to Reports → Labels Overview
Step 2. See metrics like:
-
Most used labels
-
Conversation volume by label
-
Response times by label
-
Resolution rates by label

Label Best Practices
-
Use Consistent Naming: Stick to a naming convention (e.g., all caps, lowercase)
-
Don't Over-Label: Start with 5-10 essential labels
-
Use Colors: Assign colors to quickly identify label types
-
Create Categories: Group labels (e.g., Priority: High/Medium/Low)
-
Use in Automation: Trigger actions based on labels
What's Next?
Now that you've mastered these core features, move on to Lesson 3(b) to learn about Response Templates, Custom Attributes, Automation, and Reports!