VowChat allows you to track additional information about conversations and contacts through custom attributes. These can include details like subscription plan, signup date, last transaction date, or any other data relevant to your business.
What are Custom Attributes?
Custom attributes let you store and track information that isn't captured by standard fields. Examples include:
-
Subscription plan (Free, Pro, Enterprise)
-
Signup date
-
Last transaction date
-
Account value
-
Product preferences
-
Customer tier
-
Any business-specific data
Important Note: The only difference between custom and standard attributes is that standard data attributes automatically get updated, while custom attributes require manual updates or SDK integration.
How to Create Custom Attributes
Step 1. Go to Settings → Custom Attributes
Step 2. Click Add Custom Attribute
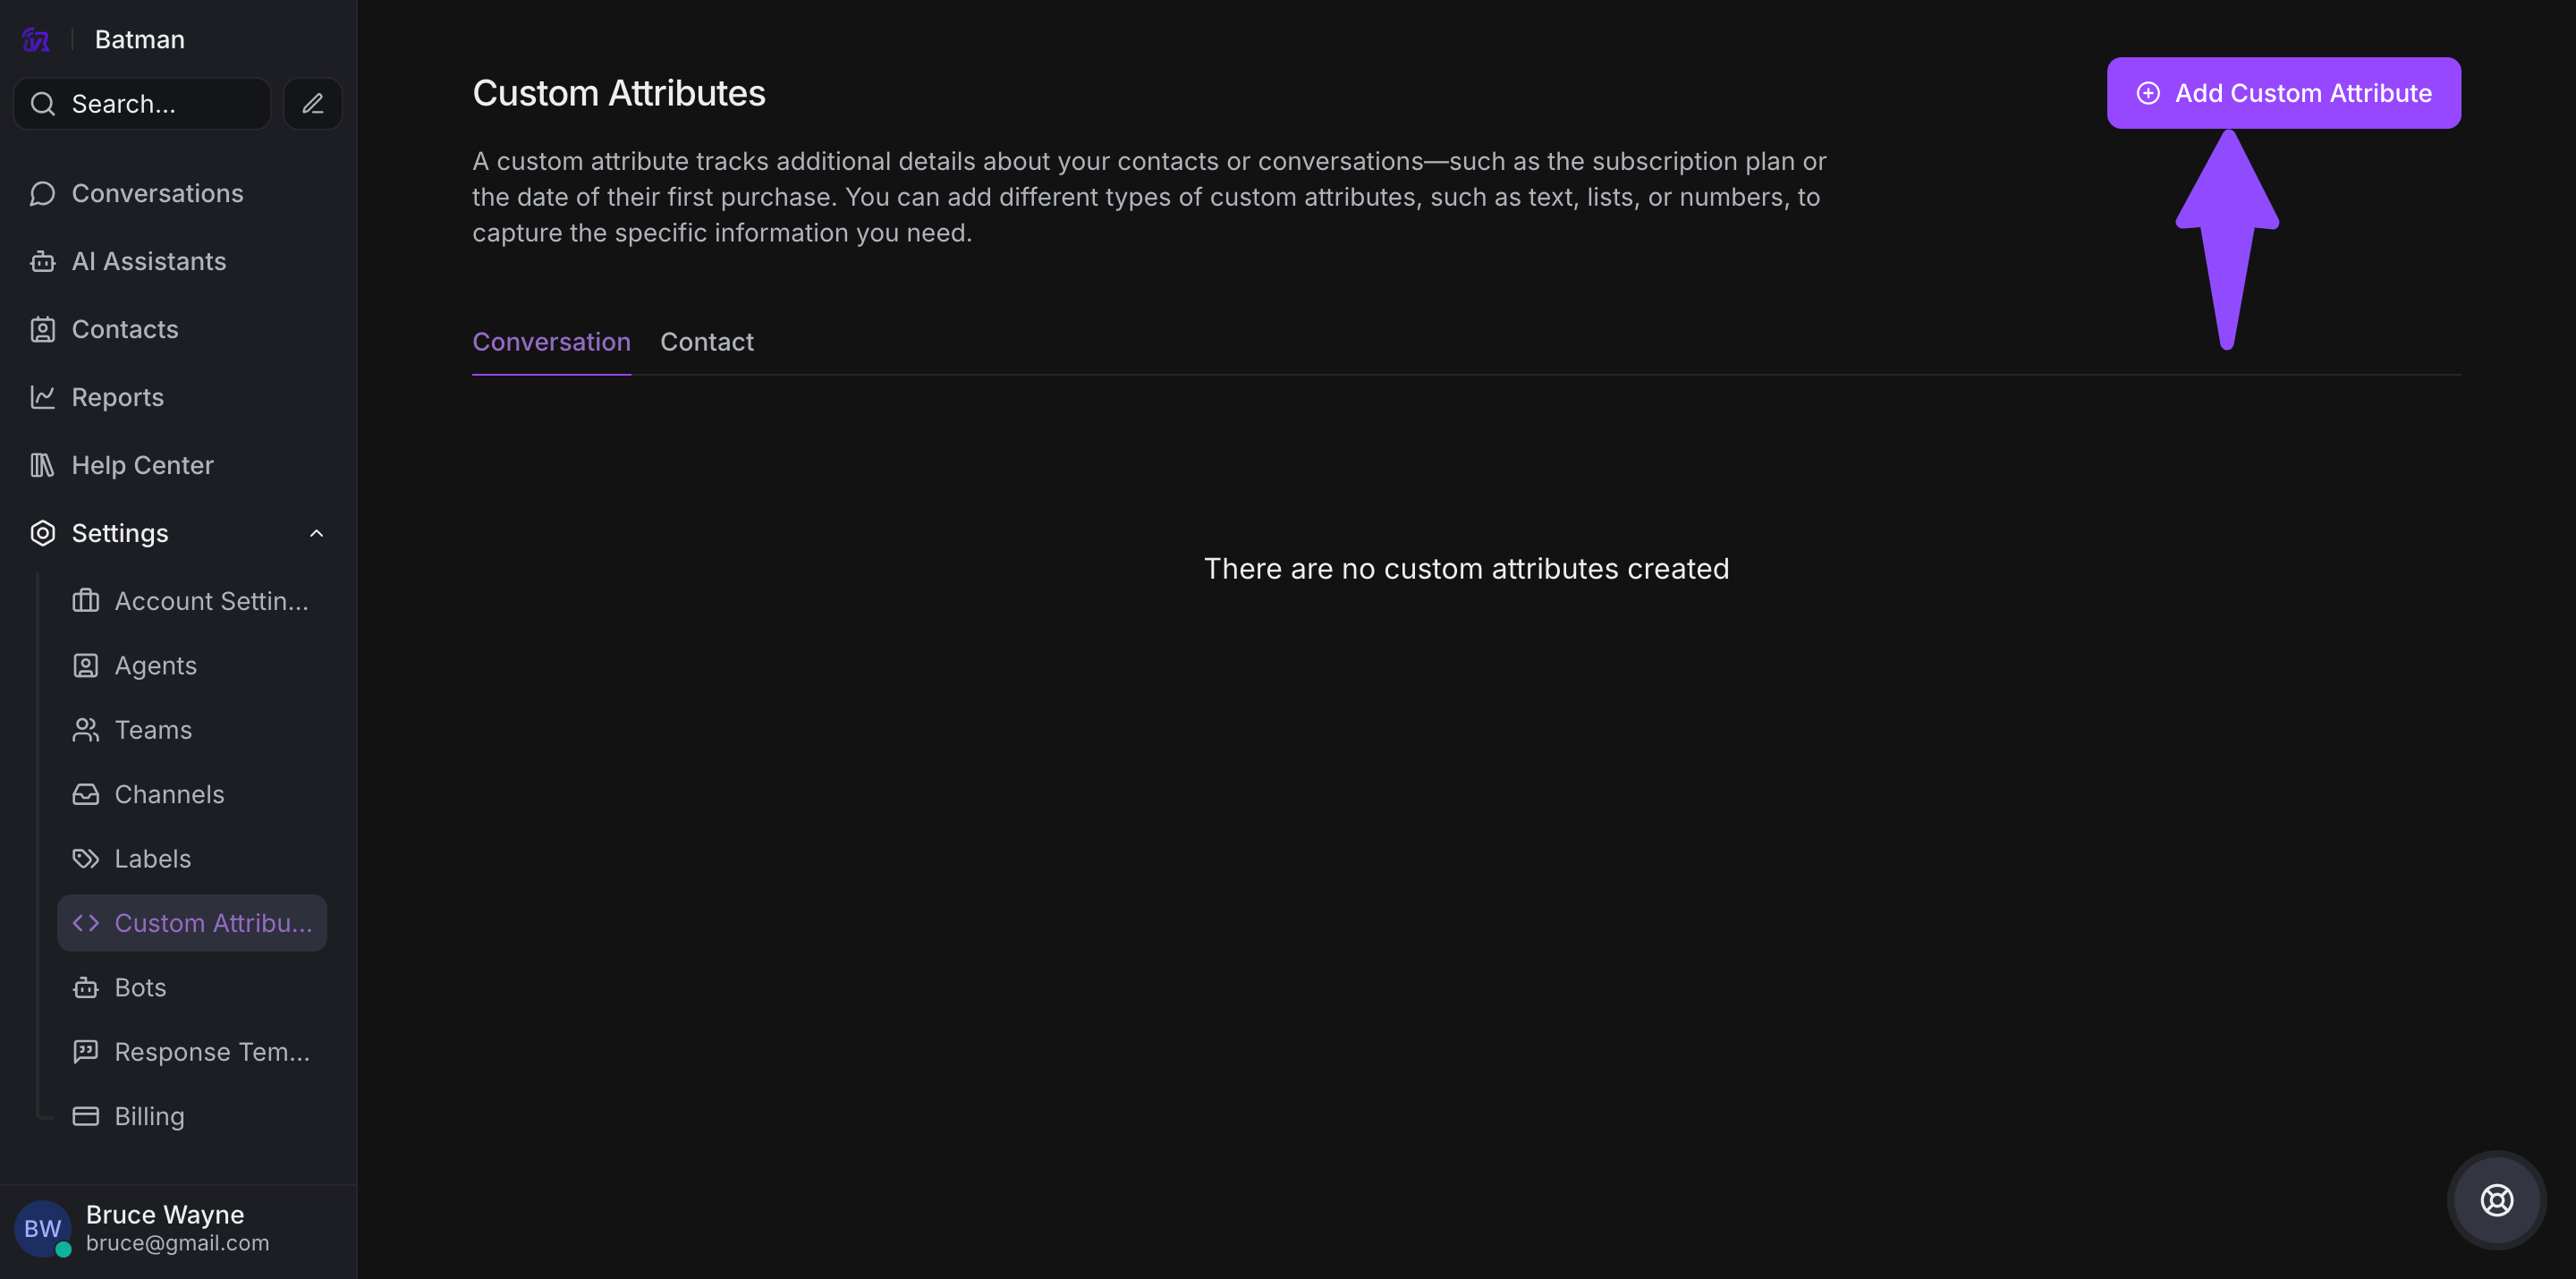
Step 3. Fill in the attribute details:
-
Applies to: Choose between Conversation or Contact
-
Display Name: The label shown in the interface
-
Unique Key: A unique identifier (cannot be duplicated)
-
Description: Explain what this attribute tracks
-
Type: Select the data type
-
Text
-
Number
-
Link
-
Date
-
List (dropdown options)
-
Checkbox
-
Step 4. Click Create
Restriction: You cannot create a custom attribute with the same key twice.
How to Set Custom Attributes
Method 1: Via SDK
Use the VowChat SDK to set custom attributes programmatically:
window.$vowchat.setCustomAttributes({
  subscription_plan: 'pro',
  signup_date: '2024-01-15',
  account_value: 5000,
  is_premium: true
});
Important: Keys must match the unique identifiers you created. Values must match the attribute type (Number, Date, String, etc.).
Method 2: Via Sidebar (Manual Entry)
For Conversations:
Step 1. Open a conversation
Step 2. In the right sidebar, look for the Conversation Information section
Step 3. Click the + icon to expand attributes
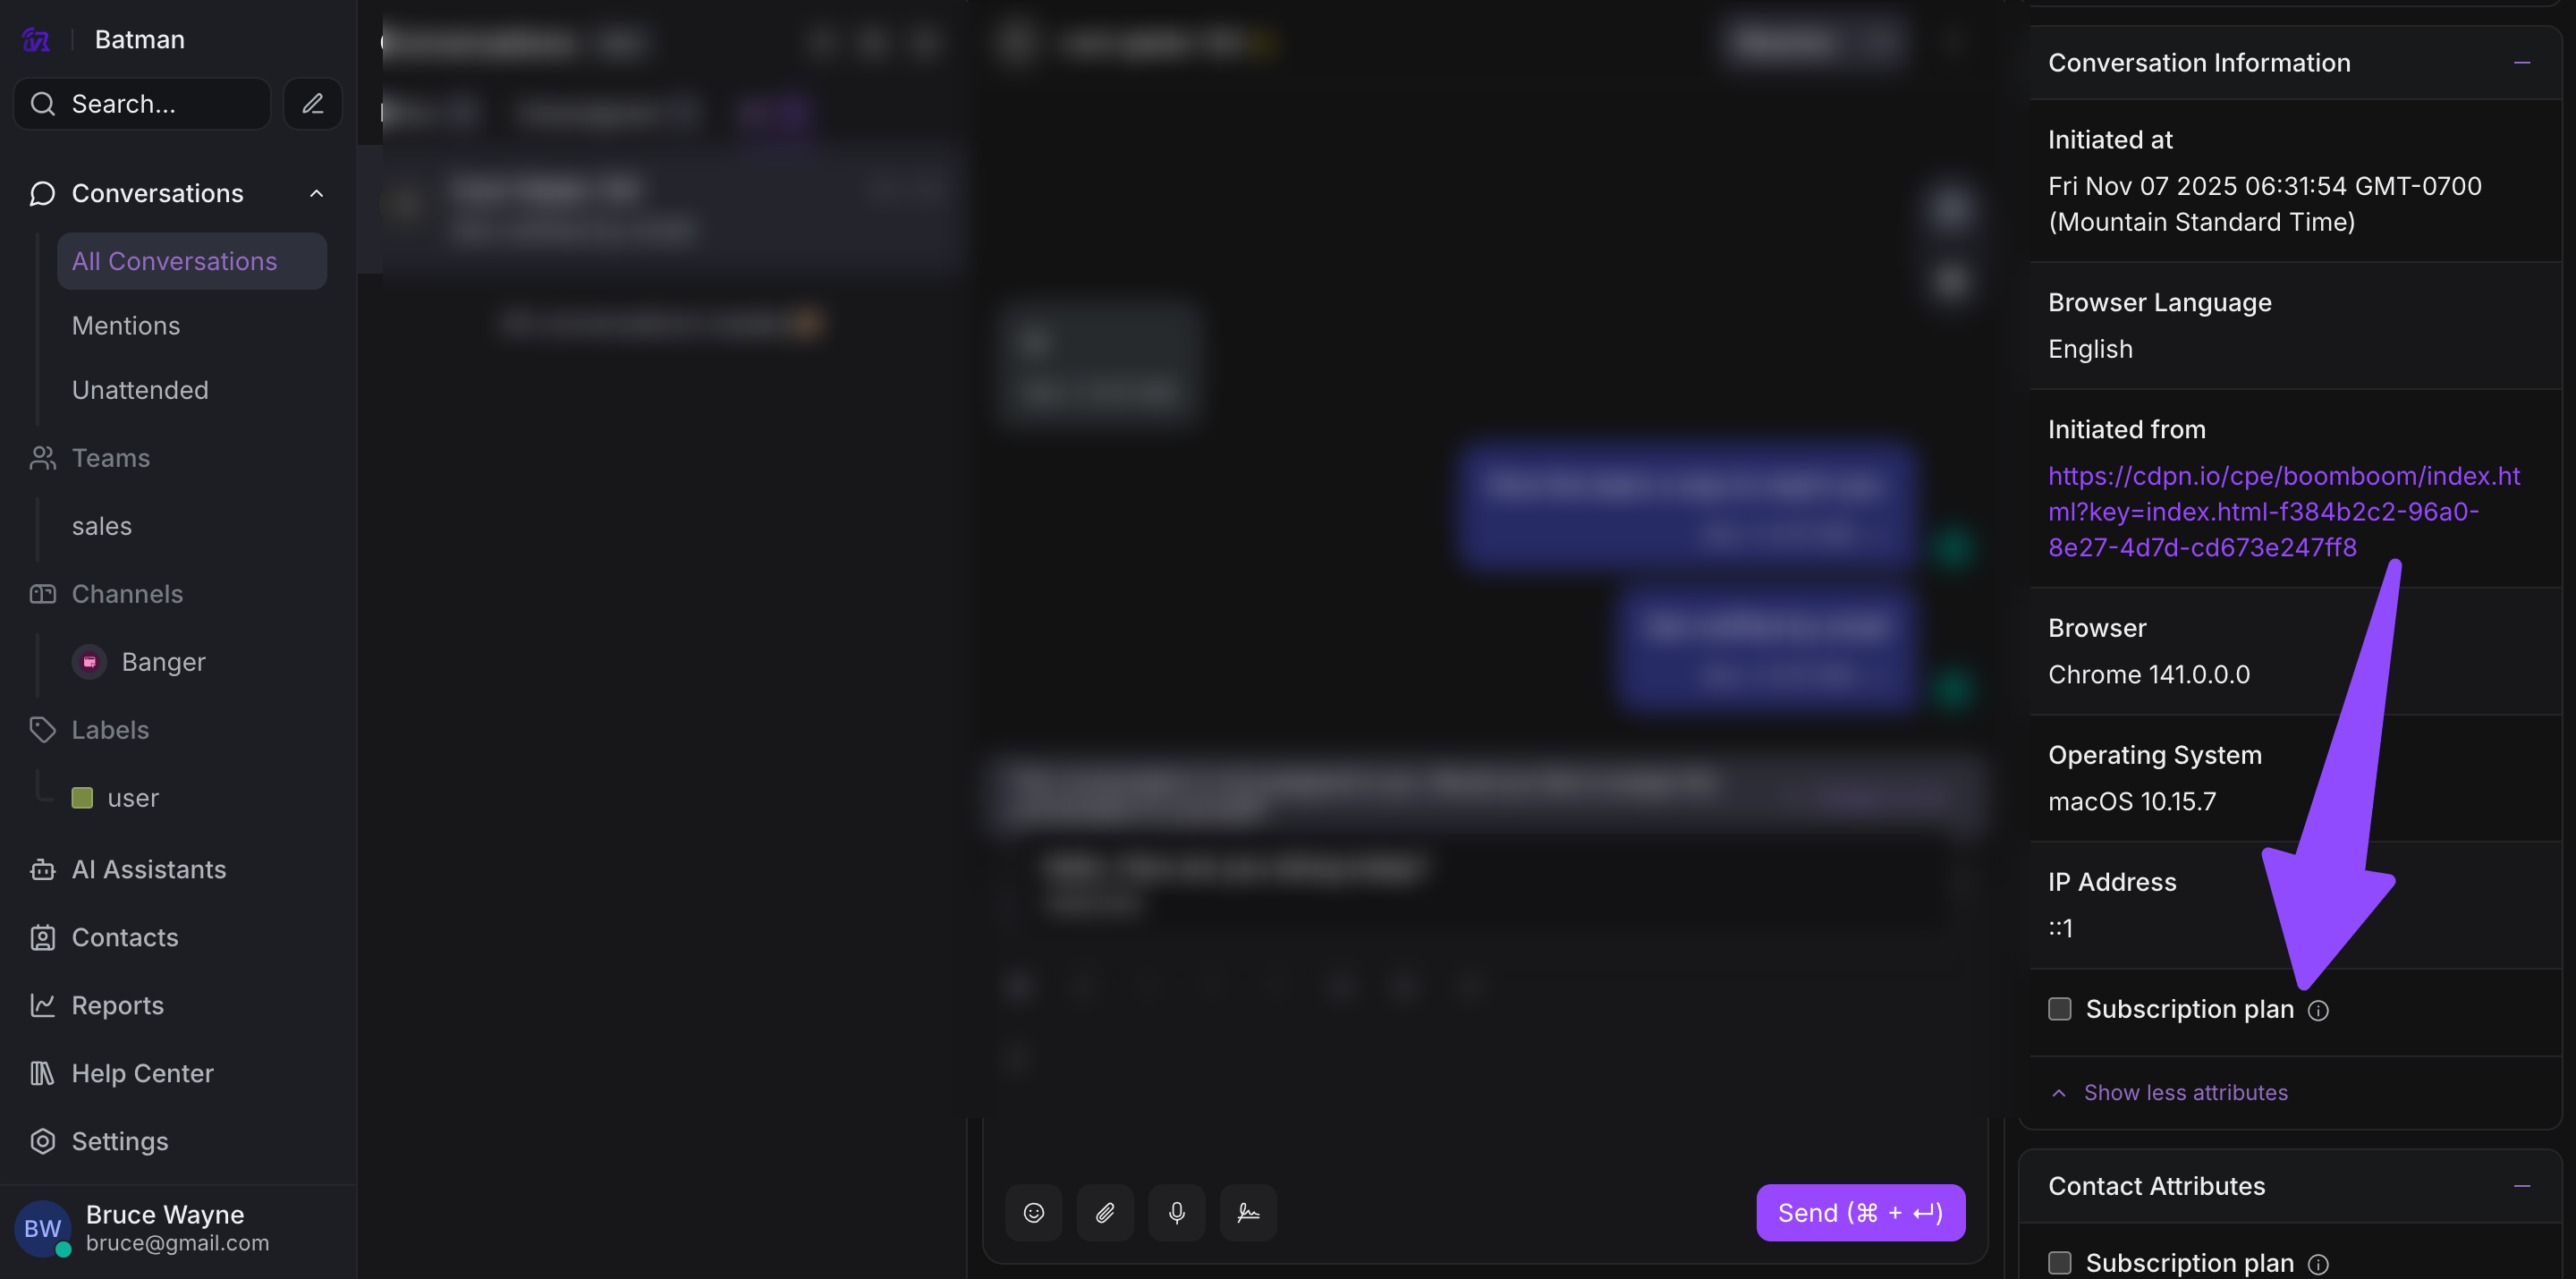
Step 4. Select "Add Attributes"
Step 5. Choose the custom attribute from the list
Step 6. Populate with the appropriate value
Step 7. Save the changes
For Contacts:
Step 1. Navigate to Contacts and open a contact profile
Step 2. In the contact details panel, find the attributes section
Step 3. Click to add or edit attributes
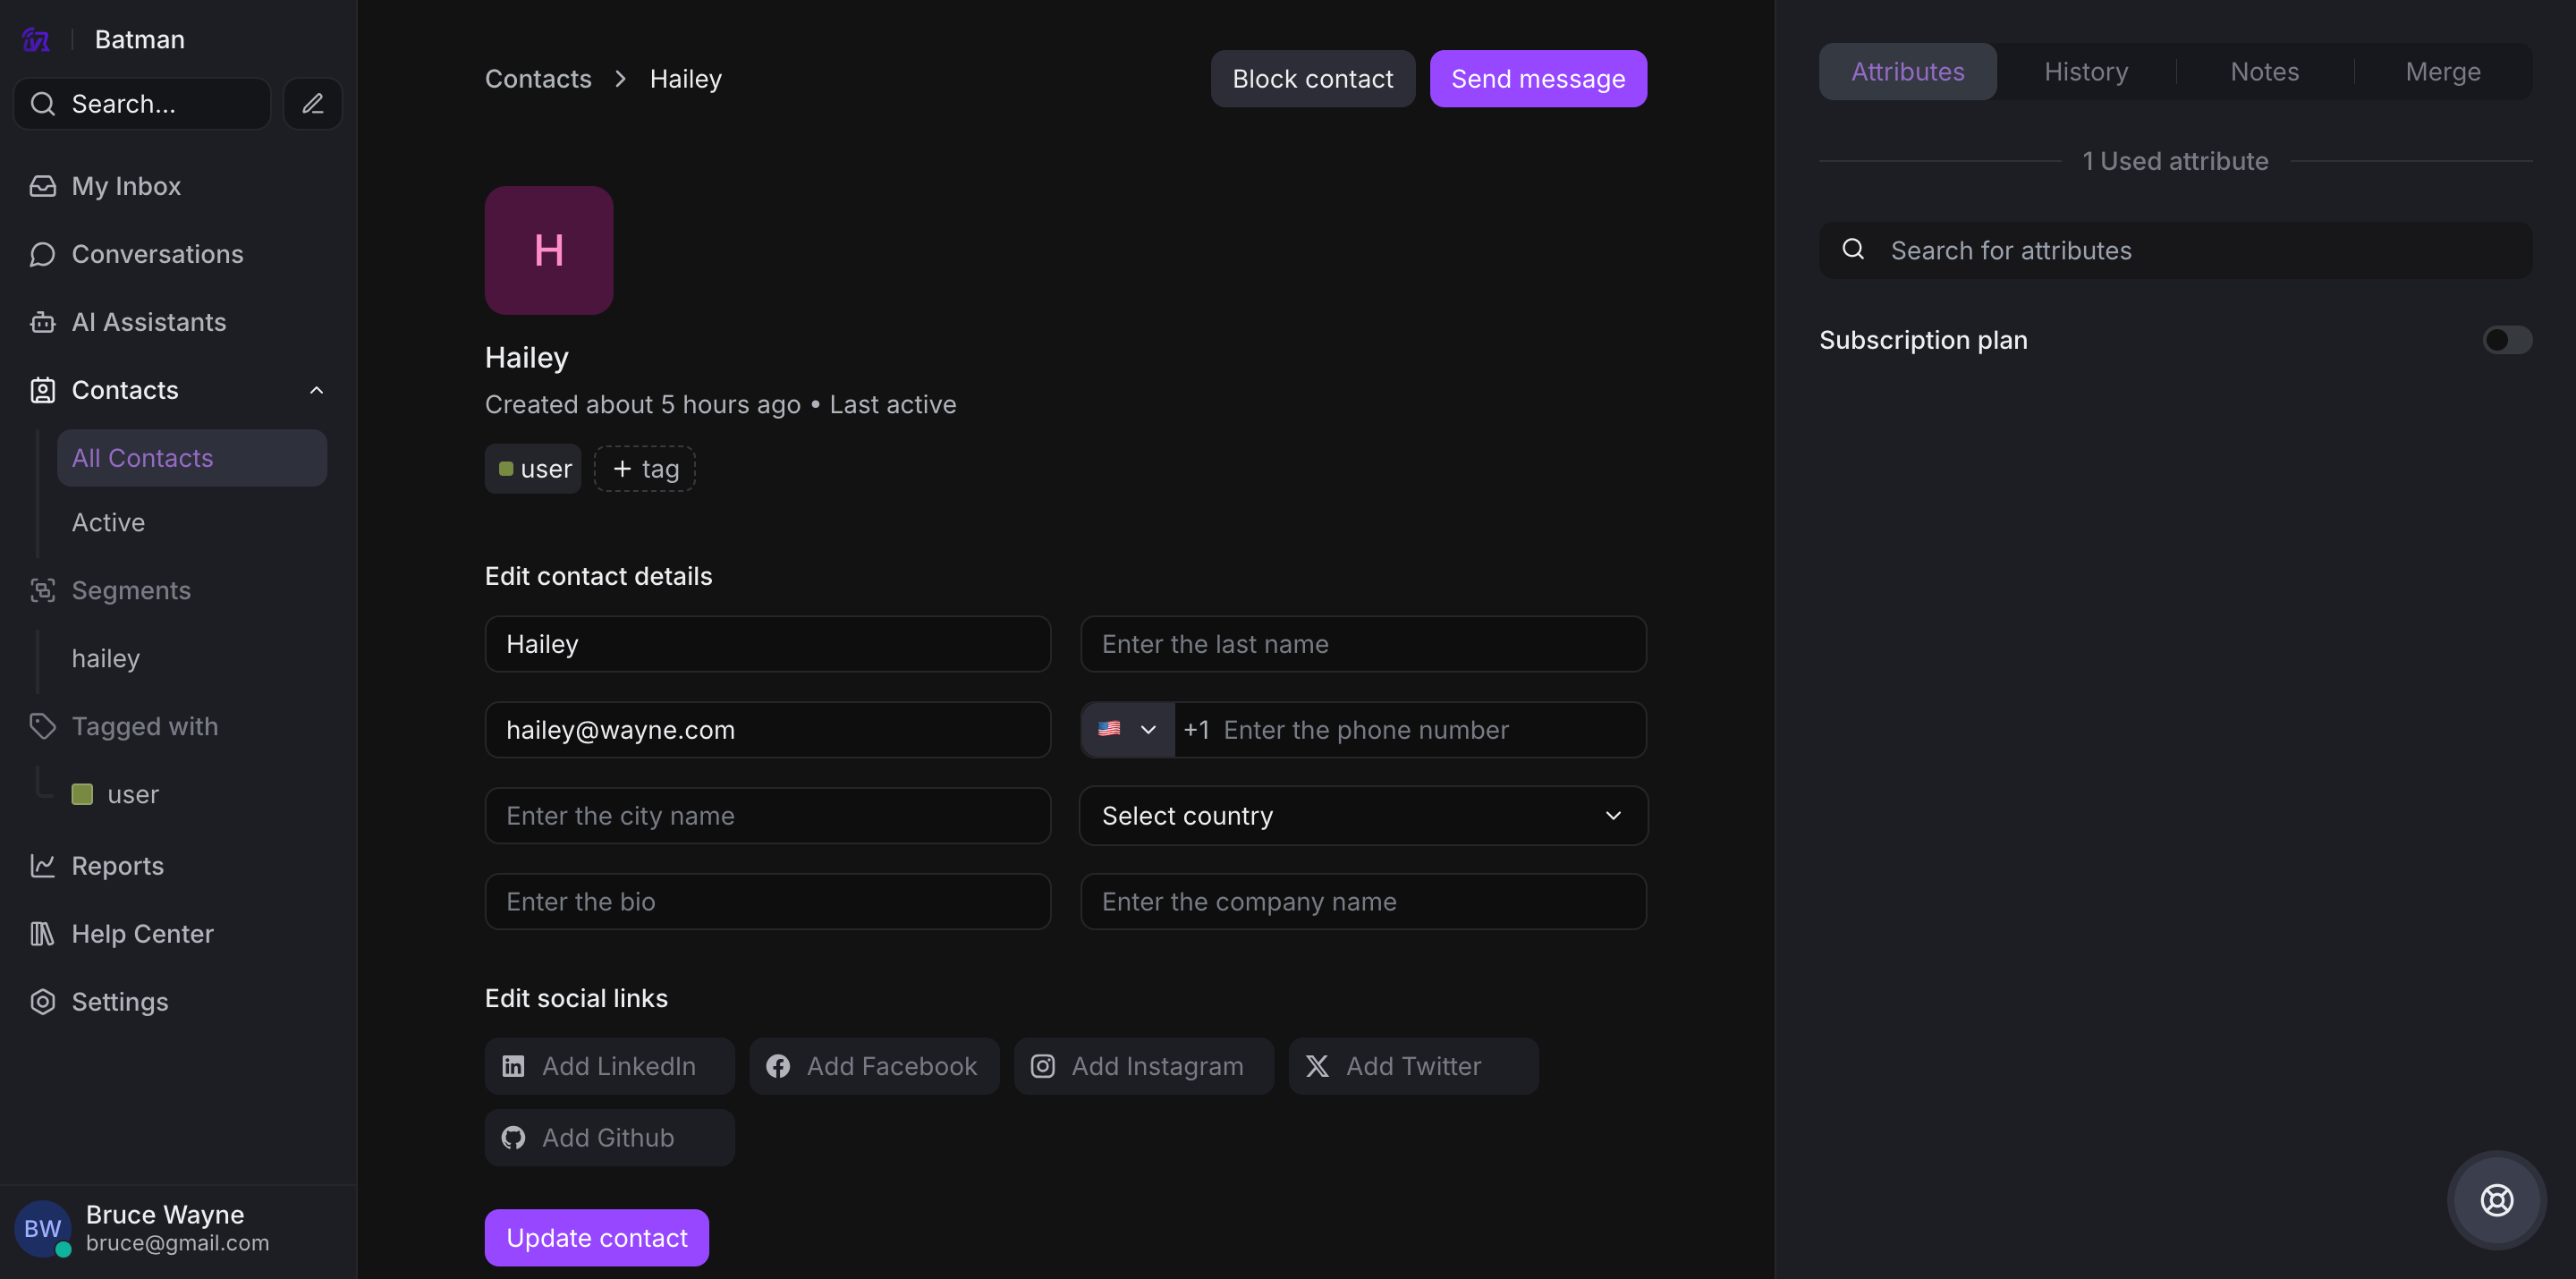
Step 4. Select custom attributes and populate values
Step 5. Save the contact information
Use Cases for Custom Attributes
-
Segmentation: Filter contacts by subscription tier or account value
-
Personalization: Tailor responses based on customer data
-
Automation: Trigger rules based on custom attribute values
-
Reporting: Generate insights on custom business metrics
-
Context: Give agents immediate visibility into customer details
Best Practices
-
Plan your attributes: Define what data you need before creating attributes
-
Use consistent naming: Follow a naming convention for keys
-
Choose appropriate types: Select the correct data type for accurate filtering
-
Document attributes: Keep a guide of what each attribute means
-
Automate when possible: Use SDK to populate attributes automatically