Contacts in VowChat are the people who interact with your business through any of your channels. You can manage contacts manually, import them in bulk, or collect them automatically through pre-chat forms and channel greetings.

How to Add Contacts?
There are three primary methods to add contacts to VowChat:
Method 1: Manual Upload (Single Contact)
Step 1. Navigate to the Contacts section
Step 2. Click the New Contact button
Step 3. Fill in the contact details:
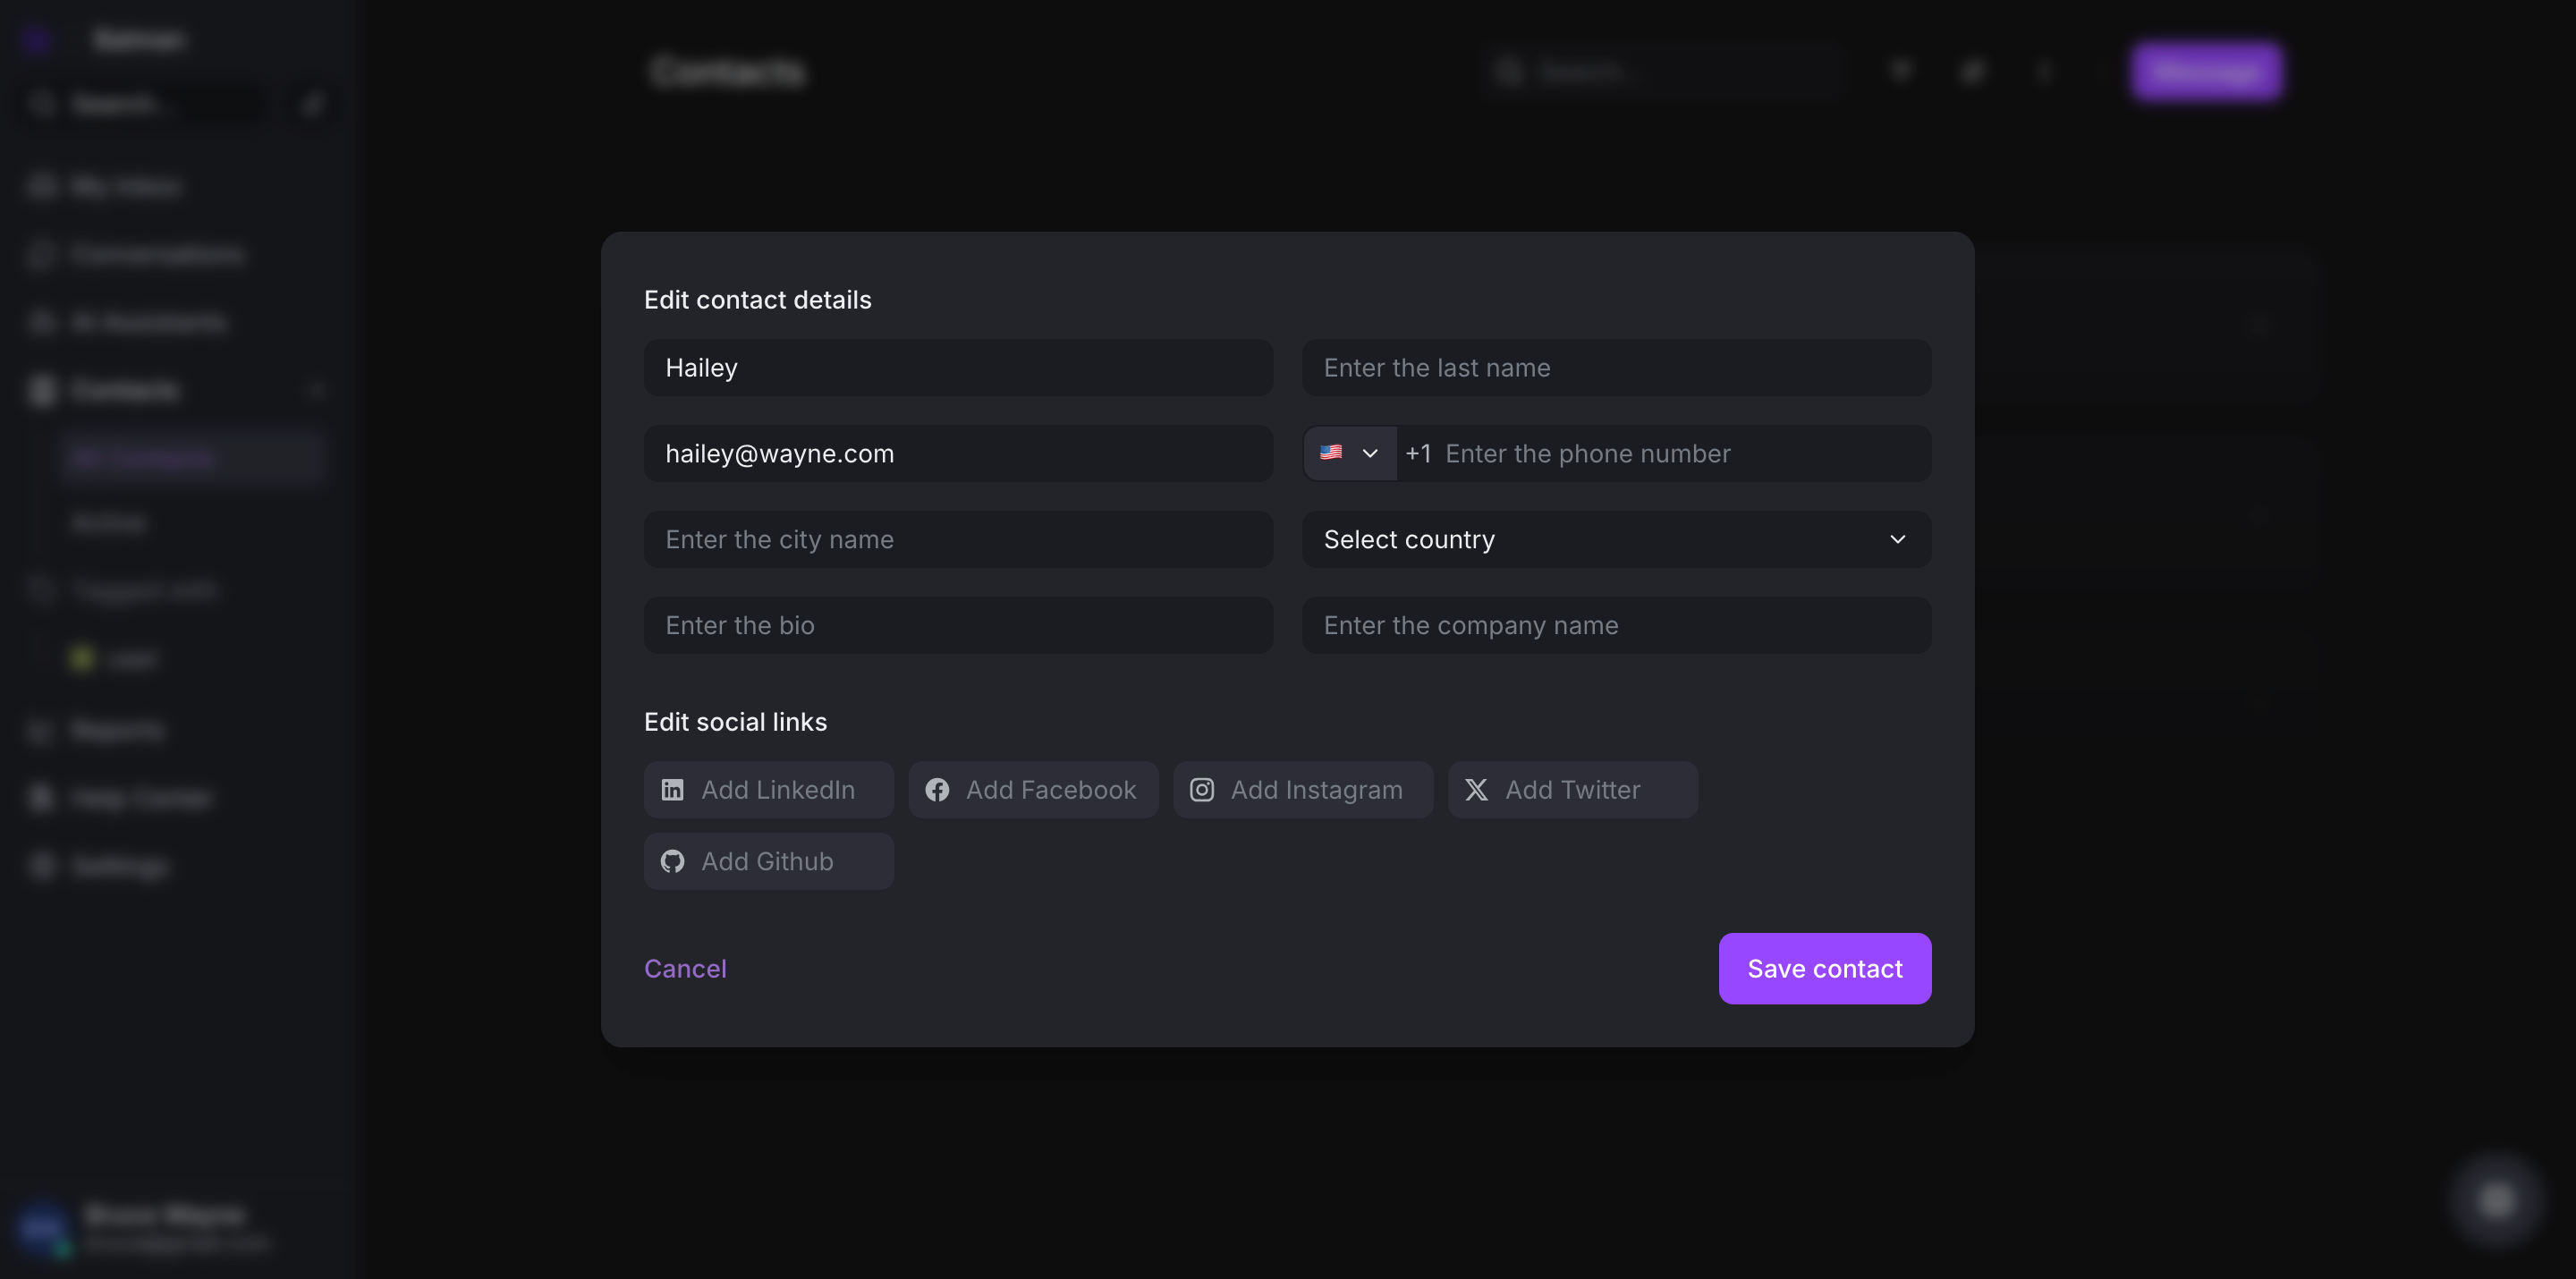
-
Name
-
Email address
-
Phone number
-
Bio/Description
-
Social profiles (optional)
Step 4. Click Create Contact
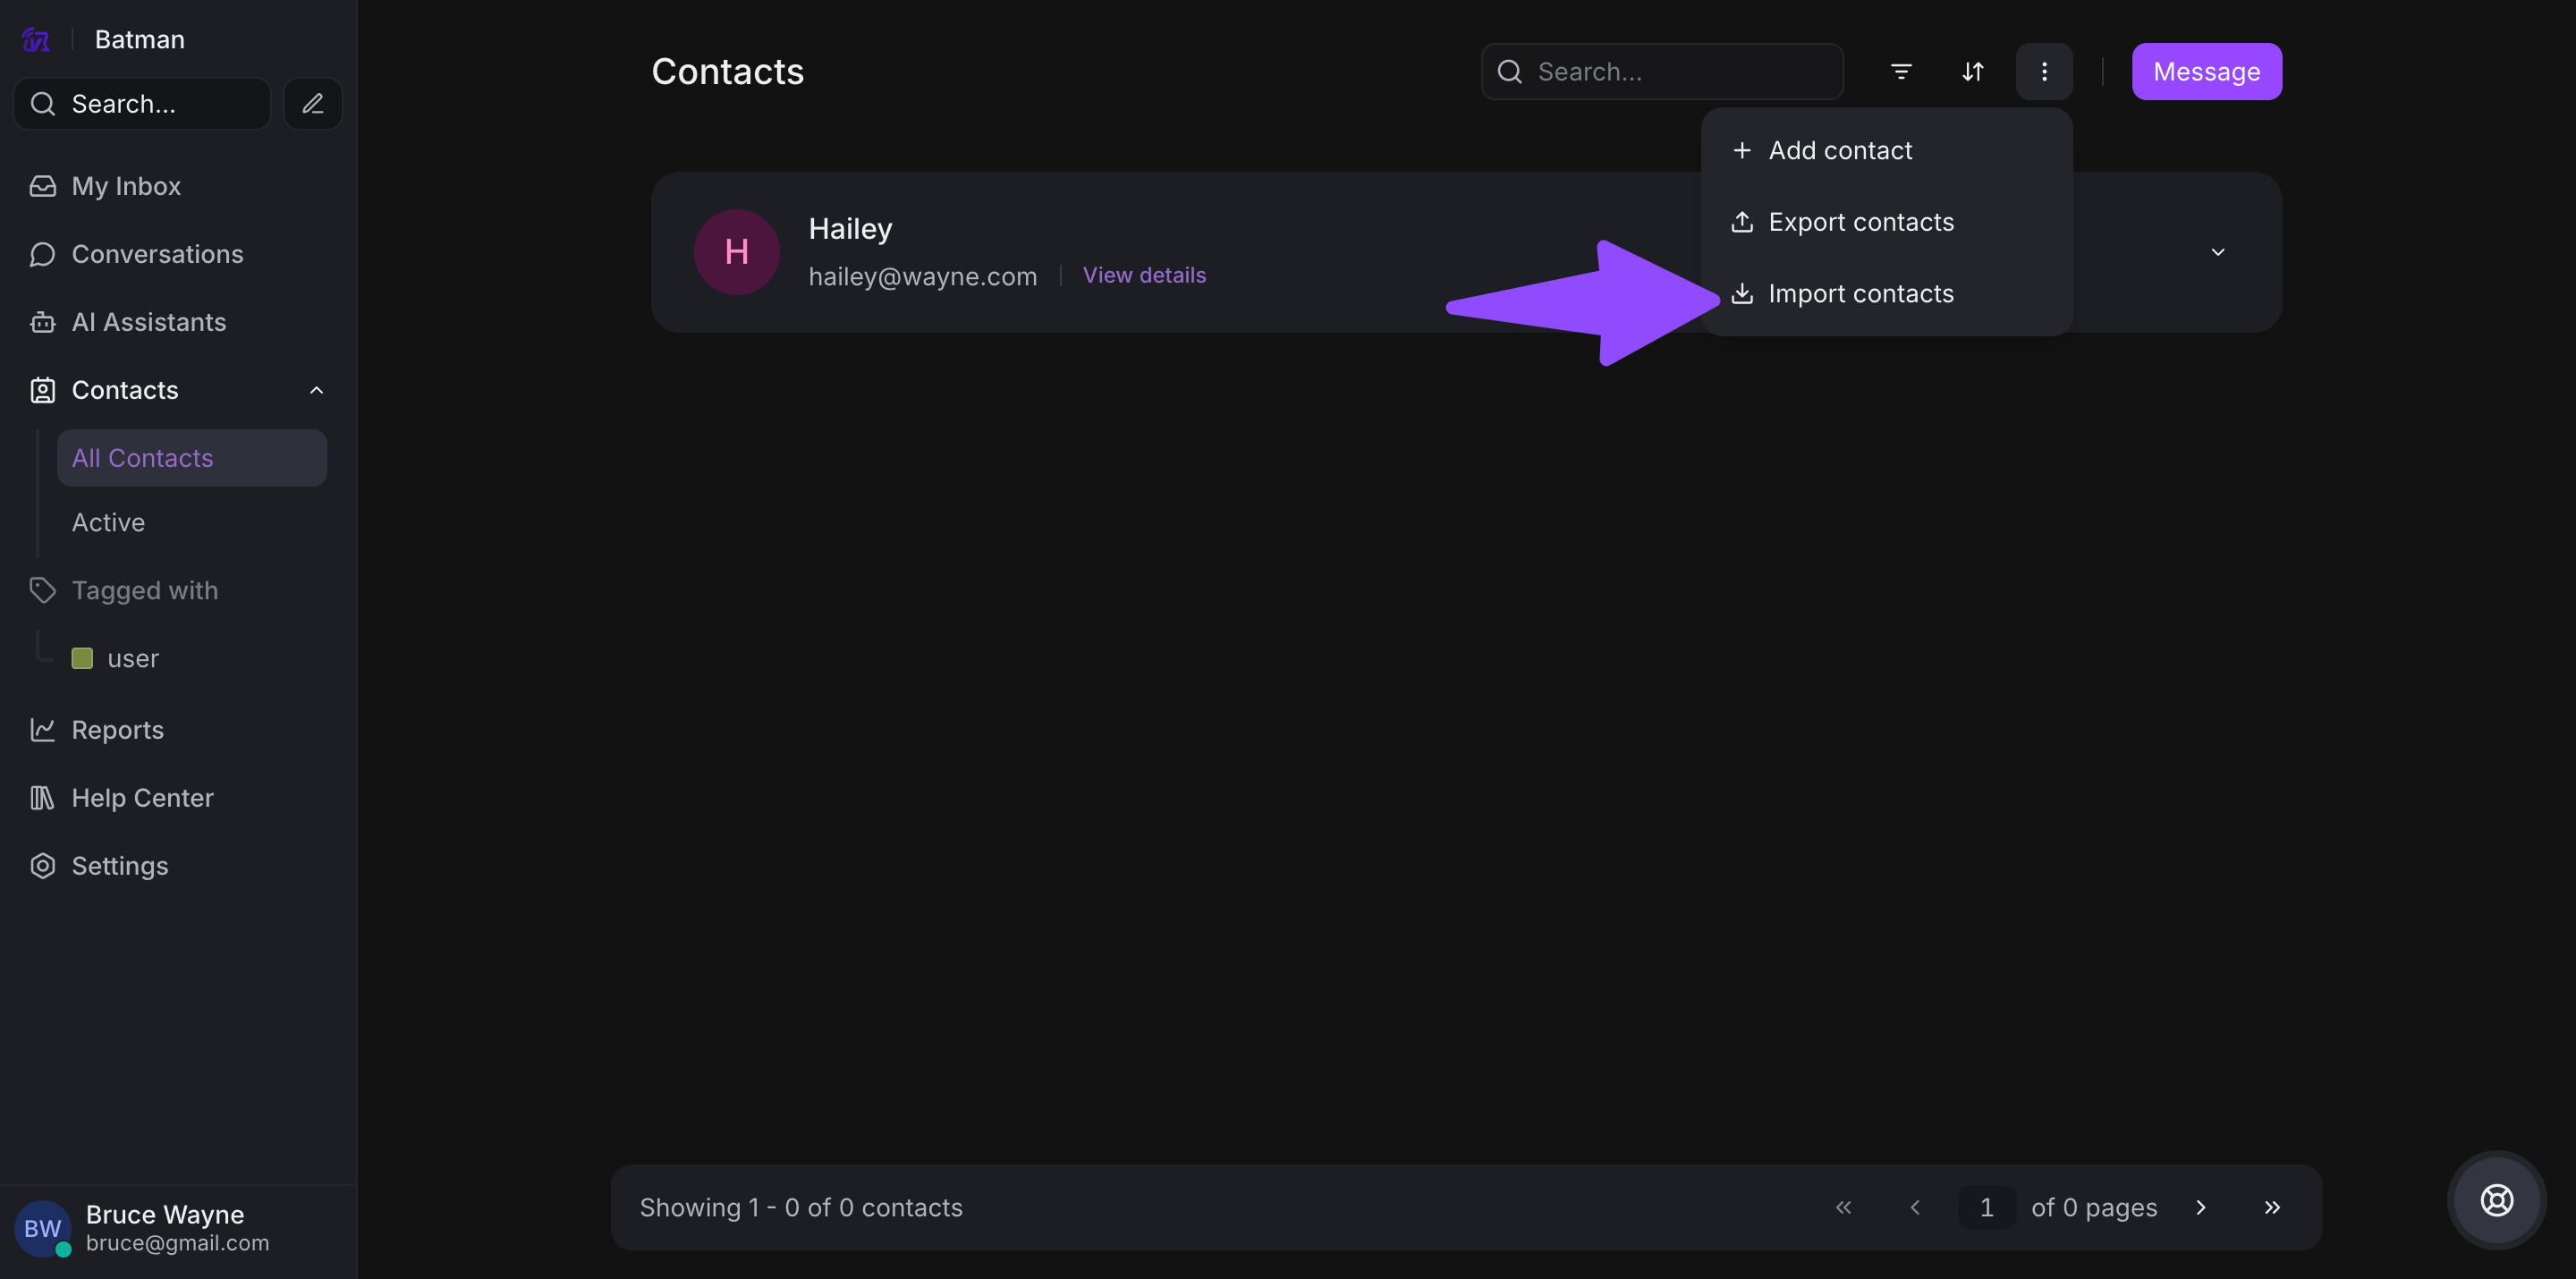
Method 2: Import Contacts (CSV Bulk Upload)
Step 1. Navigate to the Contacts section
Step 2. Click Import Contacts
Step 3. Download the sample CSV template
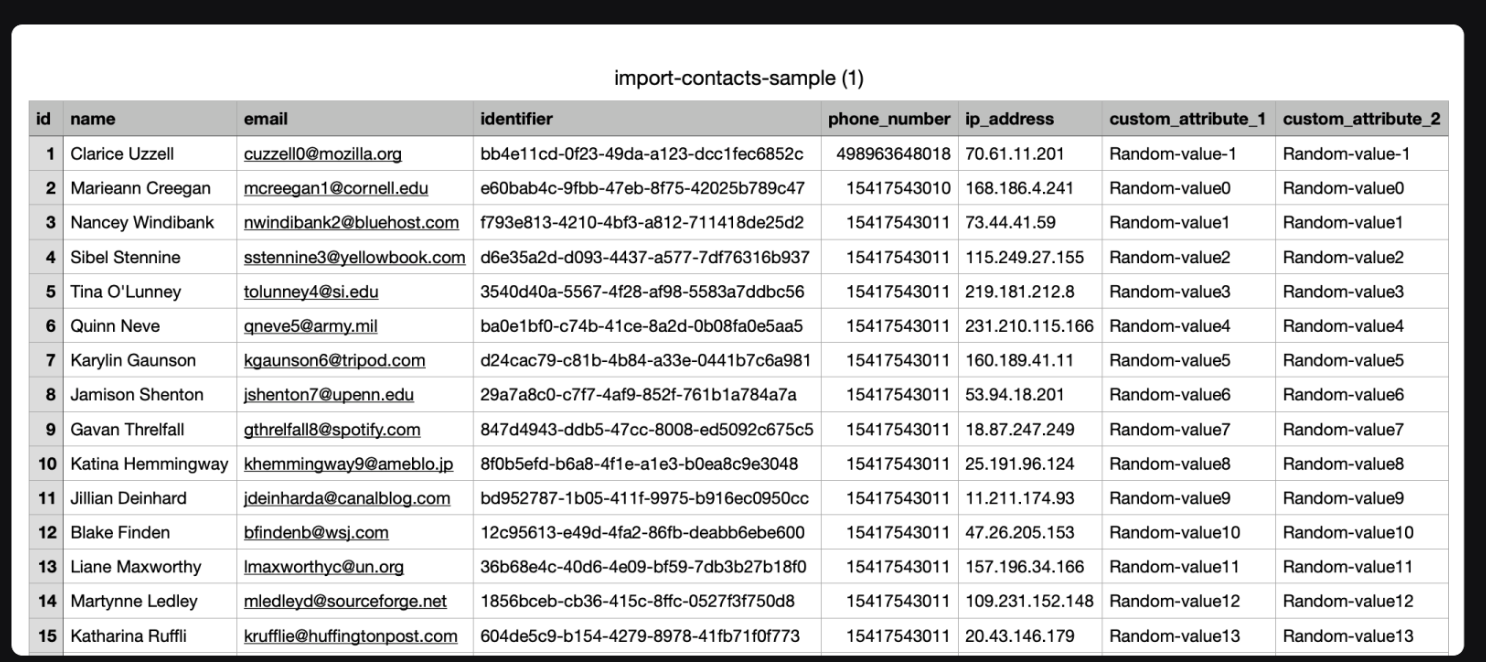
Step 4. Fill in your contacts data following the template format
Step 5. Upload the completed CSV file
Step 6. Map the CSV columns to VowChat contact fields
Step 7. Complete the import
Method 3: Pre-chat Forms
Collect contact information automatically before conversations begin.

Customers fill in their details (name, email, etc.) before starting a chat, and VowChat automatically creates their contact profile.
Method 4: Channel Greetings
Contacts are created automatically when customers initiate conversations through your channels.

Contacts Grouped by Labels
Organize contacts by applying labels for better segmentation.
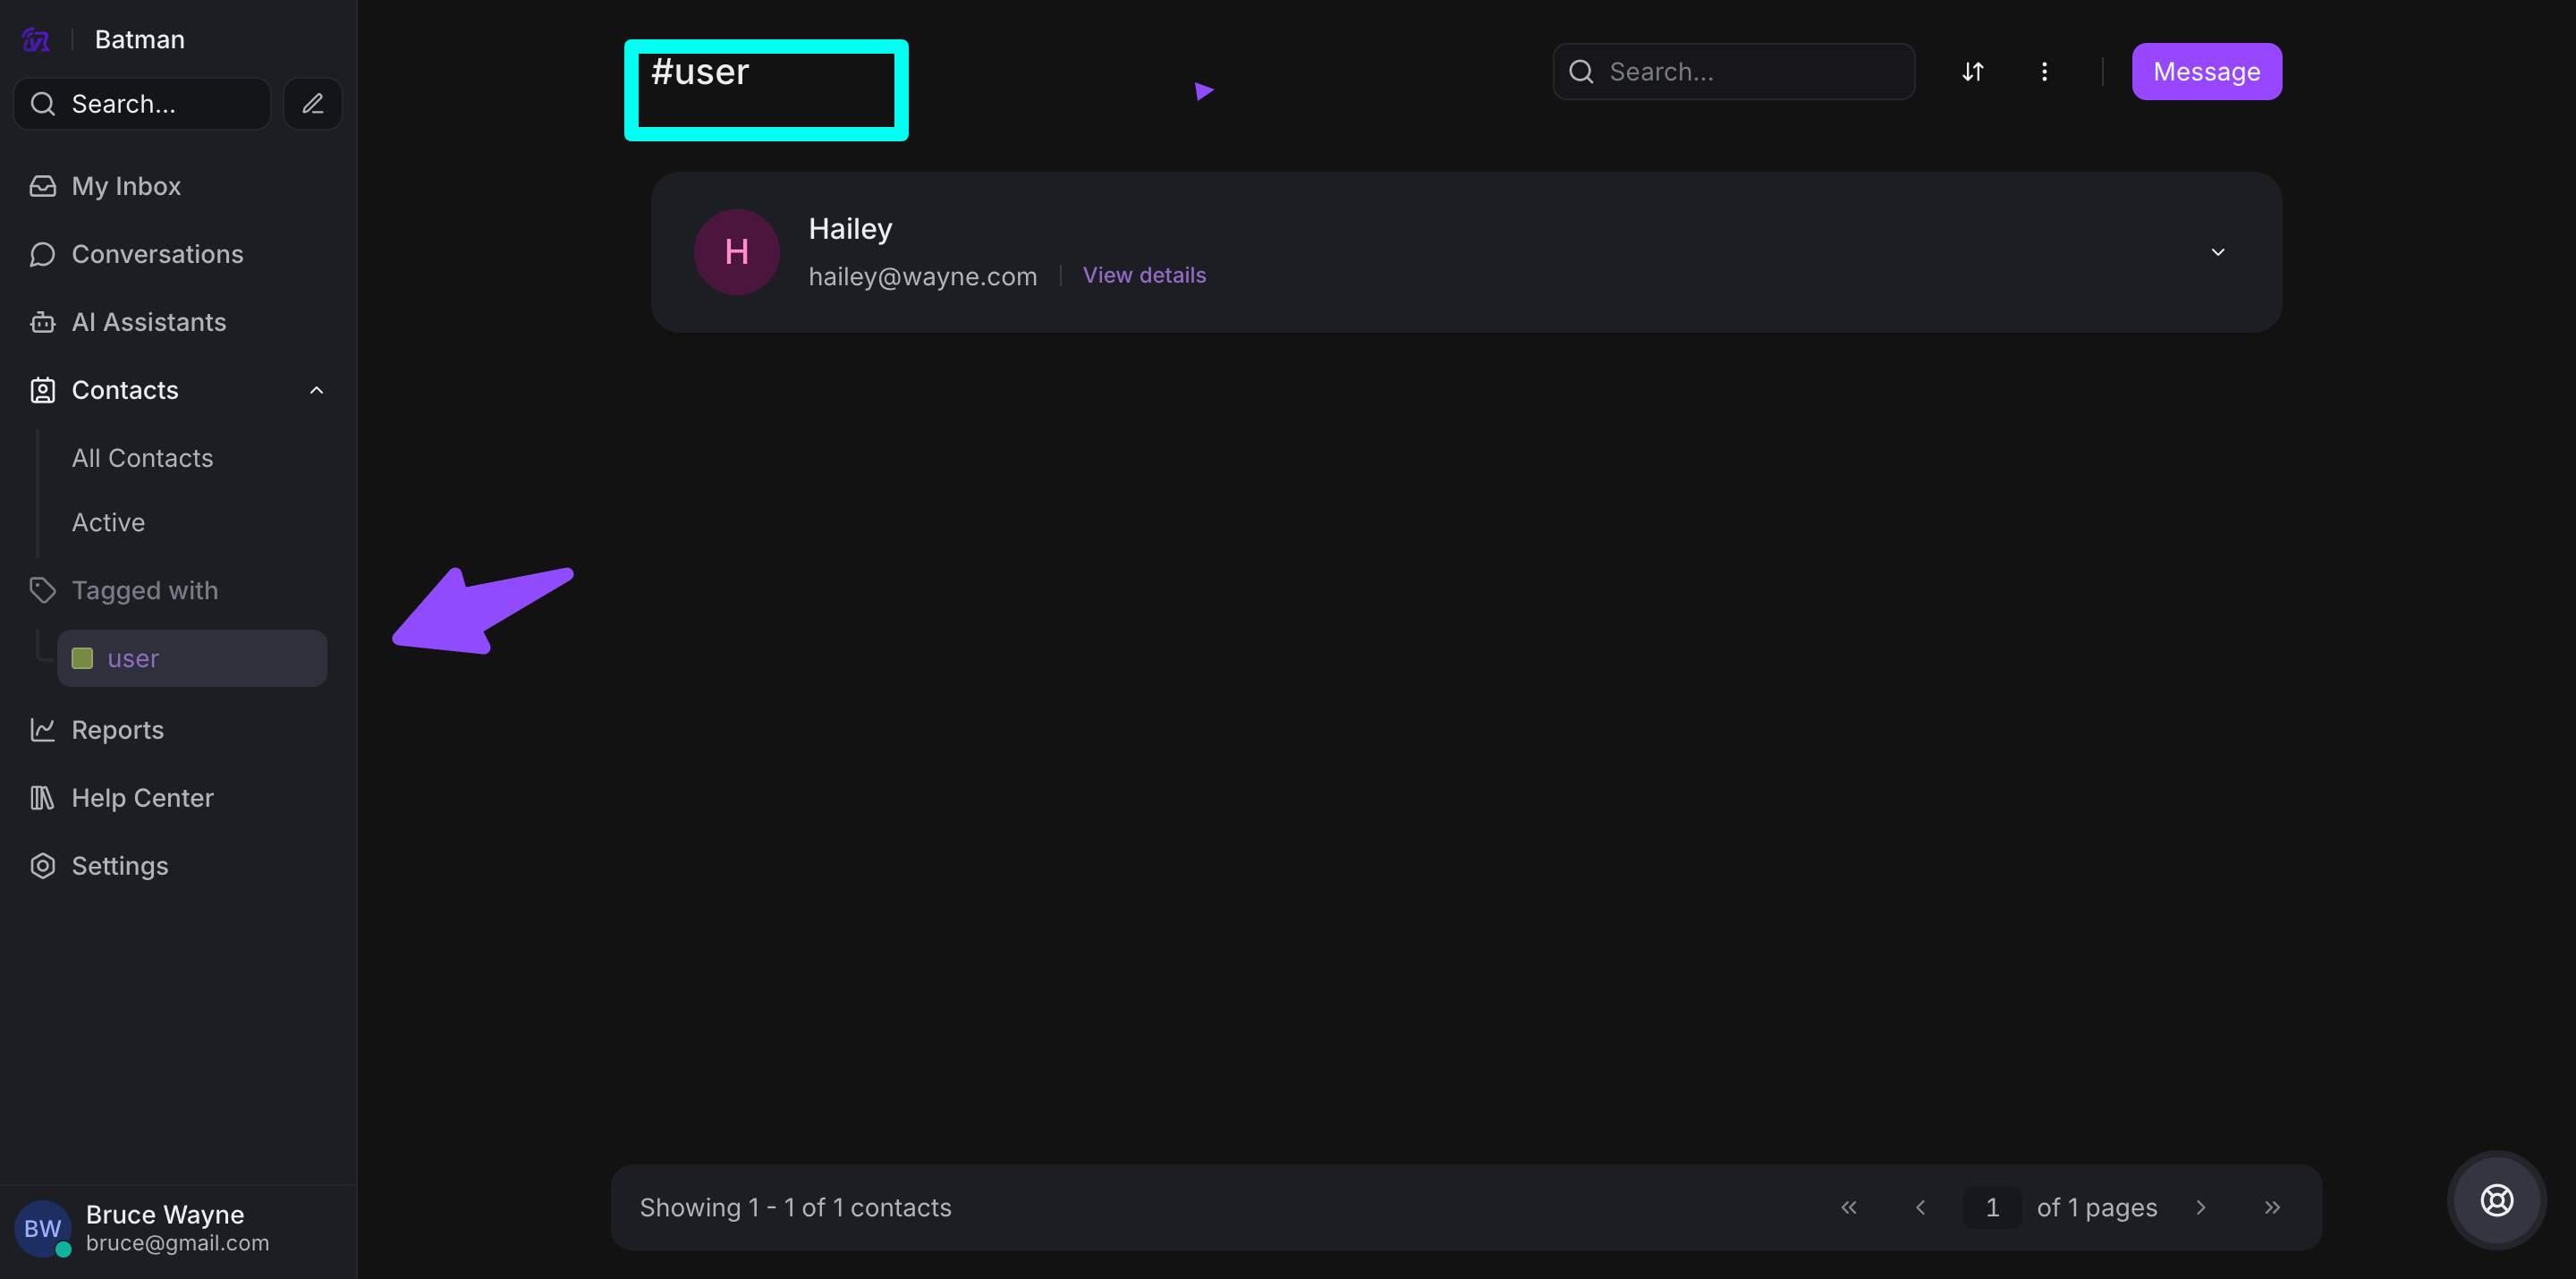
You can filter and view contacts by specific labels to focus on particular customer segments.
Sorting Contacts
Sort your contact list by various criteria:
-
Name (A-Z or Z-A)
-
Last activity date
-
Created date
-
Email address
Contact Actions
Perform various actions on contacts from the sidebar:

-
Edit contact information
-
Add labels
-
Set custom attributes
-
Merge duplicate contacts
-
Delete contacts
-
Export contact data
Contact Notes
Add internal notes to contacts for context and reference.
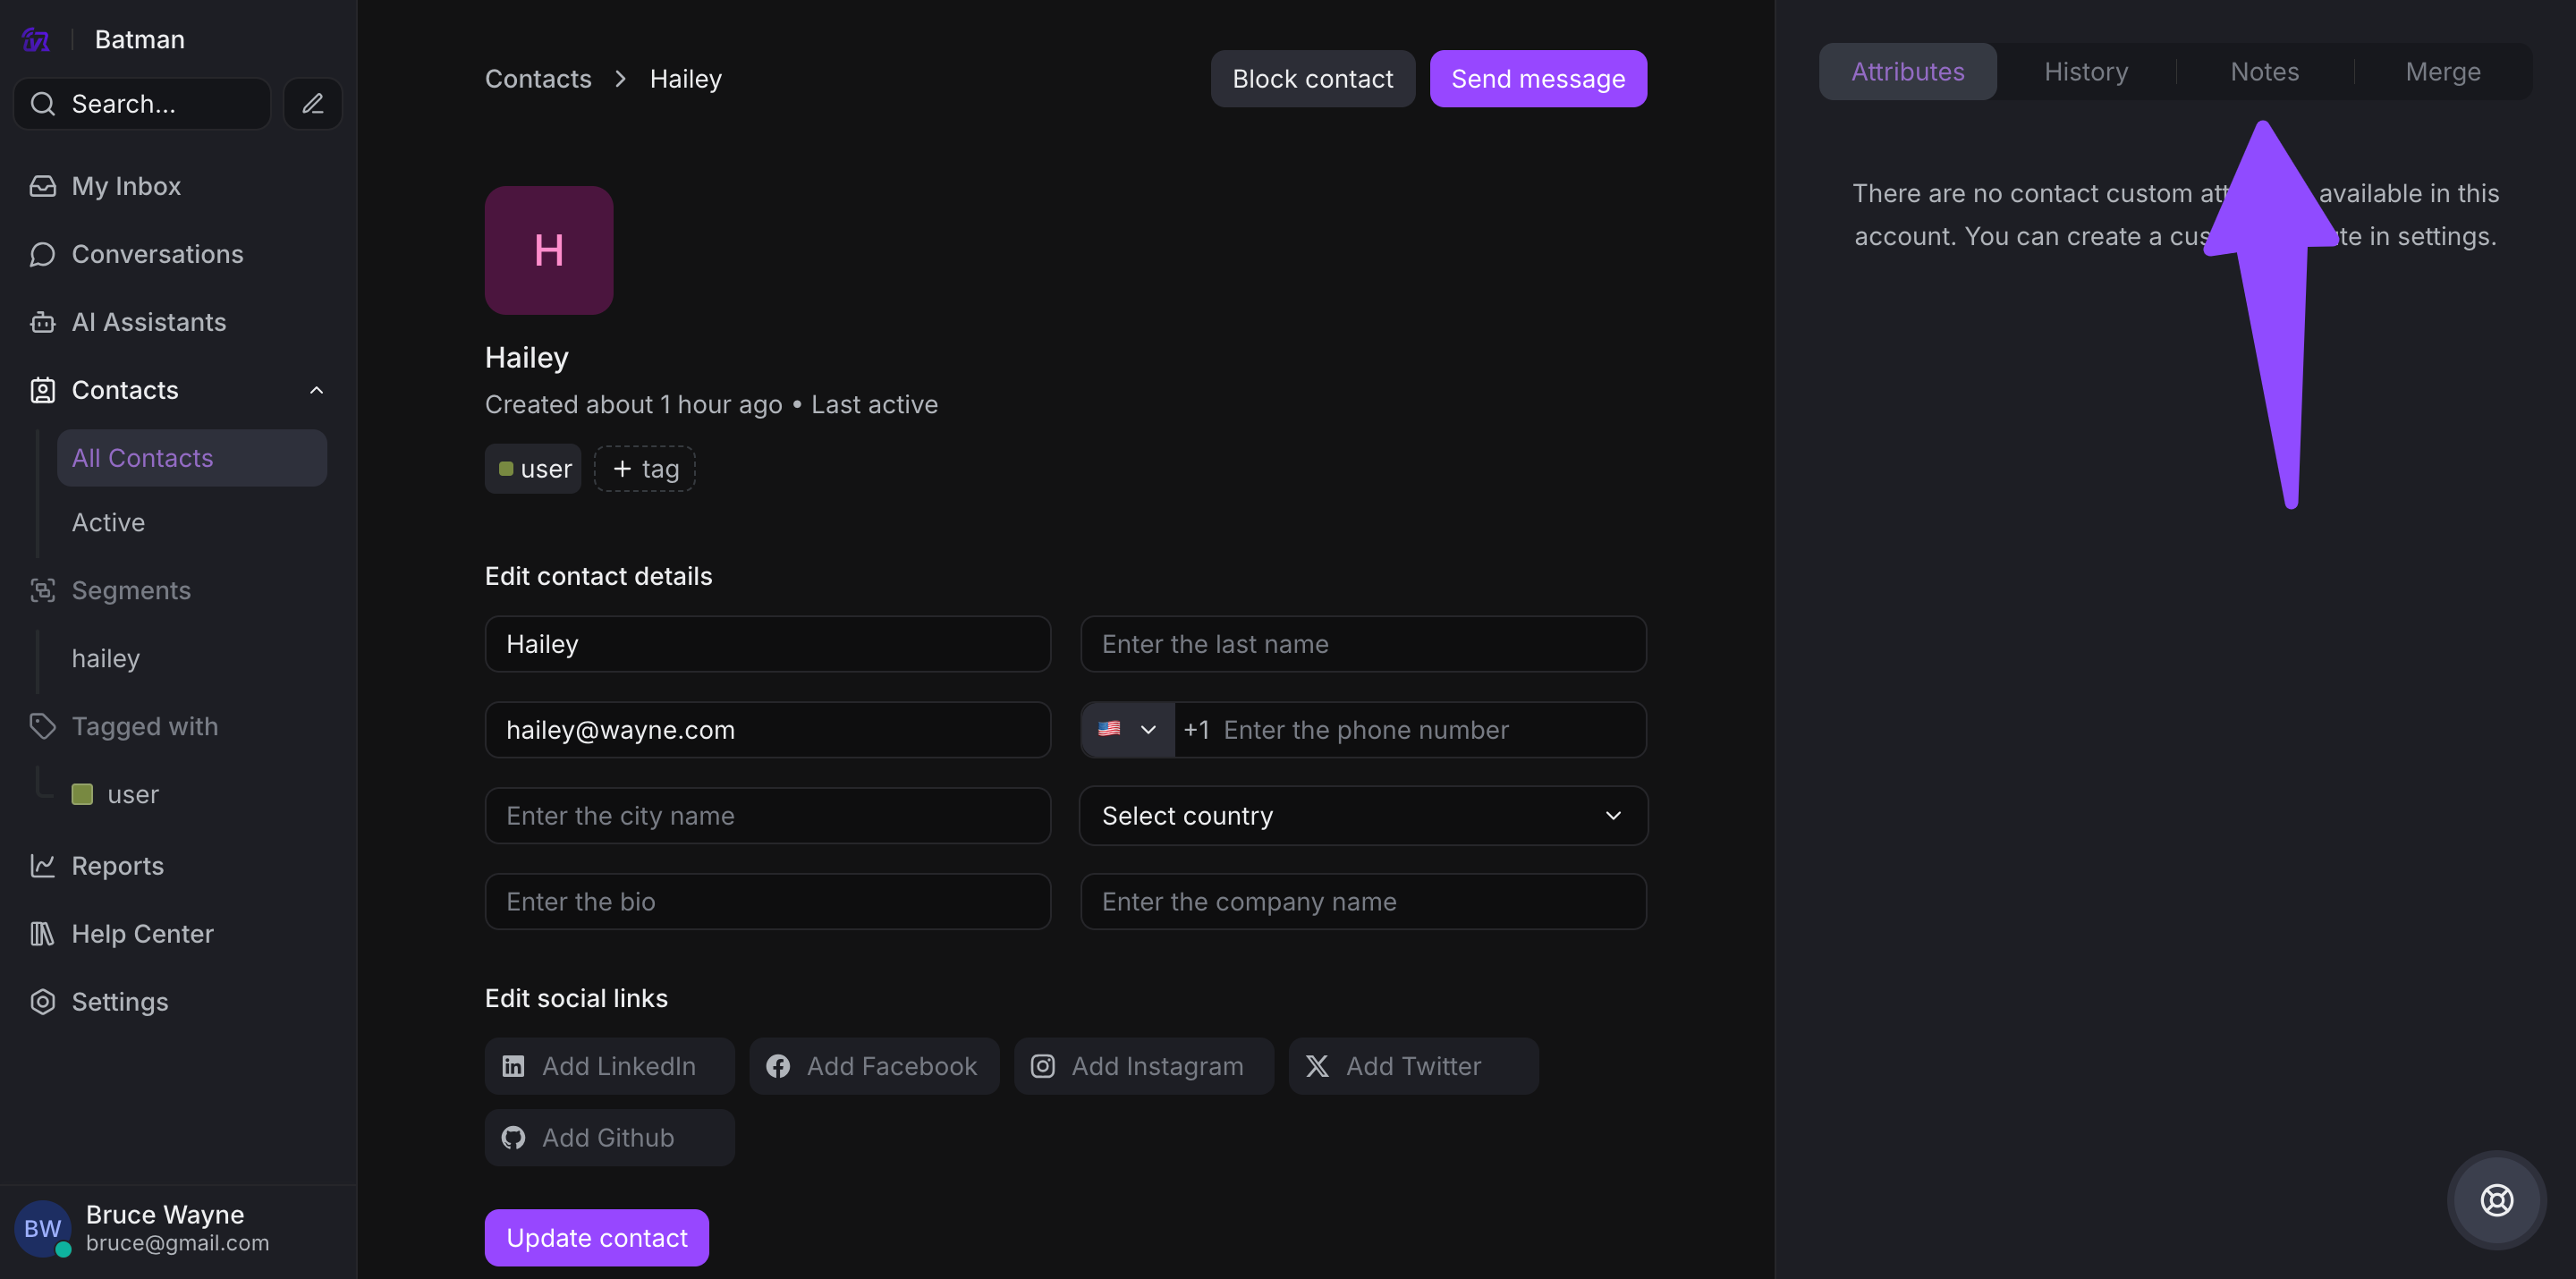
Step 1. Open a contact profile
Step 2. Navigate to the Notes section
Step 3. Add your note with relevant information
Step 4. Save the note
Notes are visible only to agents and help maintain important context about customers.
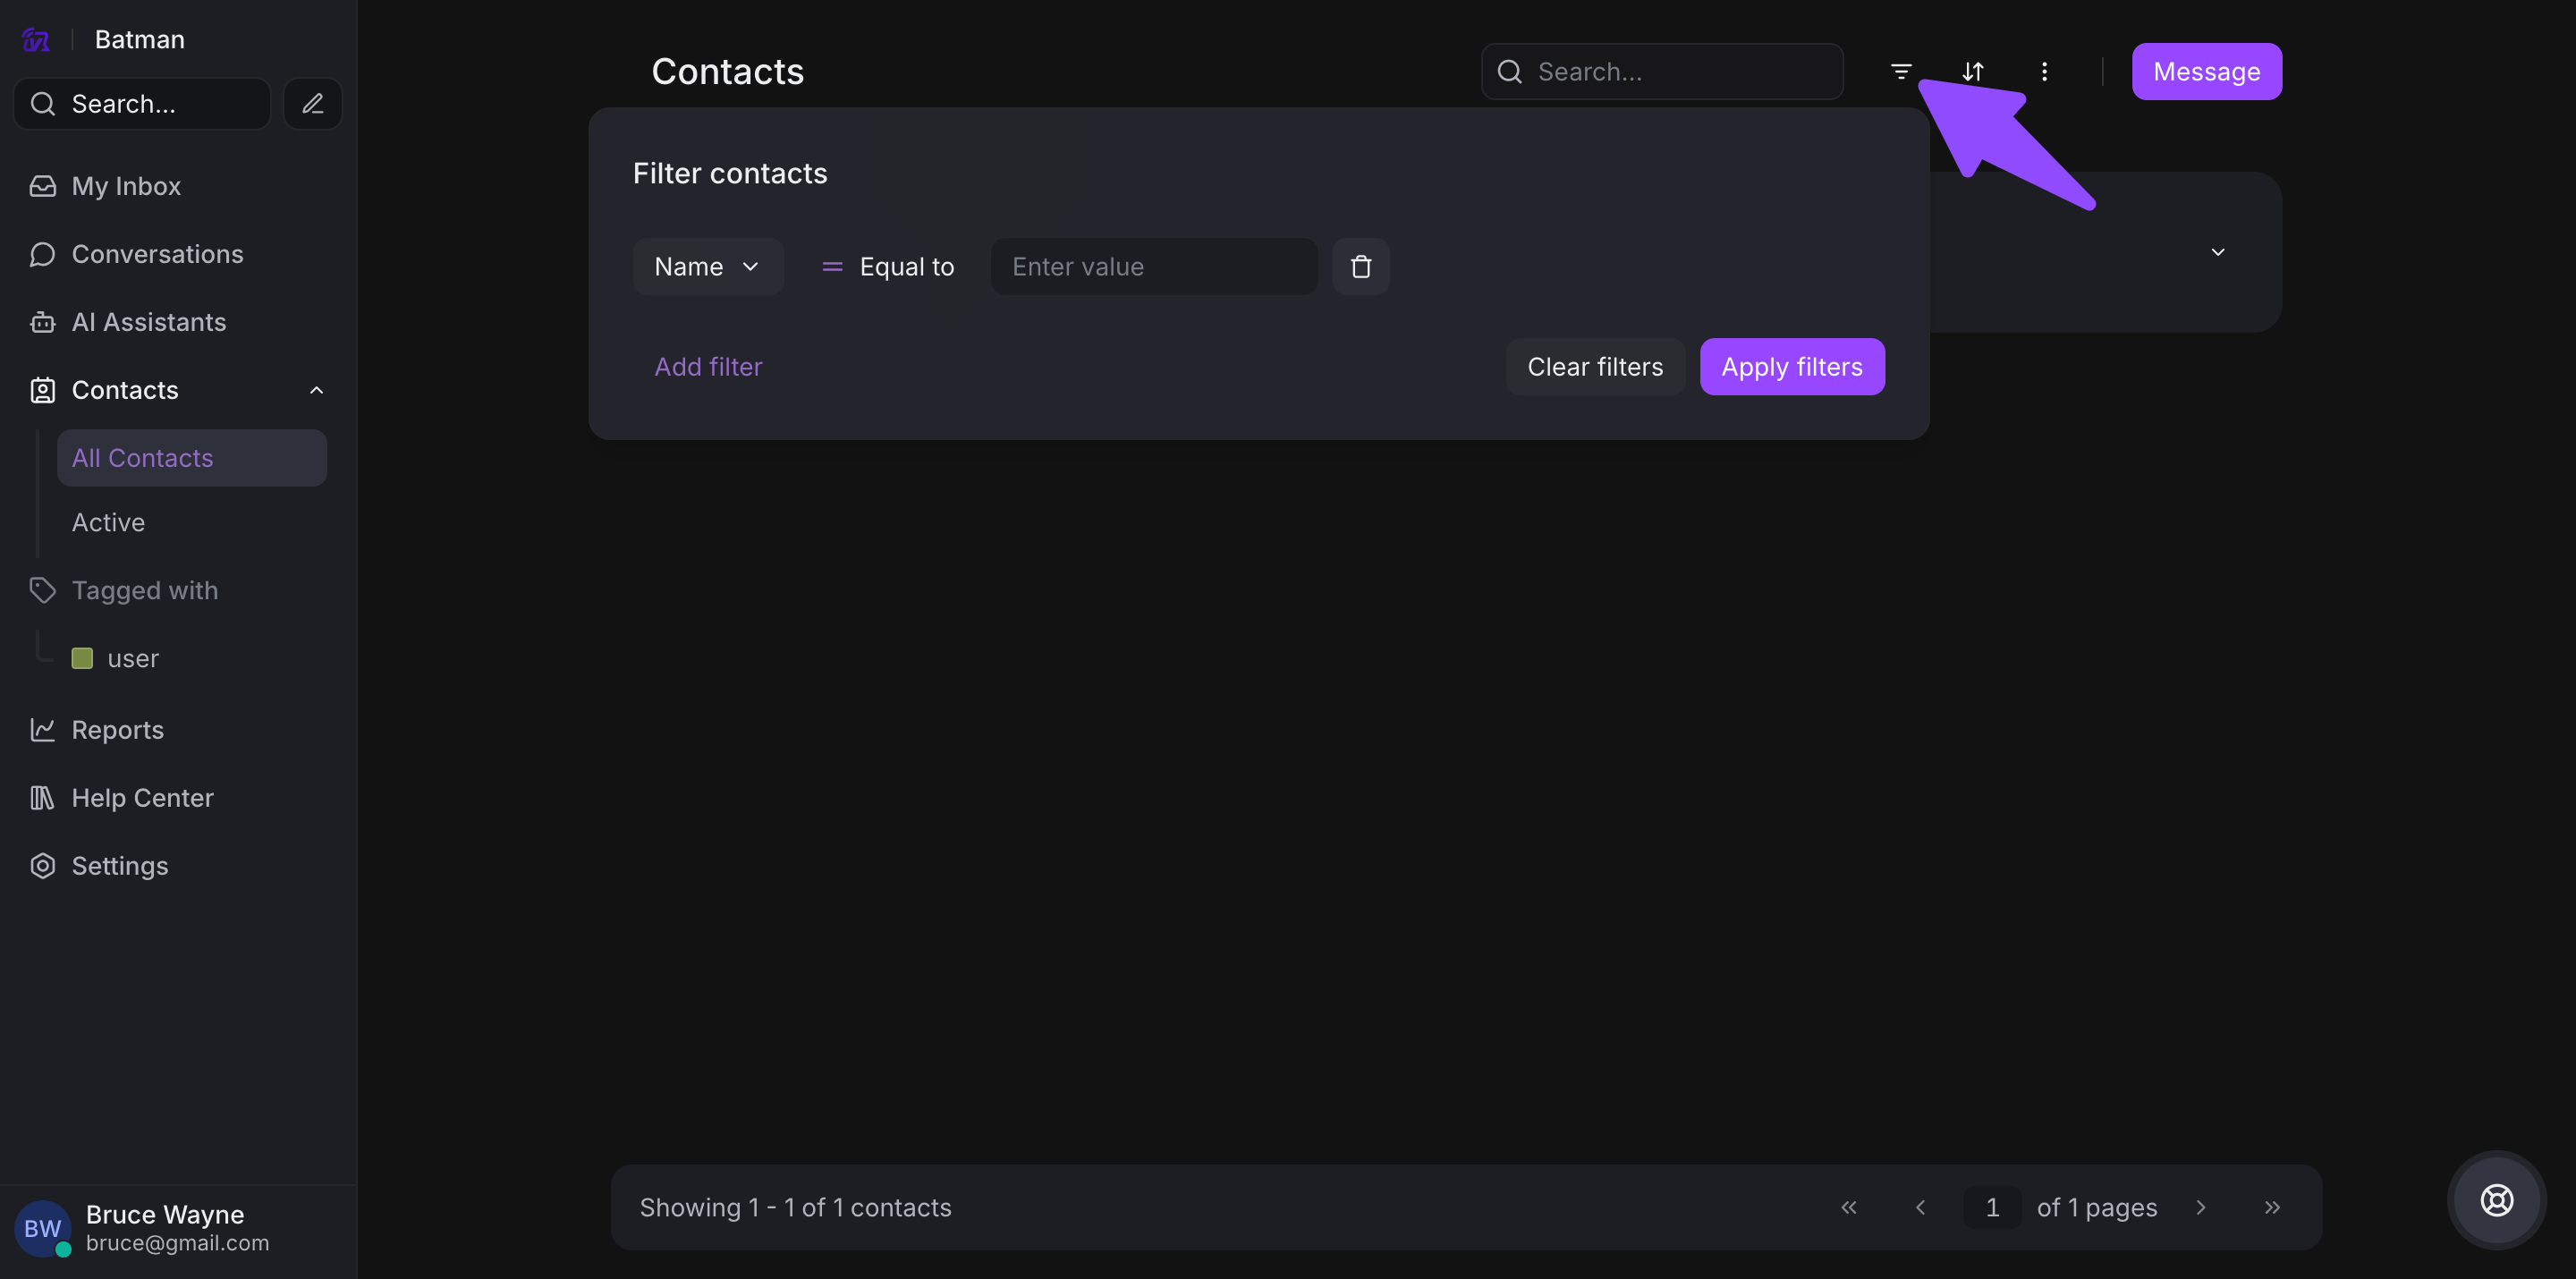
Filtering Contacts
Create advanced filters to find specific contacts:

Step 1. Click the Filter button
Step 2. Define filter criteria:
-
Labels
-
Custom attributes
-
Location (Country, City)
-
Conversation status
-
Channel source
Step 3. Apply filters to see matching contacts
Step 4. Save filter as a segment for future use

Contact Segments
Saved filters become reusable segments that help you:
-
Target specific customer groups
-
Create campaigns for specific audiences
-
Generate reports for customer cohorts
-
Organize support workflows by customer type
That's everything you need to know about managing contacts in VowChat!